You know that high-quality images play a huge role in your WooCommerce store’s success.
As a result, each product and variation that you sell gets its own set of detailed images. And while that’s great for helping boost your store’s conversion rate…it can mean that an inordinate amount of your time gets spent managing images at your store.
See, not only do you have to deal with optimizing and implementing potentially thousands of images, but WooCommerce uses the same upload system and Media Library as your regular WordPress blog posts. That is, WooCommerce puts your product images in folders organized by year and month.
That means you can easily waste time in two spots:
- Optimizing and implementing your WooCommerce images when you upload them.
- Organizing and managing your images in your WordPress Media Library for use later on.
To help you work more productively with media files at your WooCommerce store, we’re going to share some plugins and tools you can use to better manage WooCommerce images.
You’ll learn how to do things like:
- Automatically optimize all your product images without lifting a finger
- Create custom thumbnail sizes for your product images to easily use them in blog posts or other spots
- Use product images in more interesting ways – like creating separate galleries for each variation
- Organize WooCommerce product images using real folders, and insert those images into your products by browsing a simple folder structure
Let’s jump right in so that you can stop wasting time managing images at your WooCommerce store.
Automatically Resize And Compress Product Images When You Upload Them
On average, images comprise 50% of the size of a web page. And because page speed is massively important to your store’s conversion rates, you shouldn’t let your page sizes balloon with unoptimized images.
But when you’re dealing with product images, you don’t want to have to optimize every single image manually. Thankfully, with the right WordPress image optimization plugin, you don’t have to.
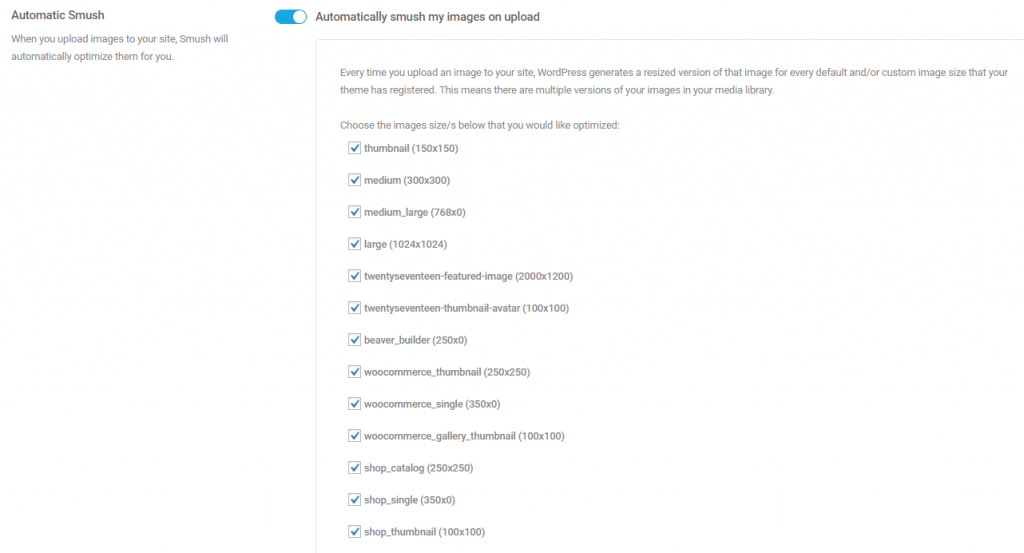
There are a ton of great optimization plugins, but we like Smush as a good first option because:
- It automatically resizes large images to maximum dimensions that you specify
- It automatically compresses images using lossless compression (file size reduction with no loss in quality)
- It’s 100% free for unlimited images as long as no individual image exceeds 1MB
If you need to optimize images larger than 1 MB, or want access to lossy compression, a few more good options are:
Define Custom Image Sizes For WooCommerce
If you use the plugin above, you can set a maximum resolution for all your product images. But you’ll likely want to get a bit more granular and define custom image sizes for specific areas of your site.
There are two ways that you can create custom WooCommerce image sizes.
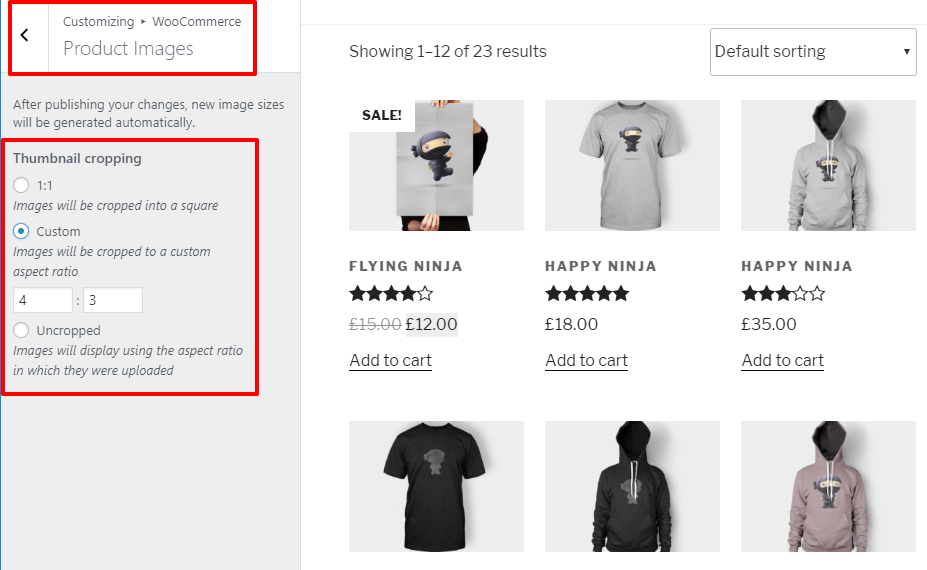
First, you can use the core WooCommerce setting that’s in the WordPress Customizer. Just head to Appearance → Customize. Then, use the Customizer sidebar to navigate to WooCommerce → Product Images.
There, you can customize the default thumbnail cropping and sizing for WooCommerce images:
So that’s the easy way to manage image sizes on product pages. But what if you want to create custom sizes to use in other spots, like a blog post about your products?
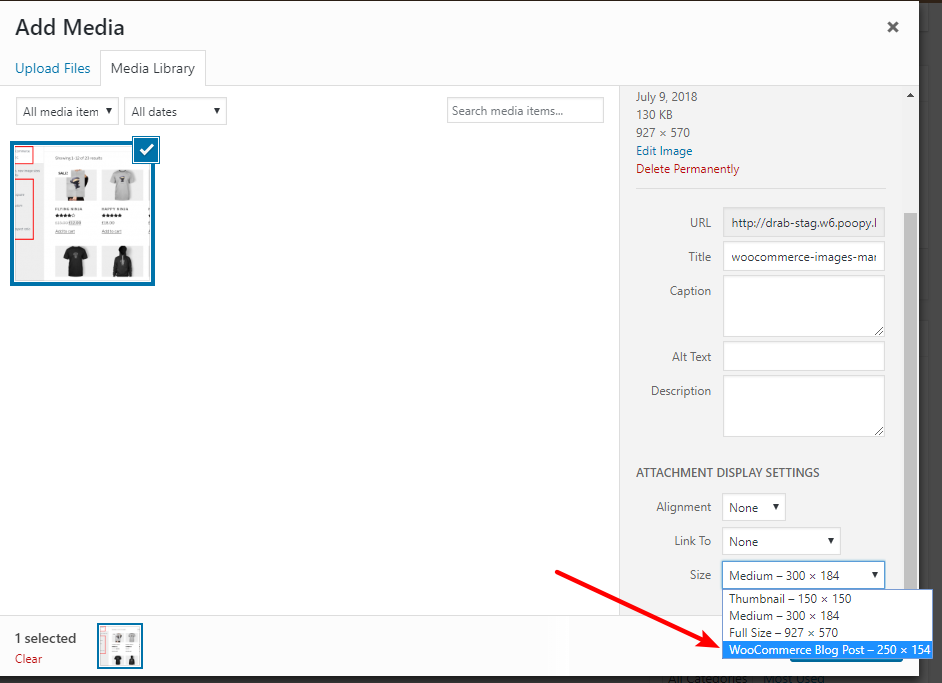
In that case, you can use the free Simple Image Sizes plugin to define custom thumbnail image sizes:
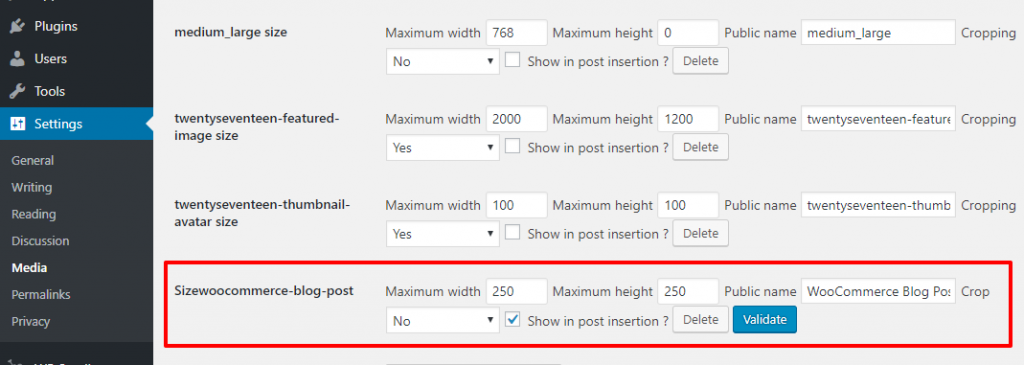
Once you add your custom size and regenerate your thumbnails using the included tool, you’ll be able to insert product images in any area of your site using your custom size:
Create Separate Product Image Galleries For Different Variations
If you use product variants at your store, managing the images for different variants can be a real pain. We’ll talk about some ways to organize them in your Media Library in a second. But first, let’s start with a better way to present them to your shoppers.
By default, WooCommerce lets you change the featured image when a user selects a certain variant. But there’s no way to display a completely different product gallery when a user selects a variant.
The free Smart Variations Images plugin changes that. With the plugin installed, you’re able to apply each product gallery image to a specific variation using a new drop-down:
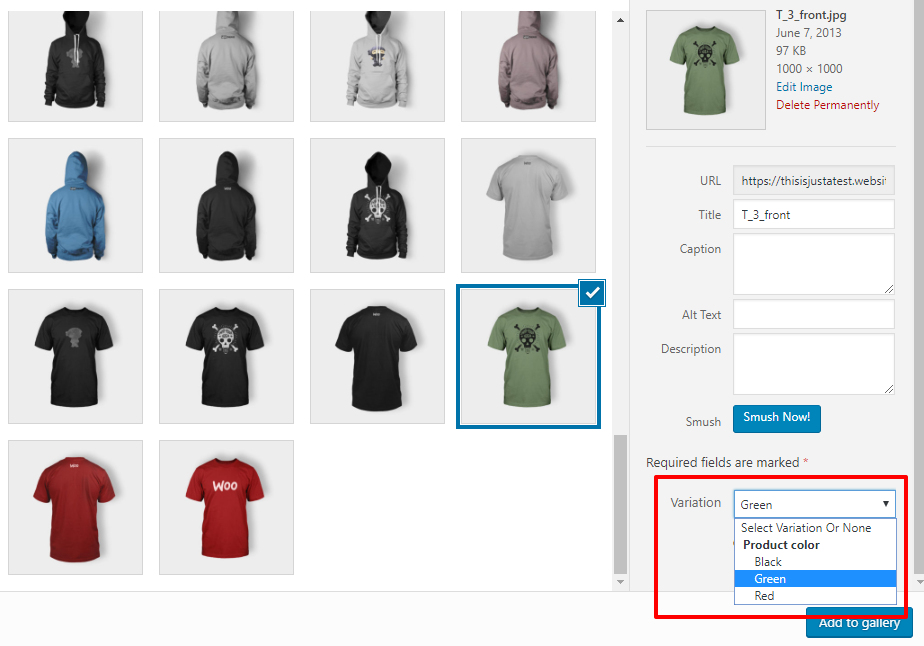
Visitors will then only see the relevant images when they choose a variant.
Use Folders To Keep Your WooCommerce Images Organized
Up until now, much of what we’ve focused on is “in the moment” management. But what about keeping all your images organized so that you can use them in the future?
That’s where folders come in…
By using your own custom folders to organize your WooCommerce images, you’ll be able to create a structure with context that actually makes sense for your store.
For example, if you have a clothing store, you could organize your images with:
- A parent folder for the type of clothing – e.g. t-shirts, hoodies, hats, etc.
- A subfolder for each individual product (or, if you sell a lot of products/variations, you could even create more subfolders to go even deeper).
Then, instead of trying to remember that you uploaded your “Ninja T-Shirt” images back in July of 2017 (yourstore.com/wp-content/uploads/2017/07), you can just head straight to yourstore.com/wp-content/uploads/t-shirts/ninja-shirt using real media folders in your WordPress dashboard.
That makes a lot more sense, right?
Media Library Folders Pro And WooCommerce Make Great Partners
Media Library Folders Pro is a plugin that helps you add real media folders to your WordPress Media Library. By “real”, I mean that the folder structure you see in your Media Library is identical to the folder structure on your actual server.
Using the plugin’s interface, you can set up a custom folder structure that fits the needs of your unique store:
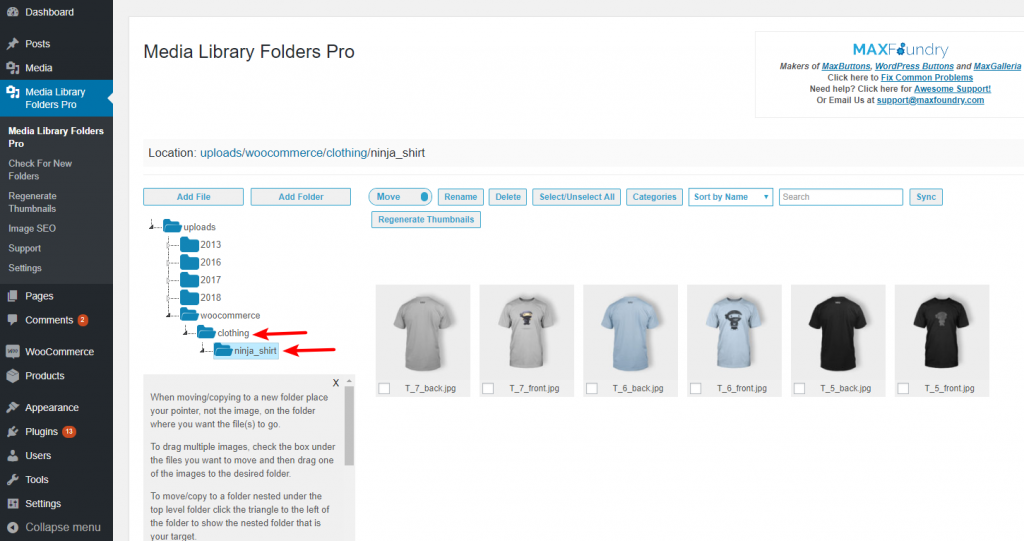
The folders in your WordPress dashboard work the same as the folders you use every day on your computer – you can:
- Drag and drop files between different folders (if you move a file, the plugin will automatically update the URL for every spot where you used that image)
- Create multiple levels of subfolders
- Search/filter your folders for a specific file
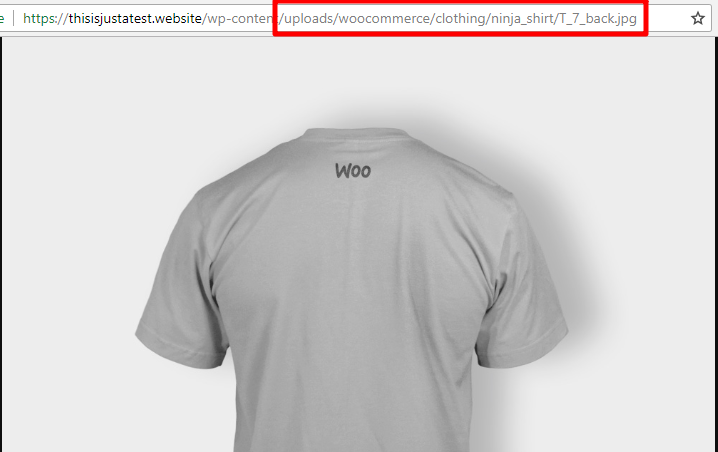
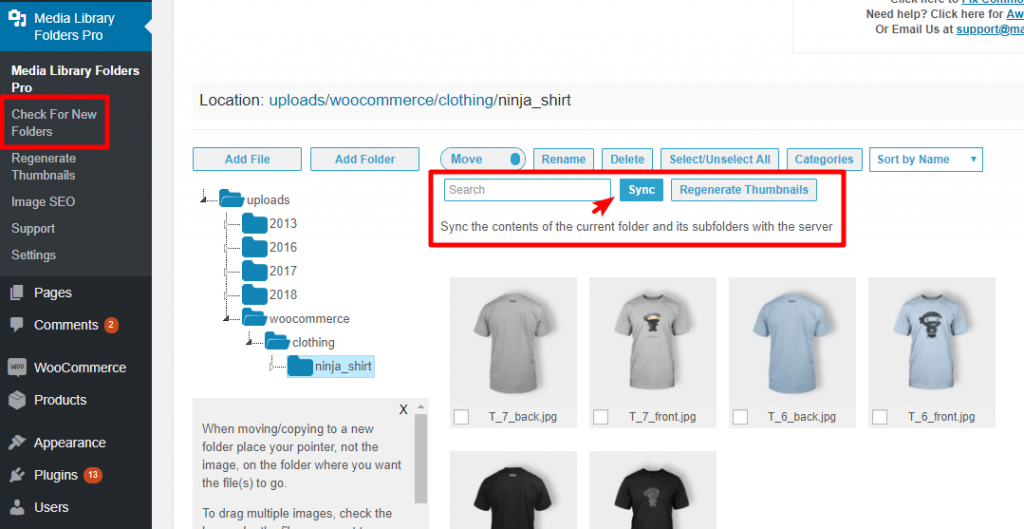
Because Media Library Folders Pro uses real folders, rather than the virtual folders you get with some other plugins, you can also upload product images directly via FTP and then import and sync that folder structure to your WordPress Media Library.
As a tertiary benefit of this “real folder” approach, your product images will also have more relevant URLs, which can help with usability and image SEO at your store:
How To Use Media Library Folders Pro To Organize WooCommerce Images
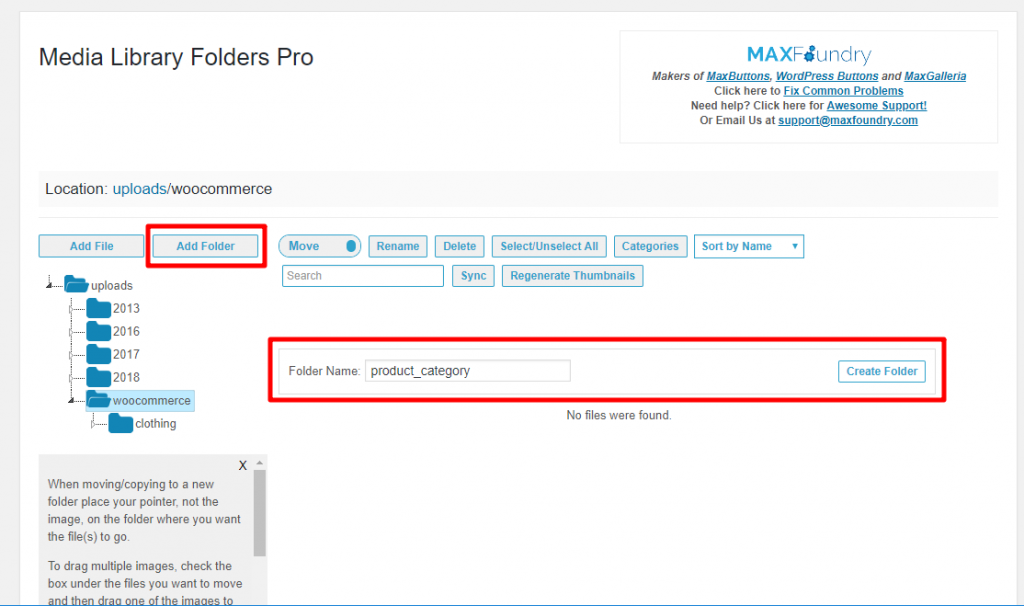
With Media Library Folders Pro, you can create any type of folder structure. That is, don’t feel like you’re locked into the structure we use in our example below.
But as a good starting point for most WooCommerce stores, we think it makes sense to create:
- A parent folder for each product category
- Subfolders for each individual product
For example:
- T-Shirts
- Ninja shirt
- Skull shirt
- Flying ninja shirt
- Hoodies
- Ninja hoodie
- Skull hoodie
- Etc.
If needed, you could also further break down each product folder with subfolders for different variations.
To set up your store’s folder structure, you can either:
- Create new folders from your WordPress dashboard by using the Media Library Folders Pro tab.
- Organize your product images on your computer and upload them via FTP. You can then import your product images to your Media Library by using Media Library Folders Pro’s Check For New Folders and Sync functionality.
From there, Media Library Folders Pro integrates itself into the WooCommerce Product interface. Here’s how easy it is to upload, manage, and insert images from your folders while working with individual WooCommerce products…
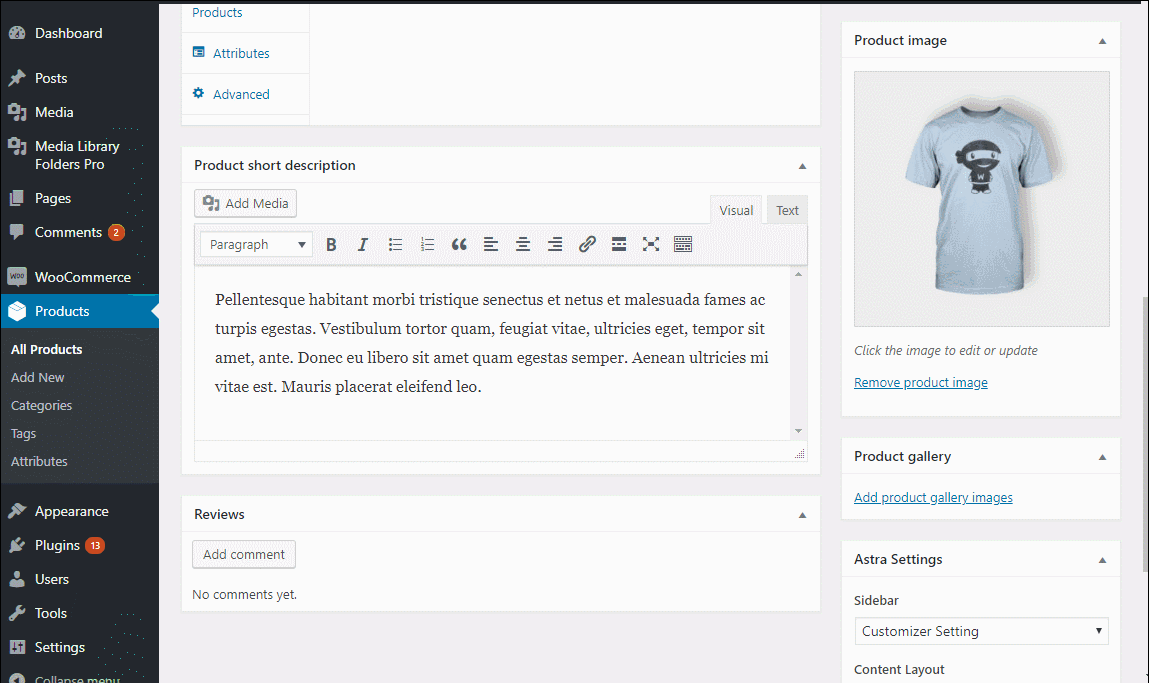
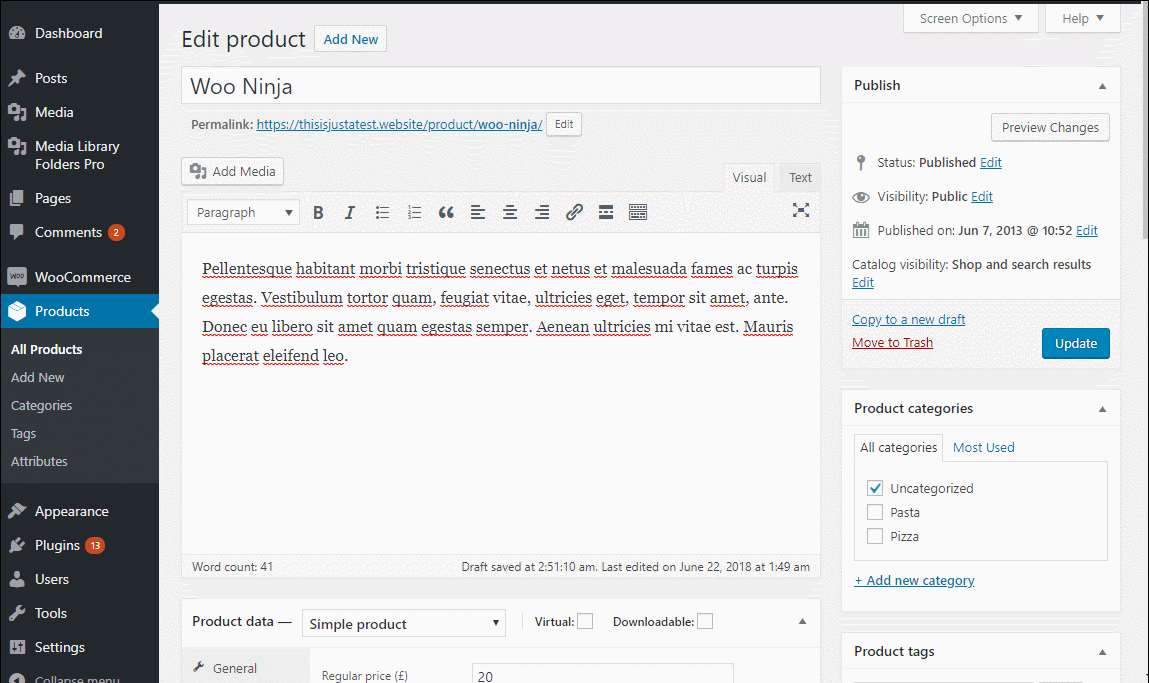
Set Your Product Featured Image
To set your product featured image, you just click the native Set product image link, browse to the relevant folder, and select the image you want to use:
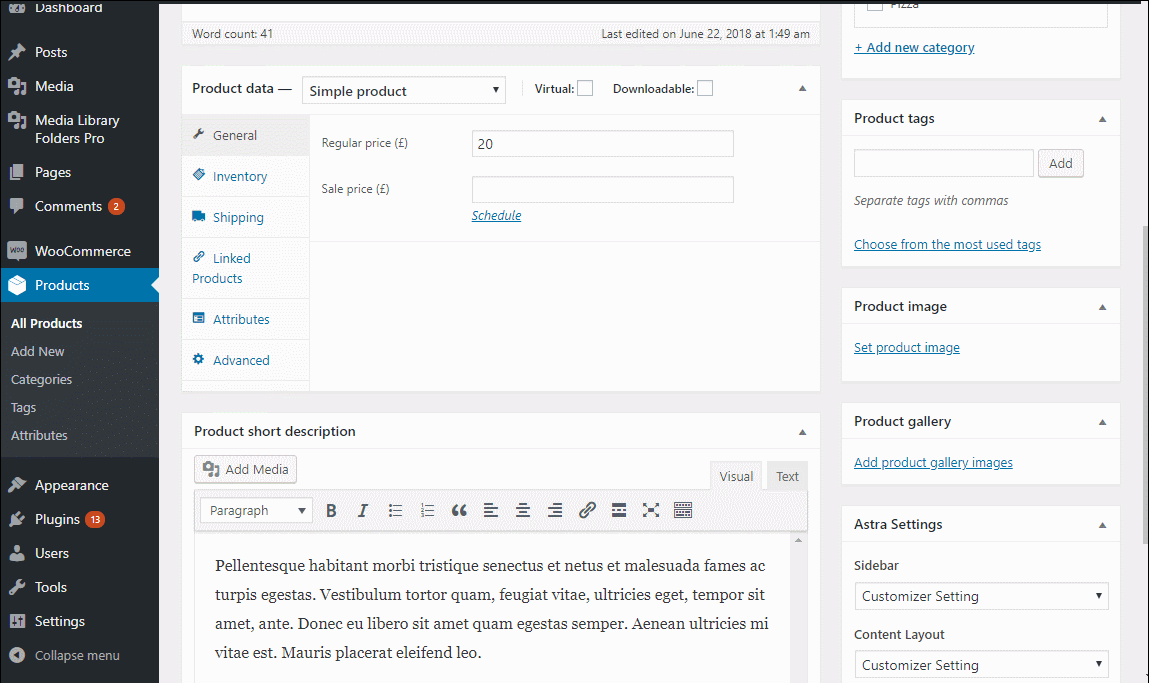
If you haven’t already uploaded your images, you can also upload images via this same interface.
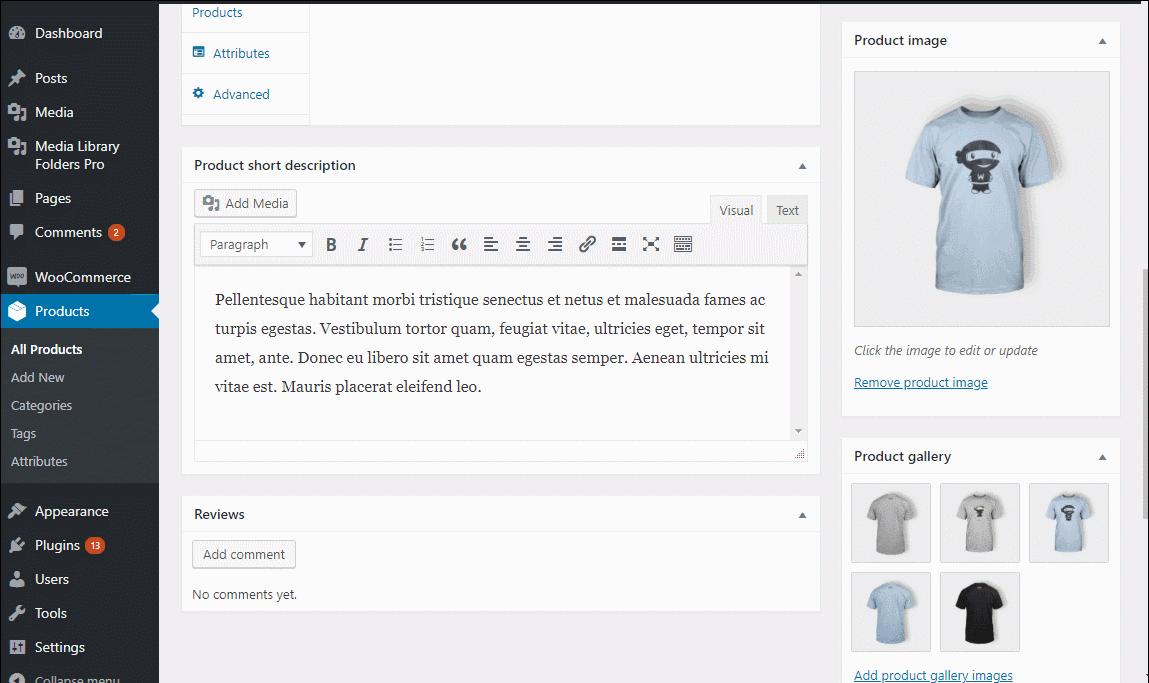
Set Your Product Gallery Images
Unlike your product featured image, your Product gallery uses multiple images. To insert multiple images in a folder at the same time, you can use CTRL + Click (Windows) or Command + Click (Mac) to select multiple images.
Here’s how that works:
You can then drag and drop your images to order them using the normal WooCommerce functionality:
Use Images In Your Product Description(s)
If you want to use images in your product’s description or short description, you can similarly access your folders via the regular Add Media button:
Media Library Folders Pro Works In Other Spots, Too
Beyond the specific examples above, you should also be able to use Media Library Folders Pro to insert product images in any other area where you’d normally use the regular WordPress Media Library. That means you can use it for:
- Product sliders/carousels
- Blog posts about your products
- Third-party plugins
- Etc.
Bonus: Offload Your WooCommerce Images To Amazon S3 Or DigitalOcean Spaces
If your store has a large catalog of products and variations, it’s easy to quickly find yourself with thousands of product images.
That many images not only takes up a large amount of storage space on your server, it’s also a large number of requests to your server for each page load.
For example, if a single product page has twelve different images, that’s twelve separate requests to your server for each shopper!
To reduce the load on your server, speed up your site, and maybe even save on storage costs, you can offload your WooCommerce images to Amazon S3 or DigitalOcean Spaces.
Amazon S3 and DigitalOcean Spaces are what’s known as object storage. They can affordably store and serve your product images, which means your server is able to focus all its resources on processing PHP and serving your product pages faster.
The Media Library Folders Pro S3 And Spaces Add-on Makes That Easy
With the included Media Library Folders Pro S3 and Spaces add-on, you can automatically offload your WooCommerce product images to either Amazon S3 or DigitalOcean Spaces.
You won’t do anything differently. You can still:
- Upload your images via the normal Media Library Folders Pro interface
- Browse your images via folders from inside your WordPress dashboard
- Insert your images into products using the folders shown above
- Etc.
But behind the scenes, the Media Library Folders Pro S3 and Spaces add-on will seamlessly move all your files to your chosen storage service while preserving the exact same folder structure that you created.
You can then serve images directly from S3 or Spaces. Or, you can also connect S3 or Spaces to a CDN – you can find guides on how to use Amazon S3 or DigitalOcean Spaces with a CDN.
All Media Library Folders Pro users can offload 3,000 images for free. If your store has more than 3,000 images, you can also purchase additional images starting at $99 per year for 10,000 images.
Final Thoughts On Managing Your WooCommerce Images
By using automatic plugins like Smush (optimization) and Simple Image Sizes (properly sized thumbnails), you can speed up how you work with WooCommerce images in the moment.
Then, by organizing your WooCommerce images with real folders, you provide a more user-friendly way to organize images for future use.
You’ll be able to work with product images more quickly, and if you have additional store managers who may not have been part of setting up products in the first place, they’ll especially appreciate the ability to navigate human-friendly folders rather than arbitrary upload dates.
Either way, that means more time for you and your team to work on growing your store, and less time wasted working with product images!