In this post, we’ll cover some common issues that users experience with the core MaxGalleria plugin and/or the Slick Slider WordPress add-on.
The issues that we will cover are:
- MaxGalleria
- Slick Slider WordPress
You can click on a specific issue to jump straight to that section. Or, continue reading.
MaxGalleria Core Plugin Troubleshooting
These issues apply specifically to the free core MaxGalleria plugin.
How To Install MaxGalleria Core Plugin
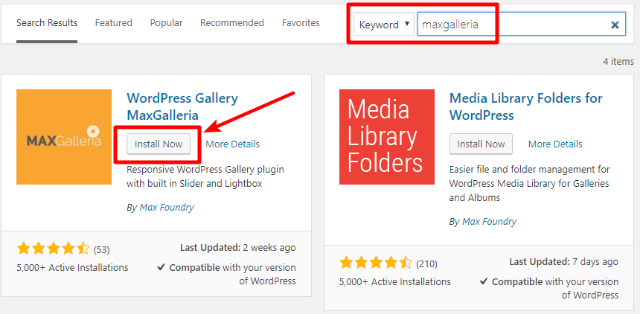
Because the core MaxGalleria plugin is listed at WordPress.org, you can install it directly from your WordPress site’s dashboard by going to Plugins → Add New and searching for “MaxGalleria”:
Unable To Add YouTube Video To MaxGalleria
Struggling with how to add YouTube videos to MaxGalleria?
In order to add YouTube videos to your gallery, you need to first obtain a Google Developer API Key.
For detailed instructions on how to obtain this key, please see this post.
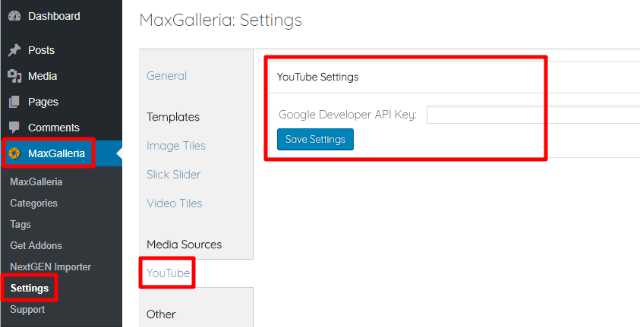
Once you follow the instructions in that post to obtain your key, make sure to enter it in MaxGalleria’s settings by going to MaxGalleria → Settings → YouTube:
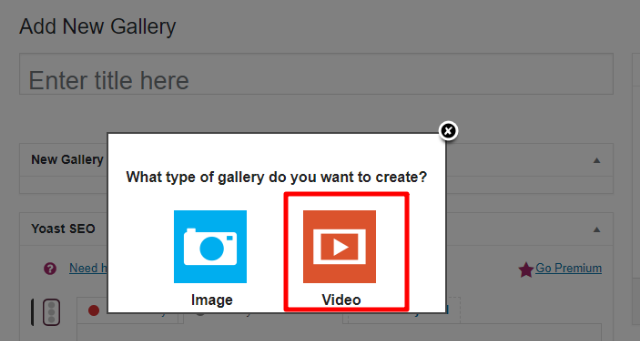
Once you add your Google Developer API Key, make sure that you choose the Video option when creating a new gallery:
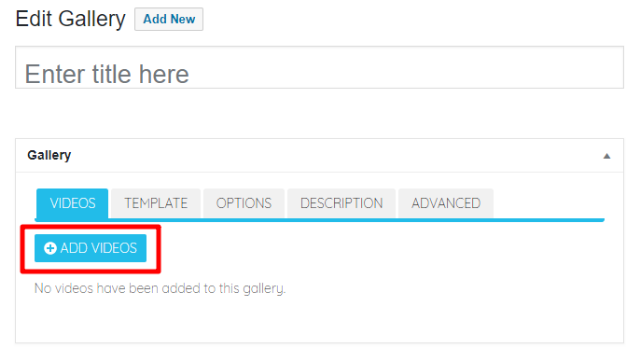
Then, click the Add Videos button and paste in the URLs to the YouTube videos (the actual page URL of the video) that you want to include:
Problems With Gallery Permalinks
MaxGalleria lets you showcase your galleries, and subsequently your gallery permalinks, via two different methods.
The most flexible method to display a gallery is by using its shortcode. With the shortcode method, you can add your gallery to an existing post/page or create a new post/page just for your gallery. You can also add the shortcode to a text widget to display the gallery in your sidebar.
Essentially, the shortcode method lets you display your gallery anywhere on your site.
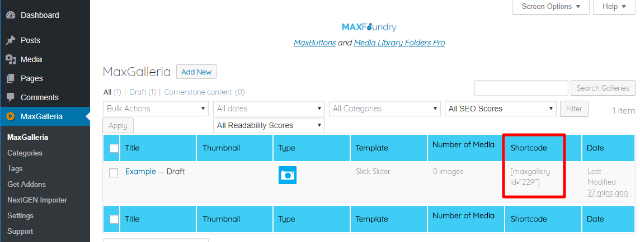
To display your gallery in this method, all you need to do is add the shortcode for that gallery, which you can obtain by clicking on MaxGalleria in your WordPress dashboard and looking at the Shortcode column:
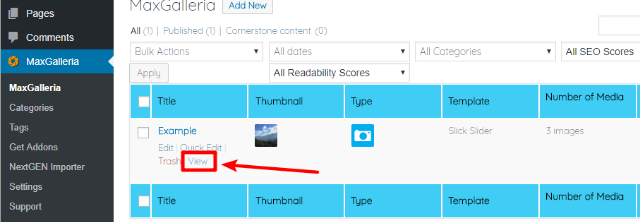
Beyond this manual shortcode method, MaxGalleria also creates a separate page for your gallery that you can view by clicking the View option under any gallery:
Occasionally, you might experience a “Page Cannot Be Found Error” when you try to view a gallery via this method.
If that happens, here are two steps to fix the issue:
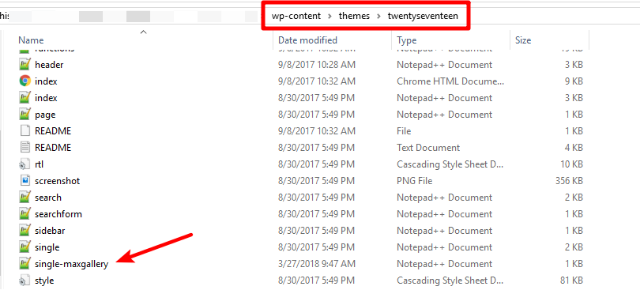
First, connect to your site via cPanel File Manager or FTP and browse to your active theme’s folder (wp-content/themes/theme_name).
In that folder, look for a file called single-maxgallery.php. MaxGalleria should create this file by default without requiring any manual intervention. But sometimes, an issue prevents that from happening:
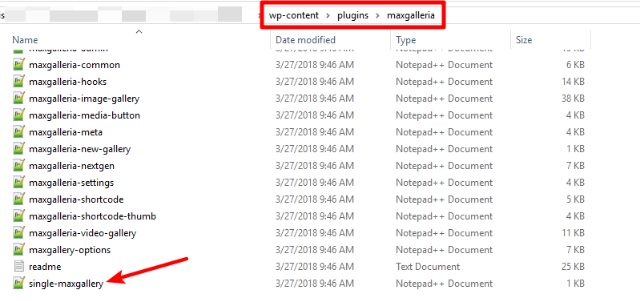
If you do not see the file in your active theme’s folder, you can manually copy it over from the MaxGalleria plugin folder (wp-content/plugins/maxgalleria).
Just copy the single-maxgallery.php file from the MaxGalleria folder to your active theme’s folder:
Once you’ve verified that the single-maxgallery.php file is in your active theme’s folder, you should refresh your permalinks. To do that:
- Go to Settings → Permalinks
- Click Save Changes (you do not need to modify any settings → just click the button)
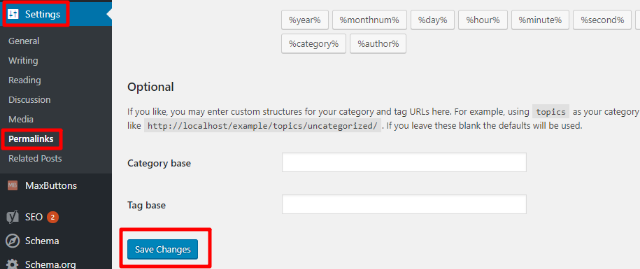
This should fix the “Page Cannot Be Found” issue.
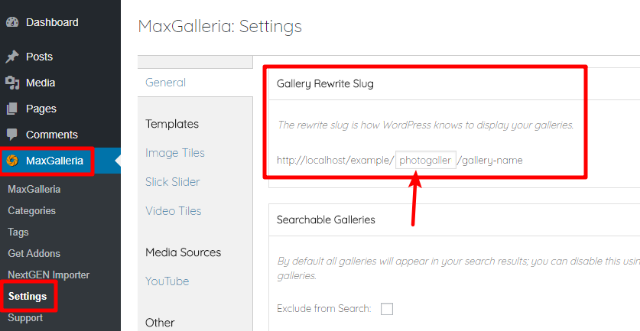
If you’re still experiencing problems, MaxGalleria’s slug might be conflicting with another plugin or theme.
By default, MaxGalleria uses gallery for its slug (e.g. yoursite.com/gallery/gallery_name). But you can manually change this by going to MaxGalleria → Settings and editing the Gallery Rewrite Slug setting:
Slick Slider WordPress Troubleshooting
These issues apply specifically to the premium Slick Slider WordPress add-on for MaxGalleria.
How To Configure Slick Slider WordPress
For more information on how to install and configure Slick Slider WordPress, please read this article. It goes through the entire process of creating a slick slider gallery and explains each interface setting.
Slick Slider WordPress Fatal Error Upon Activation
Did you try to install the Slick Slider WordPress plugin only to be met with something like “plugin could not be activated because it triggered a fatal error” when you try to activate the plugin?
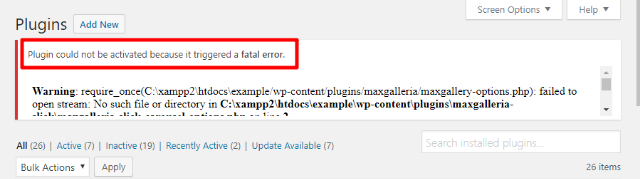
This error is triggered because Slick Slider WordPress is an add-on for the free MaxGalleria plugin.
To fix the issue, make sure that you have the free core MaxGalleria plugin installed and activated before you activate Slick Slider WordPress. You can install the free MaxGalleria plugin by searching for it from your WordPress dashboard or downloading the file from WordPress.org:
Issues With Auto Updates Or License Keys
Are you getting an error when you try to automatically update Slick Slider WordPress?
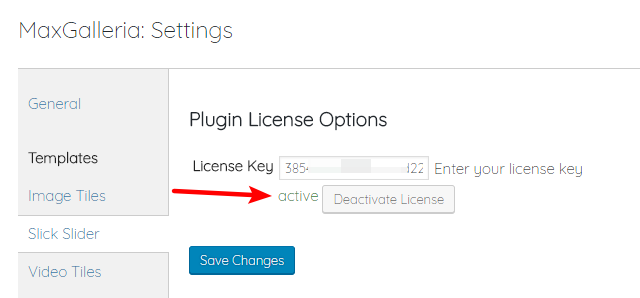
The most likely issue is your license key. Make sure that you’ve added your license key by going to MaxGalleria → Settings → Slick Slider:
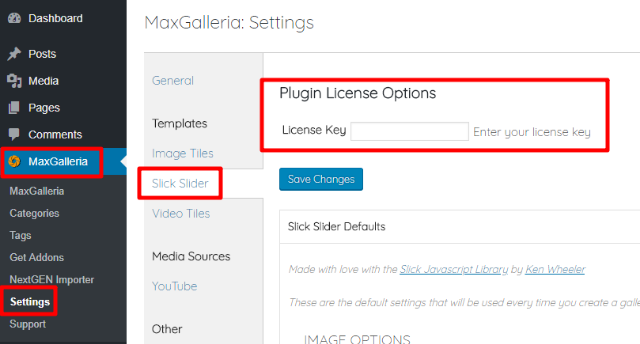
Make sure that, after inputting your license key, you click the button to Activate your license. It should look like below when you’ve completed the process:
If you’re still experiencing issues, it’s also possible to manually update the plugin. To do this:
- Delete the version of the add-on that’s installed on your site
- Install the latest version of the plugin that you download from your MaxGalleria account
You will not lose any data and your existing galleries will function again as soon as you install the updated version.
How To Use Variable Width Images With Slick Slider WordPress
There are two parts to using variable width images with Slick Slider WordPress:
- Actually turning the setting on
- Adjusting the height of your images to ensure they all stay the same height (while having variable widths)
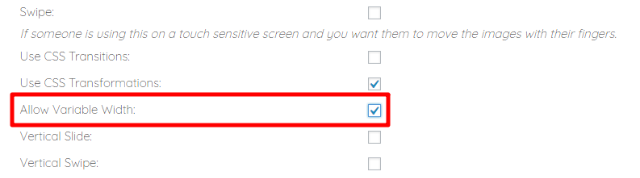
To turn on the variable width setting for Slick Slider WordPress:
- Go to the OPTIONS tab in the gallery’s settings
- Scroll down until you reach the ADVANCED OPTIONS area
- Check the box for Allow Variable Width:
Then, you need to resize each image to have the same height. You can either do this to the image files themselves or use CSS to achieve the same thing.
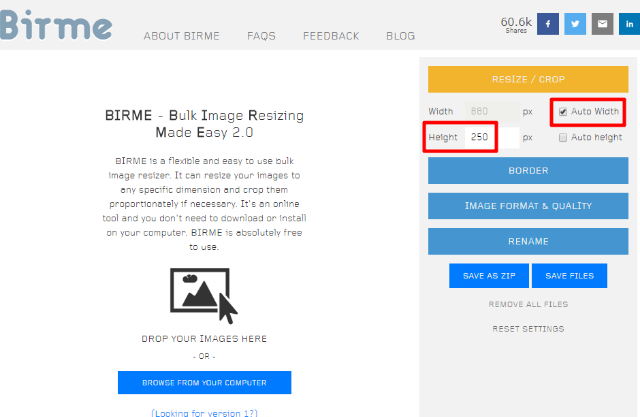
To bulk resize your images to have the same height you can use the free BIRME tool (Pixelmator and Sketch are other good options). Just make sure to:
- Check the box for Auto Width (to avoid cropping your images)
- Enter your desired height in the Height box
Alternatively, you can also use this CSS snippet to force all images to be the same size:
.slick-slide img {
 height: 250px;
 }
You can change the value to your desired height.
By default, if you use variable width your images will be the same size no matter what device a visitor is browsing from.
To change the height of your images depending on a visitor’s device, you can use the CSS media queries below:
.mg-slick-carousel .slick-slide img {
 width: auto;
 max-height: 100%;
 }
 @media (max-width: 1024px) {
 .mg-slick-carousel .slick-slide img {
 max-height: 170px;
 }
 }
 @media (max-width: 768px) {
 .mg-slick-carousel .slick-slide img {
 max-height: 150px;
 }
 }
 @media (max-width: 480px) {
 .mg-slick-carousel .slick-slide img {
 max-height: 100px;
 }
 }
 @media (max-width: 320px) {
 .mg-slick-carousel .slick-slide img {
 max-height: 50px;
 }
 }
As with the other snippet, you can adjust the height values as desired.