Slick Slider is a popular responsive jQuery carousel developed by Ken Wheeler. The Slick Slider for WordPress Addon to MaxGalleria lets you easily bring that same functionality to your WordPress site using the MaxGalleria interface.
In this article, we’ll show you how to use the Slick Slider for WordPress Addon. Then, we’ll go through some common troubleshooting tips and ways you can modify the plugin’s core functionality.
How To Use The Slick Slider for WordPress Addon
The Slick Slider for WordPress Addon is an extension for our free MaxGalleria plugin. In order to use it, you’ll need both the core MaxGalleria plugin and the Slick Slider for WordPress Addon installed.
Once you have both plugins installed, you’re ready to move on.
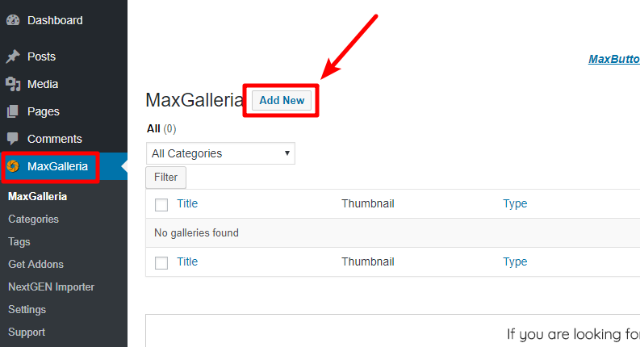
Step 1: Create A New MaxGalleria Gallery
To get started, go to MaxGalleria → Add New to create a new gallery:
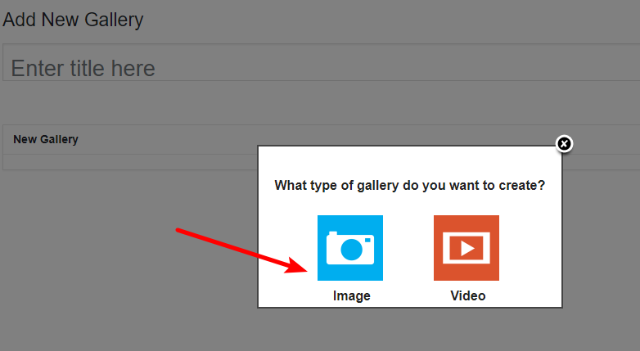
On the next screen, choose whether your want to use Images or Videos in your gallery. We’ll choose images for this example:
Then, give your new gallery a title:

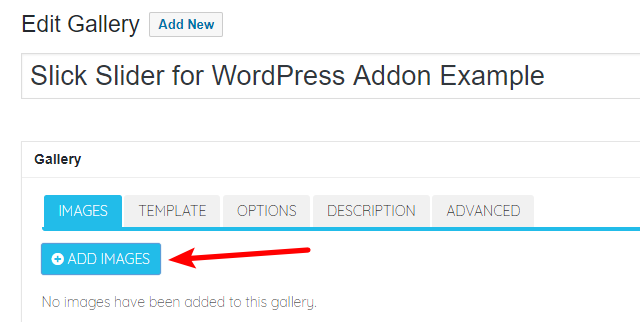
Step 2: Add Images To Your Gallery
Next, click the + ADD IMAGES button to upload your images or select existing images from the WordPress Media Library:
Once you’ve added your images, you should see them appear on your screen. If needed, you can use the buttons to edit, crop, or remove some of the images:
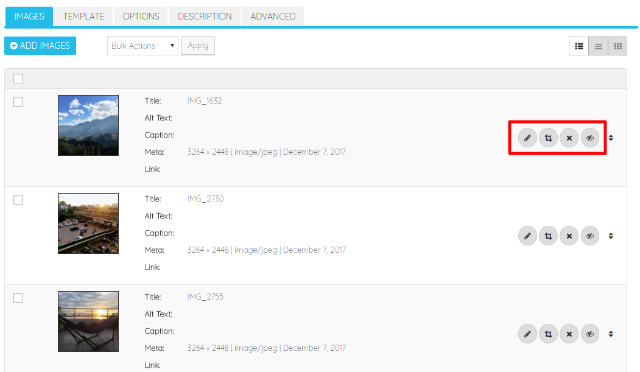
Once you’re happy with how things look, you’re ready to move on.
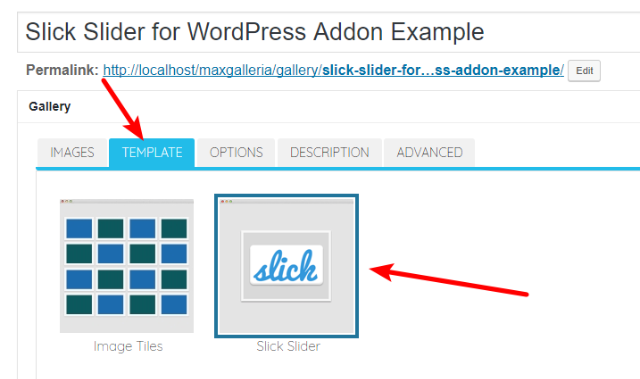
Step 3: Choose Slick Slider Template
Next, move to the TEMPLATE tab and choose the option for Slick Slider:
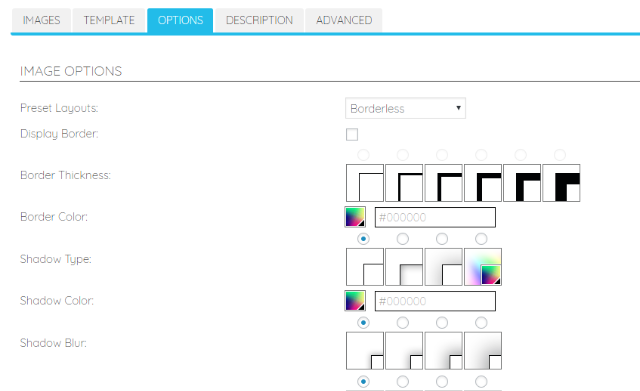
Step 4: Configure Slick Slider Options
Once you’ve chosen the Slick Slider template, move to the OPTIONS tab. At the top, you can add borders and/or shadow to your images:
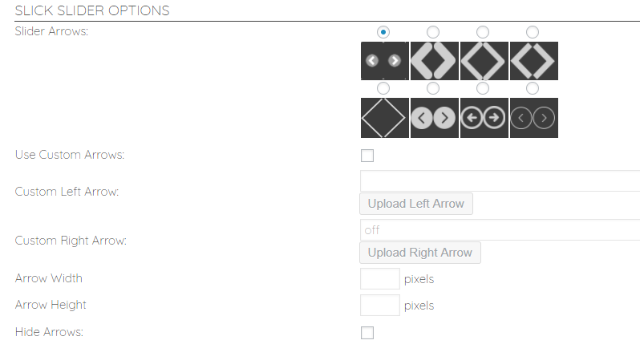
And if you scroll down, you’ll see the SLICK SLIDER OPTIONS section. It’s important to note that, while there are a lot of settings in this section, you can leave many of them as the default. Basically – the extra control is there if you want it, but you don’t need to feel compelled to configure each option.
First, you’ll choose the design for the Arrows that your visitors will use to move forward or backward through your carousel. You can:
- Choose from the included designs
- Upload your own design
- Hide the arrows completely
Below that, you can configure some functionality options:
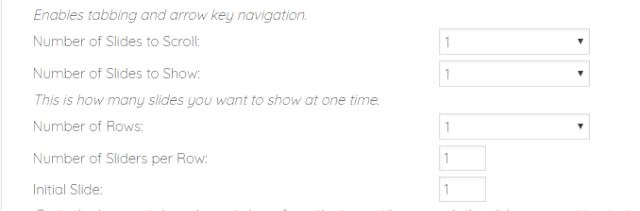
- Number of Slides to Scroll – how many slides the plugin will move forward/backward each time.
- Number of Slides to Show – each “slide” is one image or video. If you set this to “2”, the slider will show 2 images at a time.
- Number of Rows – if set to more than 1, the plugin will stack images on top of one another.
For example, here’s what a slider that displays 2 slides looks like with 2 rows:

Next, you have some more technical options:
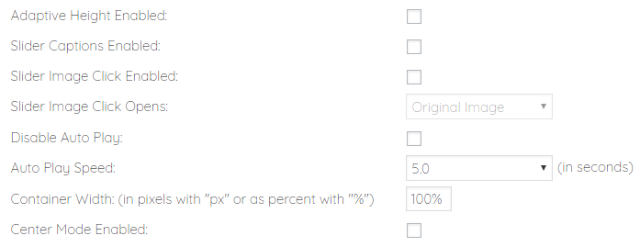
- Adaptive Height Enabled – adaptive height lets the slider “slide” up and down if the heights of the images change.
- Slider Captions Enabled – when enabled, users will see an image’s Title attribute when they hover over that image on the slider.
- Slider Image Click Enabled – when turned on, visitors can click on the images.
- Slider Image Click Opens – when the previous setting is enabled, this lets you specify where each image should link to.
- Disable Auto Play – check this box if you do not want your slider to automatically play.
- Auto Play Speed – when auto play is enabled, this lets you specify how many seconds to pause before scrolling.
- Container Width – use px for pixels or % for percentages.
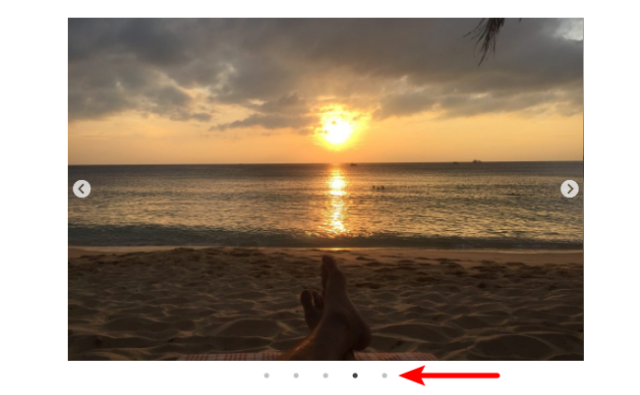
Next up, you can configure whether or not to use “dots:
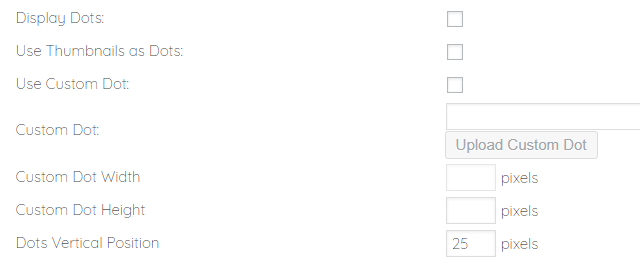
When dots are enabled, visitors will be able to jump between slides using “dots”:
Almost done! There are just a few more settings to configure:
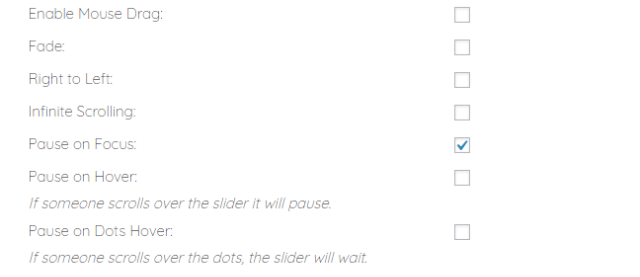
- Enable Mouse Drag – when checked, visitors can move between slides by dragging their mouse.
- Fade – uses a fade effect instead of a slide animation during slide changes.
- Right to Left – makes the slider automatically play right to left instead of the default left to right.
- Infinite Scrolling – when enabled, the slider will simply return to the beginning when it reaches the end of the slides to create an “infinite” effect.
- Pause on… – these let you pause the slider based on various visitor actions.
If desired, you can also configure more ADVANCED OPTIONS below. Otherwise, you’re ready to move on.
In the ADVANCED OPTIONS area, you can do things like:
- Enable Swipe To Slide
- Change Transition Speed
- Use Mobile First calculations for responsive settings
- Allow Variable Width
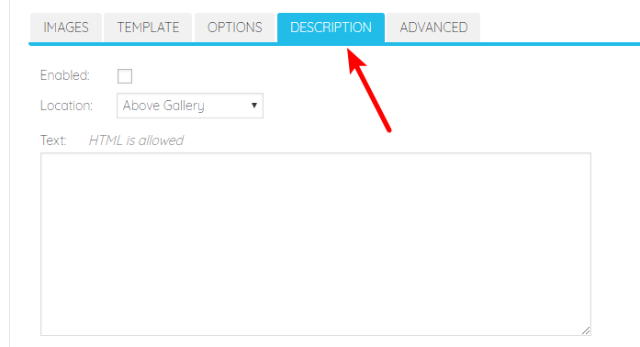
Step 5: Add A Front-end Description (Optional)
If you want to display a description above or below your carousel, you can go to the DESCRIPTION tab.
Choose Enabled and select the location. Then, you can add your description in the Text Box:
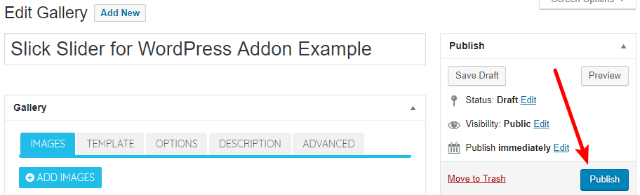
Step 6: Publish Gallery
Once you finish configuring your gallery, click the Publish button:
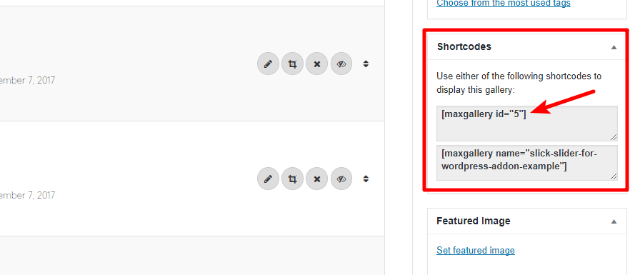
Step 7: Use Gallery Shortcode To Display
After publishing your gallery, you’ll be able to use the Shortcodes in the sidebar to embed your gallery anywhere on your site:
Troubleshooting Common Problems For The Slick Slider for WordPress Addon
Below, we’ll take you through some common issues (and their solutions):
I Installed The Plugin But I Don’t See It Working
The Slick Slider for WordPress Addon is an add-on for our MaxGalleria plugin. So in order to create galleries using Slick Slider, you’ll need to already have MaxGalleria installed and activated.
If you don’t see the Slick Slider for WordPress Addon, make sure that you’ve already installed the free MaxGalleria plugin.
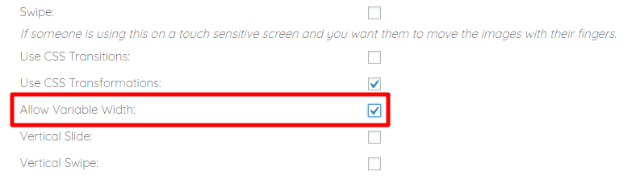
How To Use Variable Width Images With Slick Slider Carousel
To allow variable width images in your carousel:
- Go to the OPTIONS tab
- Scroll down to the ADVANCED OPTIONS area
- Check the box for Allow Variable Width:
If you decide to use the variable width setting, it’s important to understand two things:
- Your images should all have the same heights
- Your slider will not be responsive (this only applies when using variable widths)
If you’d prefer not to manually resize each image to make them have the same height, you can use this CSS snippet to force all images to a certain height:
.slick-slide img {
 height: 275px;
 }
How To Display Captions Underneath Slick Slider Carousel Items
The Slick Slider for WordPress Addon doesn’t include support for captions by default. But you can add such support using an action hook.
Here’s an example:
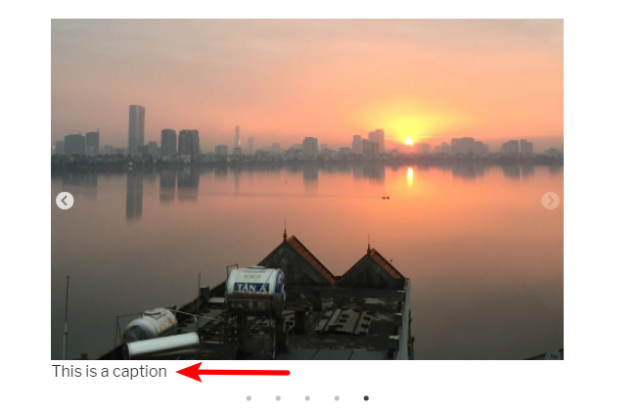
To do that, add the following code snippet to your theme’s functions.php file:
You can adjust the caption’s styling or positioning by using the slider_text and slider_text_wrapper classes.
How To Display Captions As Overlay On Slick Slider Carousel Items
If you’d prefer to display your captions as an overlay like this:
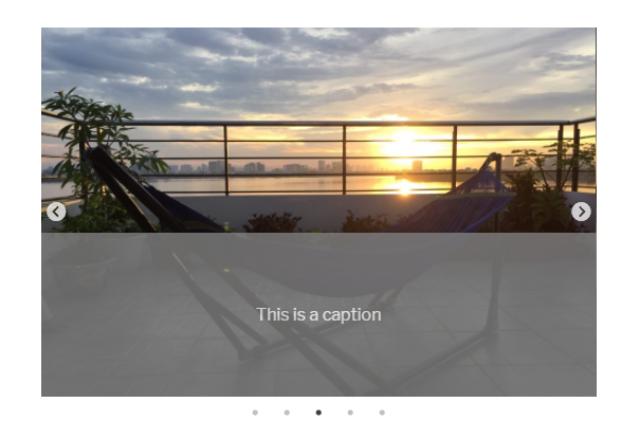
Then you can use the same code snippet as above, but add this custom CSS (we’ve added some opacity to ensure the caption is always readable):
.slider_text_wrapper {
 position: relative;
 }
 .slider_text {
 background-color: #808080;
 color: white;
 height: 155px;
 line-height: 155px;
 opacity: 0.8;
 position: absolute;
 text-align: center;
 top: -155px;
 width: 100%;
 z-index: 10;
 }
And that wraps up our guide on how to use the MaxGalleria Slick Slider for WordPress Addon. Be sure to let us know if you have any further questions.