If you’re like most WordPress users, images are a key part of almost every single post that you publish. That means if something goes wrong with your WordPress images, it can make for a pretty stressful situation (maybe that’s even how you’re feeling right now!).
Most of the time – everything goes off without a hitch and life is great. The rest of the time, you might run into some of these common WordPress image errors and issues.
We’re talking about things like the dreaded HTTP error when trying to upload an image to WordPress or situations where you simply wish that you could do something like control which image gets used when someone shares your content on Facebook.
No matter which WordPress image issue you’re facing, we have a solution for you.
We’ve collected 25+ common WordPress image errors and issues. And we’re going to show you how to fix all of them.
If you’re looking for help with a specific issue, you can use the table of contents below to jump straight to that issue. Otherwise, we encourage you to give the whole post a read to learn some new tips and tricks for working with WordPress images.
- 1. HTTP Error When Uploading Image To WordPress Media Library
- 2. File Exceeds The upload_max_filesize Error
- 3. Unable To Create Directory Error
- 4. Mixed Content Error After Switching To HTTPS
- 5. Upside Down Or Flipped Images Error
- 6. Upload: Failed to Write File to Disk Error
- 7. Temporary Folder Missing Error While Uploading Media
- 8. Image Cannot Be Found. Make Sure The Path Is Correct And Image Exists Error
- 9. How To Change Default Image Sizes
- 10. Fix WordPress Featured Image Appearing Twice Error
- 11. How To Set Default WordPress Featured Image
- 12. How To Regenerate WordPress Thumbnails To Fix Distorted Images
- 13. How To Change Image That Appears On Facebook For WordPress Site
- 14. How To Require Featured Image For WordPress Posts
- 15. How To Resize WordPress Images
- 16. How To Crop WordPress Images
- 17. How To Organize WordPress Images Into Folders
- 18. How To Add A Caption Below WordPress Image
- 19. How To Change WordPress Image Alignment
- 20. WordPress Featured Image Box Disappeared Error
- 21. WordPress Changed Image But Changes Aren’t Showing Error
- 22. How To Change Location Of WordPress Uploads Folder
- 23. How To Create Image Galleries On WordPress
- 24. How To Add A Favicon Image To WordPress
- 25. How To Upload WordPress Images Via FTP
Here’s What You’ll Need To Fix Some Of These Common WordPress Image Errors
For some of these WordPress image errors, you might need to edit or create files on your web server in order to try to diagnose and fix the issue.
If you’re not familiar with how to access those files, we’re going to show you two quick methods. This will give you all the baseline knowledge that you need to complete the more technical diagnostic steps in this guide.
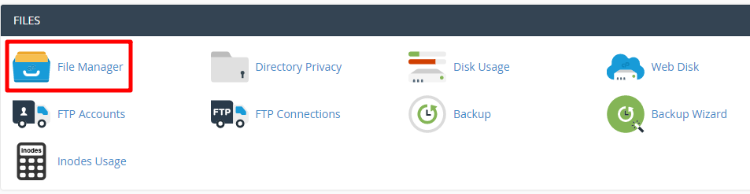
How To Edit Or Create Files With cPanel File Manager
cPanel File Manager is a tool that lets you edit and upload files right from your web browser (assuming your host uses cPanel).
To access it, look for the File Manager option in your main cPanel dashboard:
When you click the button, it will launch a window where you can:
- Browse to different folders using the folder tree on the left
- Select files on the right
- Upload and/or edit files using the options at the top
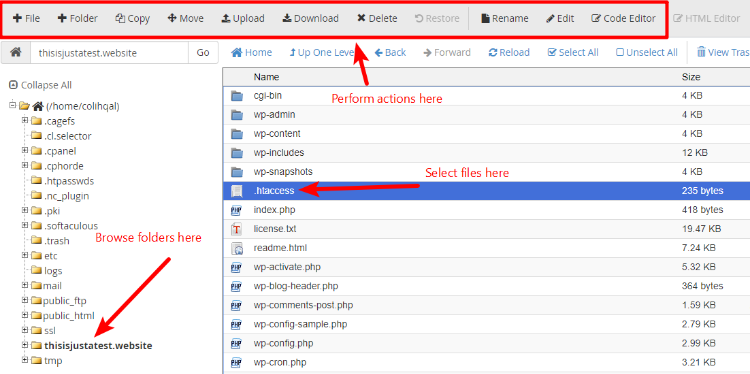
Most of the time, you’ll be working in your root folder, which is the folder pictured above that contains folders like:
- wp-admin
- wp-content
- wp-includes
How To Edit Or Create Files Via FTP
To edit or create files via FTP, you’ll need:
- An FTP program – FileZilla is a good free option.
- Your FTP credentials – you can get your username, password, and port via your host’s dashboard or support.
You can then connect to your site using those credentials:

Once you’re connected, you can browse the folder tree as needed. Usually, your root folder is located at public_html or public:

1. HTTP Error When Uploading Image To WordPress Media Library
One of the most common errors that you’ll encounter is the HTTP error when trying to upload new images to your Media Library:
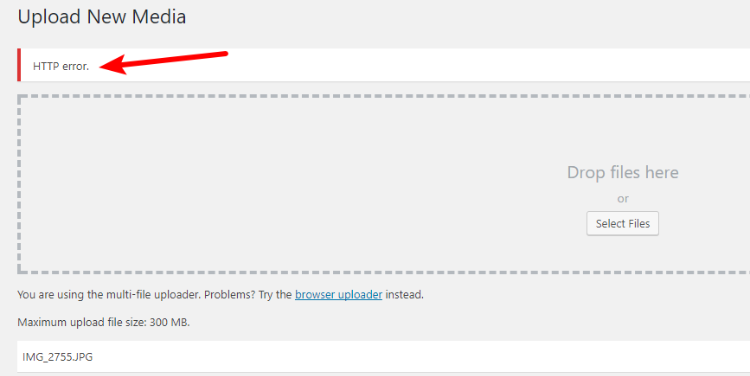
This error can be especially frustrating because it often seems random – that is, you can upload 10 different images and only one of them will return an HTTP error.
So what causes the HTTP error when uploading images to the WordPress Media Library?
Well…that’s another frustrating thing – there’s not a single cause.
Unfortunately, that means we can’t give you one single solution – but we can provide some common fixes. Most of the time, one of these should be able to fix the issue.
1. Decrease Image Size (If Possible)
Though the WordPress HTTP error can appear when uploading all types of images, it’s most common with large images (in terms of both dimensions and file size).
To minimize your chances of encountering the error, one of the easiest fixes is to simply resize your images before you upload them.
If you’re not sure how to resize your images, here are some tools to help:
- Resize Image – good for single images.
- Batch Image Resizing Made Easy – good for bulk resizing multiple images at once.
You can also compress your images to further reduce file size by using one of these tools:
- Compressor.io – good for single images.
- Kraken.io – good for bulk compressing multiple images at once.
2. Increase WordPress Memory Limit
One potential trigger for the error is that your site is hitting its memory limit.
Most of the time, this limit is set by your host. To lift it, you’ll need to contact your host and ask them to increase your PHP memory limit.
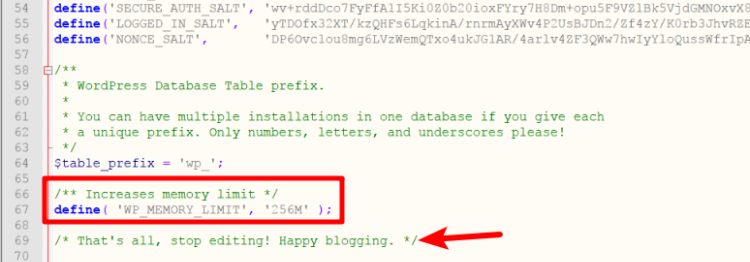
If your host allows it, you can also try to do this manually by following these instructions:
- Edit your wp-config.php file (this file is in the root folder for your site)
- Add the following code snippet above the
/* That's all, stop editing! Happy blogging. */line
/** Increases memory limit */
 define( 'WP_MEMORY_LIMIT', '256M' );
3. Force Imagick To Use A Single Thread
As part of the image upload process, WordPress uses something called Imagick to help process images. To work faster, Imagick will try to use multiple CPU threads when processing images.
However, in order to balance resources on shared servers, some hosting providers don’t let you run multi-thread tasks. This conflict between Imagick and your host’s limits is a common cause of the HTTP error (this WordPress Trac ticket provides more information).
Thankfully – there’s an easy fix:
- Edit your .htaccess file (this file is located in your root folder)
- Add the following code snippet to the top of your .htaccess file and save your changes
SetEnv MAGICK_THREAD_LIMIT 1
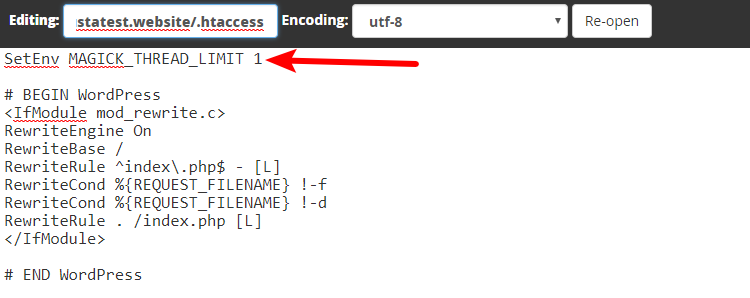
All this code snippet does is tell Imagick to always use a single thread to avoid a potential conflict with your host.
4. Disable ModSecurity Rules
Another issue, especially for larger images, is potential ModSecurity rules at your host.
Because of the way ModSecurity rules work at most hosts now, you’re unable to manually disable ModSecurity rules in most situations. Therefore, the most foolproof way to disable them is to talk to your host’s support.
But, depending on your host’s configuration, there’s still a chance you might be able to do this manually.
To try and fix the issue:
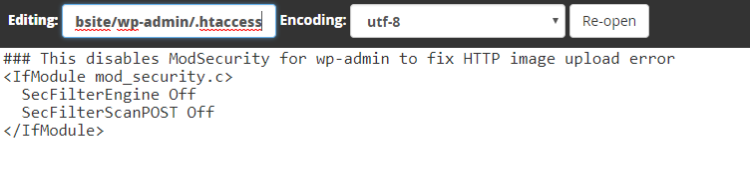
- Create a new .htaccess file in your wp-admin folder
- Add the following code snippet to the new .htaccess file:
### This disables ModSecurity for wp-admin to fix HTTP image upload error
 <IfModule mod_security.c>
 SecFilterEngine Off
 SecFilterScanPOST Off
 </IfModule>
Again – this code snippet may not have any effect depending on your host’s configuration.
5. Temporary Workaround If You Need To Upload Images NOW
This method isn’t a permanent fix, but if you absolutely need to upload images right this instant and don’t have time to try and diagnose the issue, here’s a quick workaround:
- Connect to your server via cPanel File Manager or FTP
- Upload image files to /wp-content/uploads/… folder (you can either upload images straight to the uploads folder or use the relevant year/month subfolder)
- Install and activate the free Add From Server plugin
- Go to Media → Add From Server in your WordPress dashboard
- Follow the plugin’s interface to import the files that you uploaded
Again – this won’t “fix” the issue, but it does allow you to bypass it in the meantime.
2. File Exceeds The upload_max_filesize Error
This error occurs when you try to upload a file that exceeds the maximum upload limit defined by WordPress and/or your server.
One easy solution is to simply decrease the size of your image by resizing or compressing it.
But if that’s not an option, you can try one of these three methods to increase your site’s upload limit:
1. .htaccess Method
- Edit your .htaccess file (this file is located in your root folder)
- Add the following code snippet
### Increases the max filesize for uploads
 php_value upload_max_filesize 64M
 php_value post_max_size 64M
 php_value max_execution_time 300
 php_value max_input_time 300
2. Php.ini Method
- Edit the php.ini file in your root folder (or create a new file called php.ini if it doesn’t already exist)
- Add the following code snippet
upload_max_filesize = 64M
 post_max_size = 64M
 max_execution_time = 300
3. Functions.php Method
- Edit your theme’s functions.php file by going to /wp-content/themes/**ACTIVE_THEME**/functions.php
- Add the following code snippet
@ini_set( 'upload_max_size' , '64M' );
 @ini_set( 'post_max_size', '64M');
 @ini_set( 'max_execution_time', '300' );
3. Unable To Create Directory Error
If you try to upload images to the WordPress Media Library only to be met with the Unable to create directory… error, the most common problem is with the file permissions of your uploads folder.
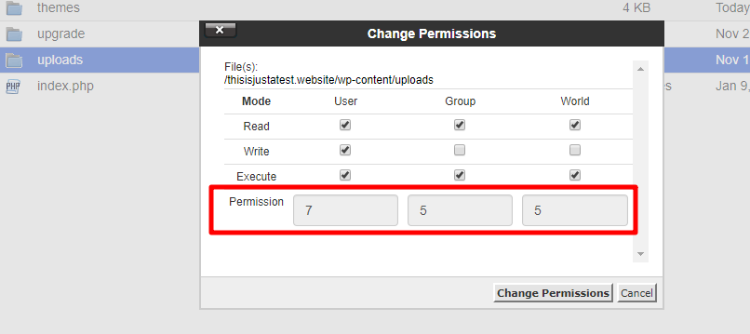
For most WordPress sites, you need to give the uploads folder 755 permissions.
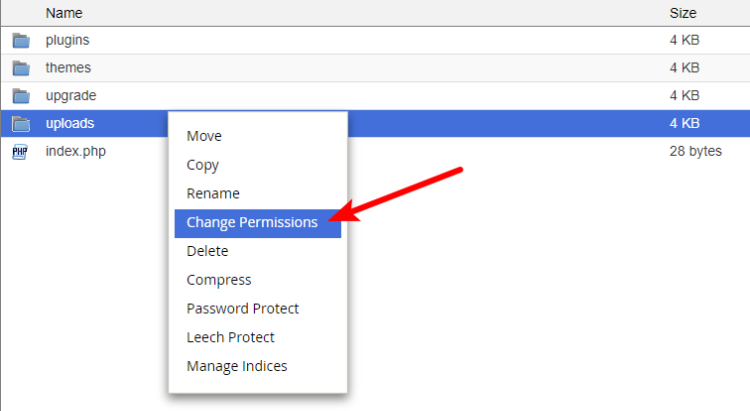
To change permissions with cPanel File Manager:
- Go to the /wp-content folder
- Right-click on uploads
- Choose Change Permissions
Make sure that the boxes read 7-5-5:
Most FTP programs let you change file permissions in a similar way, though the actual process varies for each program. Here’s what it looks like in FileZilla:
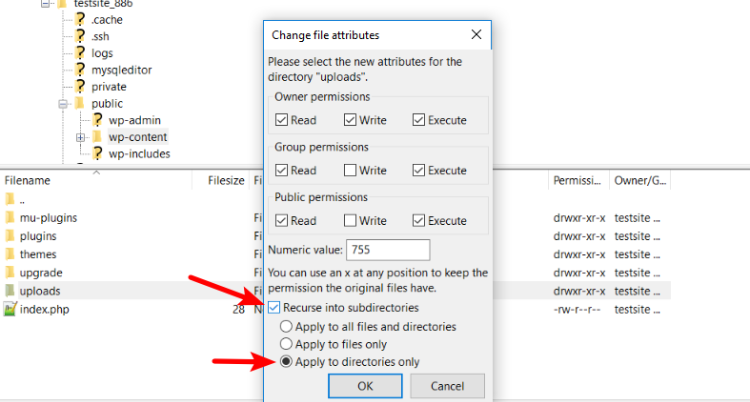
If you’re using FTP, make sure to choose the Recurse into subdirectories option.
4. Mixed Content Error After Switching To HTTPS
If you recently moved your WordPress site to HTTPS after installing a TLS/SSL certificate, you might experience the Mixed Content error.
This error doesn’t prevent your website from working, but it does cause most modern browsers to warn visitors that your website isn’t secure and prevents you from getting the “green padlock.”
On WordPress, the most common cause is that all of your old images are hardcoded to use HTTP, rather than HTTPS. As a result, your site still loads those assets over HTTP and triggers the mixed content warning.
To fix the issue, here are two solutions:
- Use the Really Simple SSL plugin to automatically rewrite the URLs for old images
- Use the Velvet Blues Update URLs plugin to manually run a find/replace to change “http://yourdomain.com” to “https://yourdomain.com”

5. Upside Down Or Flipped Images Error (Common With iPhone)
Sometimes you’ll upload an image to WordPress that looks normal on your desktop computer. But as soon as you upload it, it’s flipped upside down or rotated wrong.
This is especially common when you upload photos taken with an iOS device (like your iPhone) because iOS doesn’t properly transfer the EXIF data that’s needed to determine the image’s orientation.
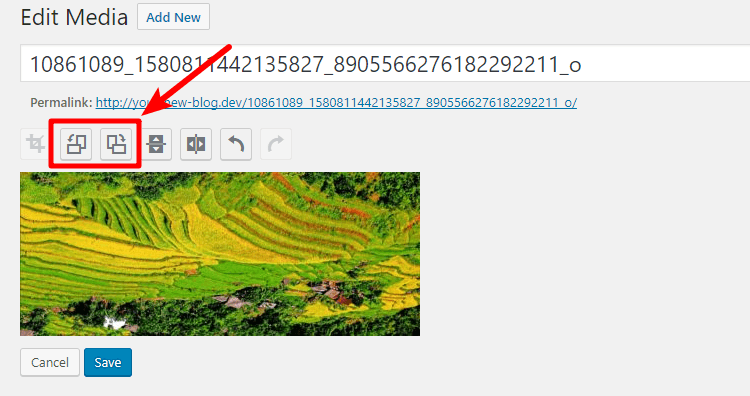
To fix a single image, you can use WordPress’ built-in image rotation feature by following these steps:
- Click on your desired image
- Select Edit Image
- Use the rotation buttons to change your image’s orientation
- Click Save when finished
If you’re regularly encountering this issue and want a more automatic fix, you can also install the free Fix Image Rotation plugin. This plugin will automatically apply the proper orientation to any images that you upload.
6. Upload: Failed to Write File to Disk Error
If you’re seeing the Upload: Failed to Write File to Disk Error, the most common cause is incorrect file permissions.
To fix the issue, you can follow the same instructions as the Unable To Create Directory Error. Click here to go those instructions.
7. Temporary Folder Missing Error While Uploading Media
In order to properly upload images, WordPress needs to be able to access the temporary folder that’s defined by your site’s PHP settings. If your PHP settings aren’t properly providing this information, WordPress won’t be able to locate the folder and will throw this error as a result.
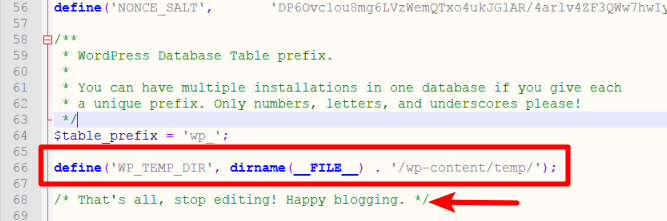
Here’s how to manually define the temporary folder:
- Edit your wp-config.php file (this file is in the root folder of your site)
- Add the following code snippet somewhere above the
/* That's all, stop editing! Happy blogging. */line in your wp-config.php file
define('WP_TEMP_DIR', dirname(__FILE__) . '/wp-content/temp/');
If that doesn’t work, you might need to reach out to your host for help with your server’s configuration.
8. Image Cannot Be Found. Make Sure The Path Is Correct And Image Exists Error
The “Image cannot be found. Make sure the path is correct and image exist” error commonly crops up when dealing with WordPress galleries, either through the core WordPress Gallery functionality or a third-party plugin that’s based on the core WordPress gallery.
The issue seems to stem from the fact that images are linked to their attachment page, instead of the actual image URL.
To fix the issue, try adding an attribute to the gallery shortcode to make each image link to its actual file URL.
For example, if your original shortcode is:
[ my_gallery ] (without the spaces)
Then add a parameter like so:
9. How To Change Default Image Sizes
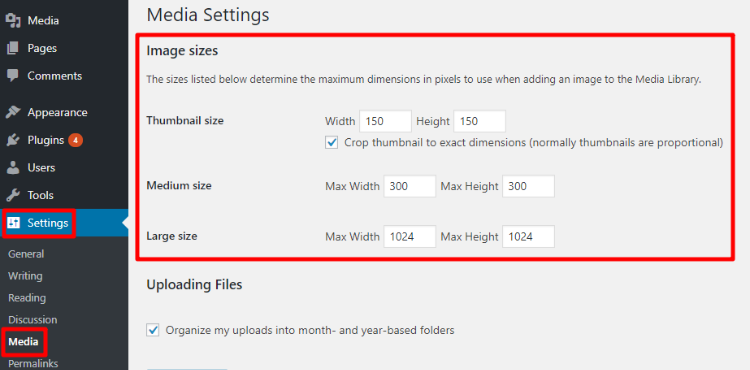
Whenever you upload an image to WordPress, WordPress will automatically resize those images to certain preset dimensions, usually based on rules supplied by your theme.
If needed, though, you can manually go in and change these default image sizes.
In your WordPress dashboard, go to Settings → Media and adjust the options as desired:
10. Fix WordPress Featured Image Appearing Twice Error
WordPress featured images can be a tricky concept to grasp. This one isn’t so much an “error”, as it is a confusing aspect of the featured image system.
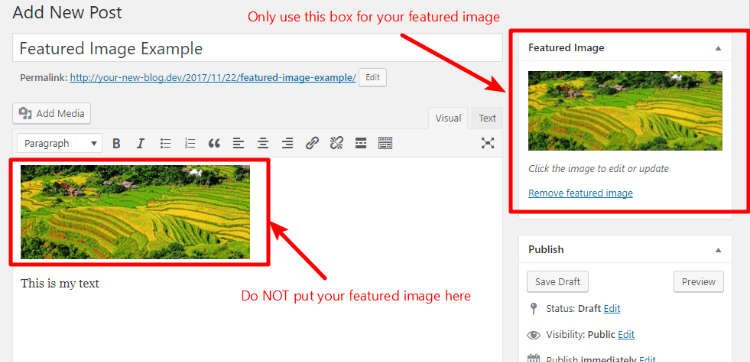
Most WordPress themes automatically display your featured image at the top of your post, so if you also add the same image to the top of the WordPress Editor, the featured image will appear twice.
To fix the issue, don’t include the featured image in the body of your post – only use the dedicated featured image option in the sidebar.
Here’s an image to illustrate the concept:
11. How To Set Default WordPress Featured Image
Beyond duplicate featured images, another issue that you might run into is the need to set a default WordPress featured image for your site.
This essentially lets you create a fallback thumbnail/featured image in case you aren’t able to use a unique featured image.
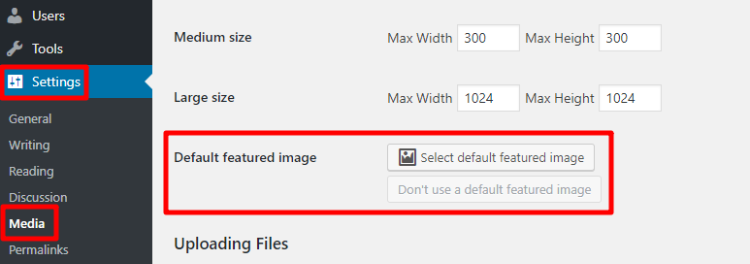
To achieve this, the easiest solution is to use the free Default featured image plugin.
Once you install and activate the plugin, you’ll be able to set your default featured image by going to Settings → Media and using the Default featured image option:
12. How To Regenerate WordPress Thumbnails To Fix Distorted Images
If you recently changed WordPress themes or manually changed your thumbnail dimensions, you might be dealing with a situation where all of your existing images look distorted.
The issue stems from the fact that WordPress automatically creates different sizes (thumbnails) for each image that you upload. These sizes are usually defined by your theme, so if you change themes your old image sizes might not look right anymore.
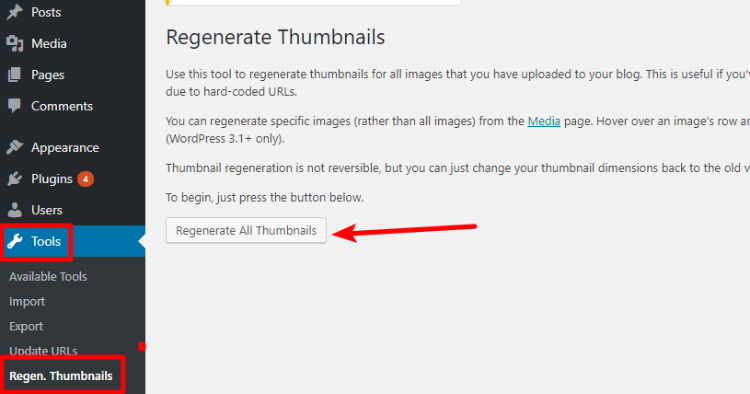
To fix the issue, you need to force WordPress to regenerate thumbnails. And to do that, you can use the popular (and free!) Regenerate Thumbnails plugin.
Once you install and activate the plugin, go to Tools → Regen. Thumbnails to start the process:
13. How To Change Image That Appears On Facebook For WordPress Site
Whenever you or one of your visitors shares your website on Facebook, Facebook will try to automatically import a relevant picture to go along with the link.
If you want to control this image, you need to use a type of metadata called Facebook Open Graph Meta Tags. These tags are easily accessible through WordPress plugins.
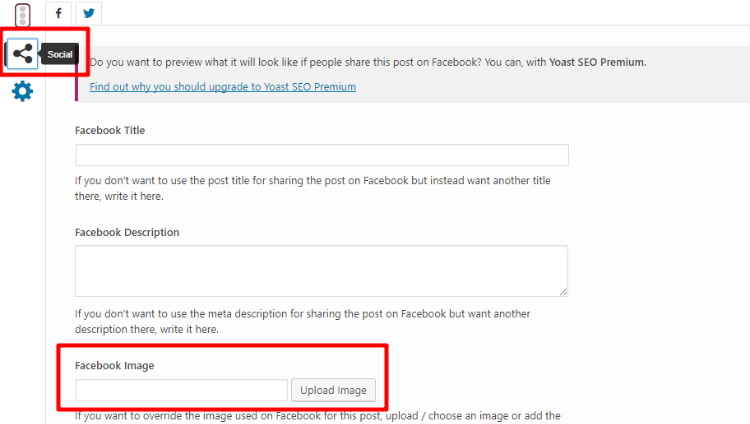
If you’re using the popular Yoast SEO plugin, you can use the Social tab of the metabox to choose the image that appears on Facebook:
And if you want a specific solution, you can use the free Facebook Open Graph, Google+ and Twitter Card Tags plugin.
14. How To Require Featured Image For WordPress Posts
If your theme requires featured images to display your posts correctly, you might want to require featured images for your WordPress posts to ensure you don’t accidentally publish a post without a featured image.
To require a featured image for all WordPress posts, you can use the free Require Featured Image plugin. Once you install and activate the plugin, it starts working right away – no need to configure anything.
15. How To Resize WordPress Images
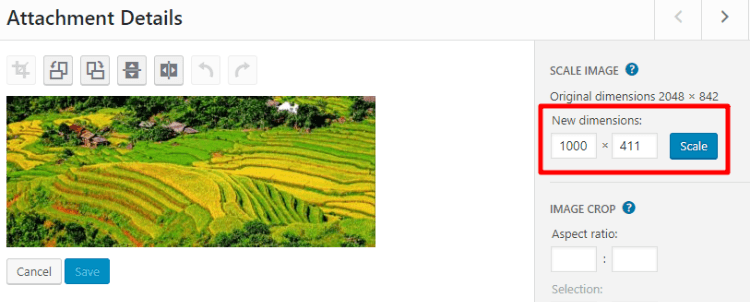
WordPress includes a tool to resize images that you’ve already uploaded directly from your dashboard. To access it:
- Click on your desired image in your Media Library
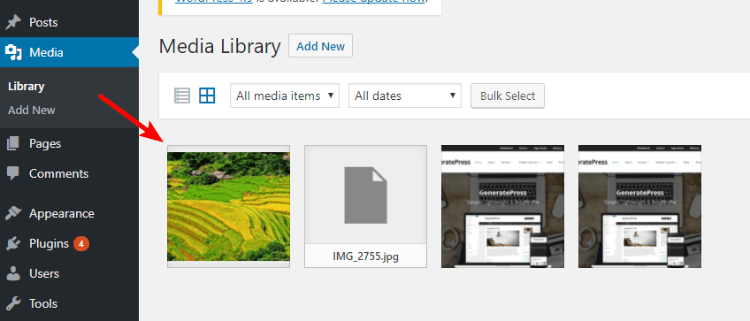
- Choose Edit Image
- Use the SCALE IMAGE box to enter new dimensions
- Click Scale to complete the process
16. How To Crop WordPress Images
If you need to crop an image, WordPress also includes an in-dashboard crop feature. To access it:
- Click on your desired image in your Media Library
- Choose Edit Image
- Click on the image preview and drag your mouse to select the area you want to crop
- Click the Crop button to generate a new preview
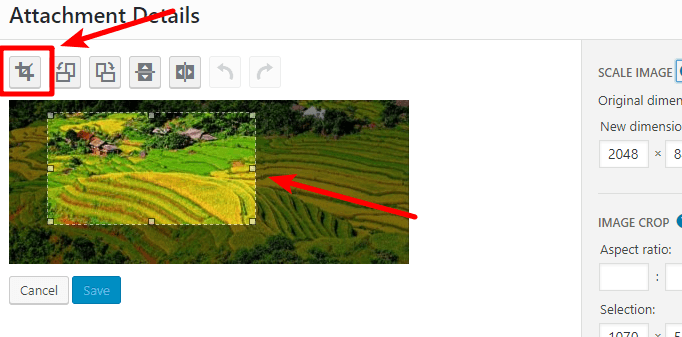
- Make sure to hit Save to finalize your crop
17. How To Organize WordPress Images Into Folders
If you want to organize your WordPress Media Library using actual folders, you can use a plugin called WordPress Media Library Folders. We’ve previously written a detailed guide on how to organize your Media Library with folders.
18. How To Add A Caption Below WordPress Image
To add a caption below an image that you use in a WordPress post, look for the Caption box when you insert the image:
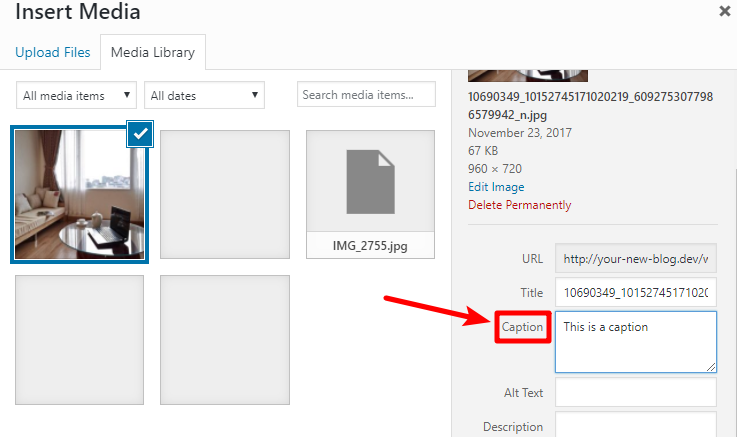
The actual styling of your caption will depend on your WordPress theme.
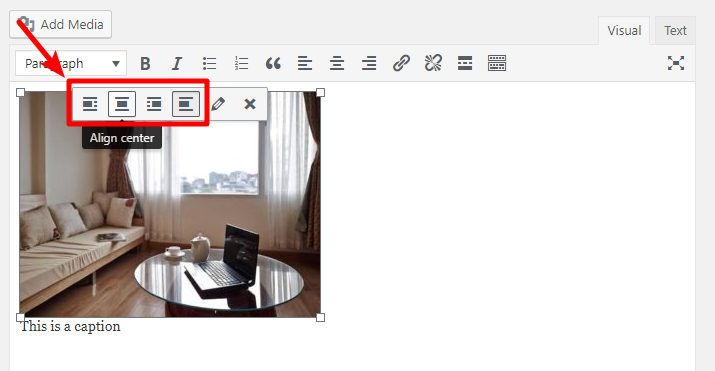
19. How To Change WordPress Image Alignment
To change the alignment of an image that you’ve used in a WordPress post, click on the image and use the four alignment buttons:
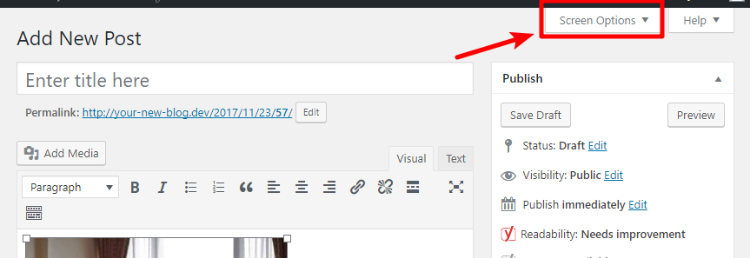
20. WordPress Featured Image Box Disappeared Error
Did your WordPress featured image box disappear? This happens when you accidentally disable its display.
To get the featured image box back, click on Screen Options in the top-right of your screen:
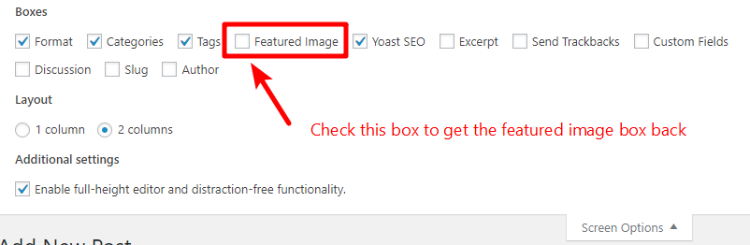
Then, make sure the box for Featured Image is checked:
21. WordPress Changed Image But Changes Aren’t Showing Error
If you changed an image in the WordPress dashboard but aren’t seeing the change on the live version of your site, the most likely culprit is a caching issue.
You can either:
- Manually reset the cache (this process is different depending on your specific caching solution)
- Wait a few hours for the cache to refresh by itself
22. How To Change Location Of WordPress Uploads Folder
By default, WordPress uploads all of your images to the …/wp-content/uploads/… folder and then organizes them into subfolders by date.
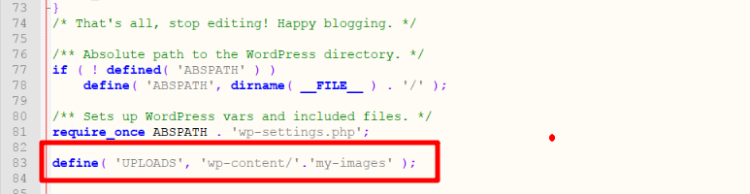
If you’d like, you can change the location of this folder by editing your wp-config.php file. Here’s how:
- Edit your wp-config.php file (this file is in the root folder of your site)
- Find the line that says require_once(ABSPATH.’wp-settings.php’);
- Add the following code snippet immediately below that line
define( 'UPLOADS', 'wp-content/'.'my-images' );
Where my-images is the name of your desired folder.
If you want to store uploads outside of the wp-content folder, you could also use something like this:
define( 'UPLOADS', ''.'my-images' );
In the above snippet, your uploaded files would be stored at yoursite.com/my-images/filename.jpg.
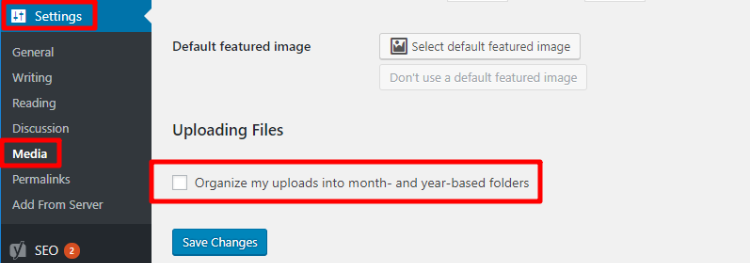
WordPress will still organize images into folders by year/month in the new folder. But if you want to change that, you can disable this functionality by going to Settings → Media and unchecking the box for Organize my uploads into month- and year-based folders:
*Note – this will not affect any existing images. All your old images will still be stored in their original folders.
23. How To Create Image Galleries On WordPress
WordPress includes a built-in WordPress Gallery function that allows you to create galleries from the images that you upload. For more information, see our detailed guide to the WordPress Gallery.
If you want more functionality, you can also use a dedicated WordPress gallery plugin like Max Galleria.
24. How To Add A Favicon Image To WordPress
A favicon is the small image that appears in a web browser tab, as well as some other areas:

Here’s how to add a favicon to your WordPress site:
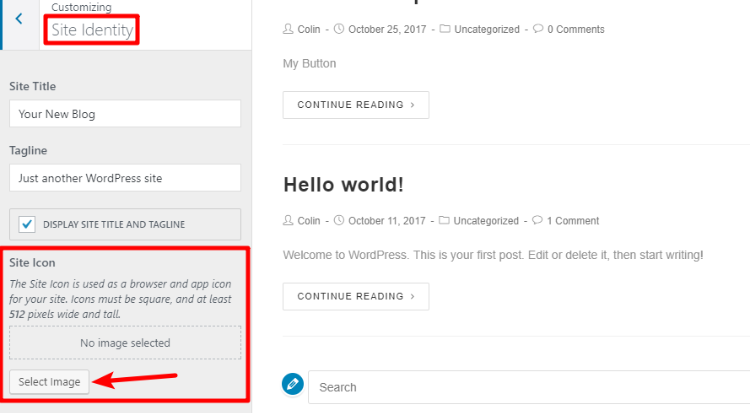
- Go to Appearance → Customize in your WordPress dashboard sidebar
- Choose the Site Identity option in the WordPress Customizer sidebar
- Use the Site Icon functionality to upload your favicon
25. How To Upload WordPress Images Via FTP
If you want to upload files to the WordPress Media Library via FTP, you’ll need to complete two steps:
- Actually upload the files (obviously!).
- Register the files to the WordPress Media Library (this is the part many people don’t understand).
To do that:
- Connect to your server via cPanel File Manager or FTP
- Upload image files to …/wp-content/uploads/… folder
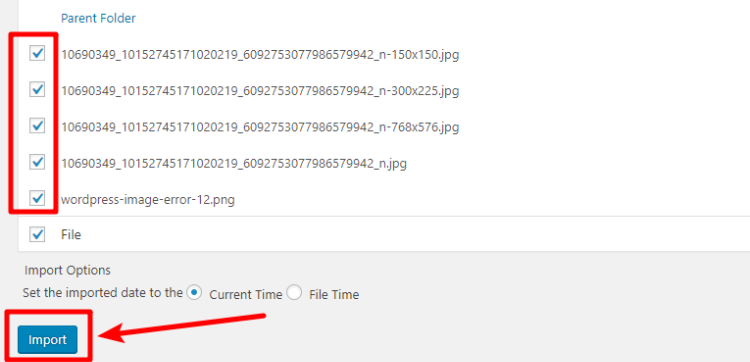
- Install and activate the free Add From Server plugin
- Go to Media → Add From Server in your WordPress dashboard
- Follow the plugin’s interface to import the files that you uploaded
Once you’ve imported the images with Add From Server, you can use them like any other image.
Here’s To Better WordPress Images
If you’re still with us, thanks for making it through. We hope you were able to find the solution to your image issue and get your WordPress site working as intended!
We encourage you to check back for more in-depth WordPress content. And if you’re looking for solutions to help you work better with WordPress images, be sure to check out Max Galleria and Media Library Folders Pro.