
When you have a fresh install of WordPress, finding files in your WordPress media library is easy. It’s like moving into a new apartment – everything is clean and in its right place.
Then you start uploading more and more files…and suddenly you can’t find your old files in the black hole that is your unorganized WordPress media library. That’s when you need the help of a plugin to wrangle your files.
Media Library Folders Pro helps you add some structure to your WordPress media library by setting you up with actual folders just like on your operating system, as well as helpful categories that you can assign your files to.
In the following sections, you’ll learn exactly how to use this plugin to organize your WordPress media library.
Options for Organizing Your WordPress Media Library
Typically, you have two options for organizing your WordPress media library:
- Folders – use the familiar folder structure offered by operating systems to drag and drop your files as needed.
- Taxonomies – add categories or tags to individual images to make it easier to find them later on.
You’ll find plenty of people on both sides saying one method is preferable to another for organizing the WordPress media library.
If you have a fairly small media library, I think it just comes down to personal preference. But if you’re working with hundreds or thousands of files, folders offer an easier approach for managing large media libraries, as well as performance improvements from lowering the number of files in each folder.
The neat thing about Media Library Folders Pro, though, is that it sets you up with both folders and categories. You can either choose your preferred method or use both at the same time for even more control.
And because the plugin creates actual folders that you can sync with your server, you can also use your favorite FTP program to organize all of your files.
In the next sections, I’ll show you how to use Media Library Folders Pro to organize your media library via both methods.
How to Organize WordPress Media Library With Folders
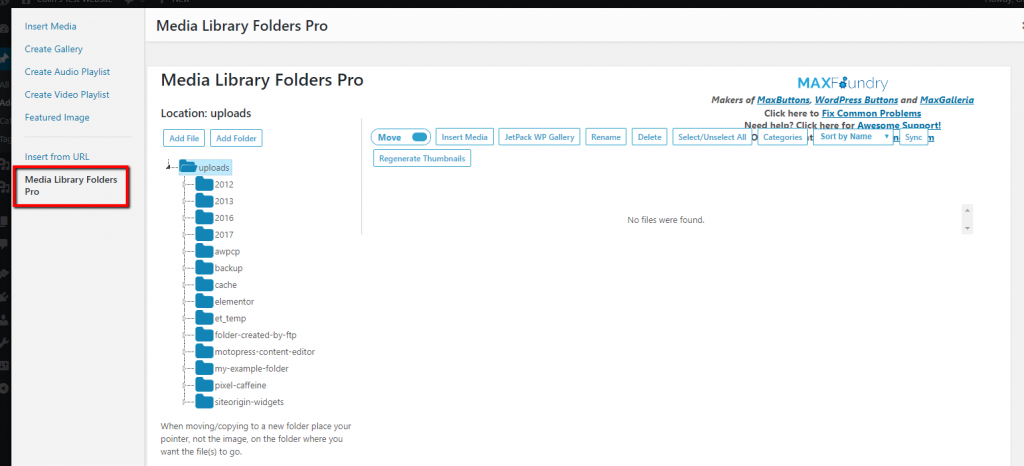
Let’s start off with how to add folders to your WordPress media library. Once you install and activate Media Library Folders Pro, you’ll get a brand new Media Library Folders Pro tab:
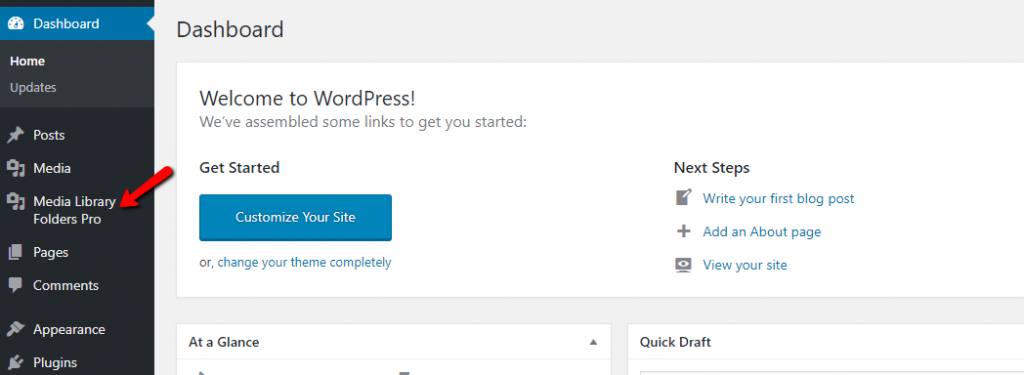
This tab is where you’ll be able to interact with your folders – your regular media library interface doesn’t change.
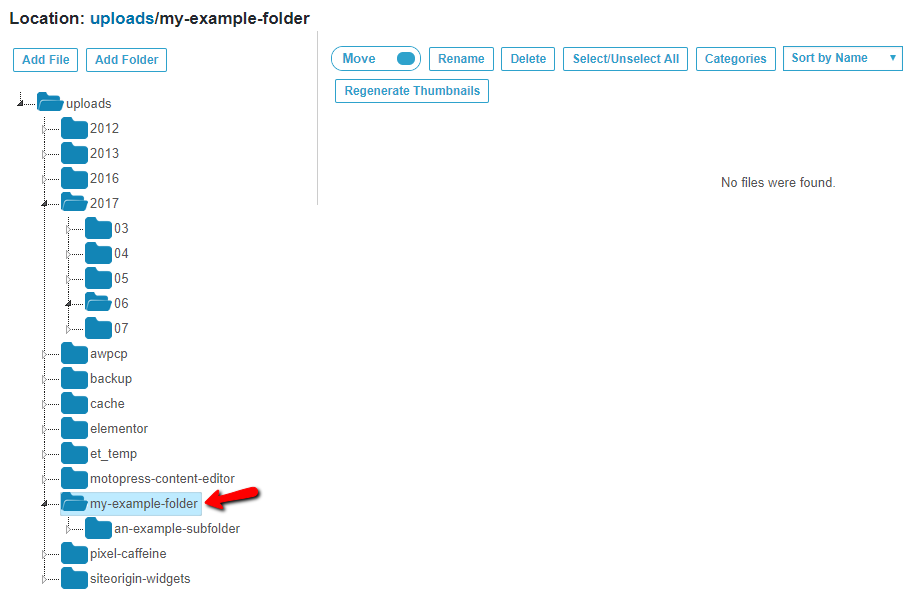
When you click on the new menu option, you’ll see your folder layout. By default, this is the full list of every single folder in your …wp-content/uploads folder:
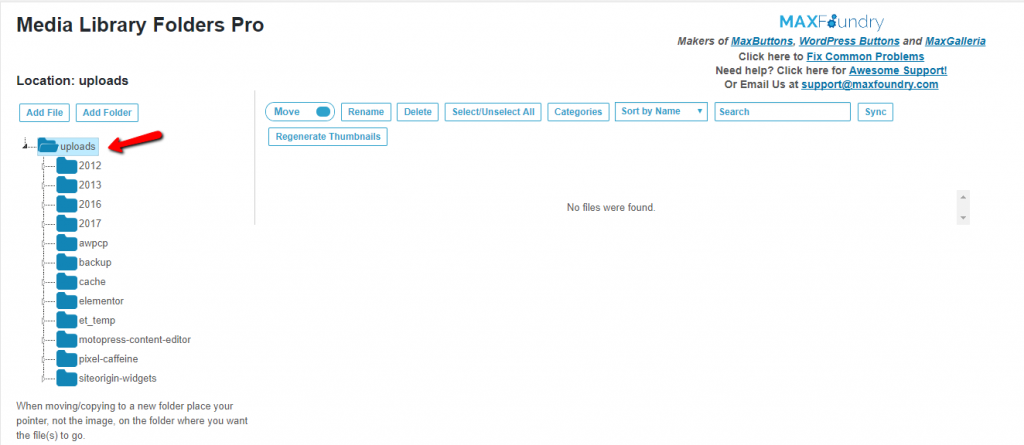
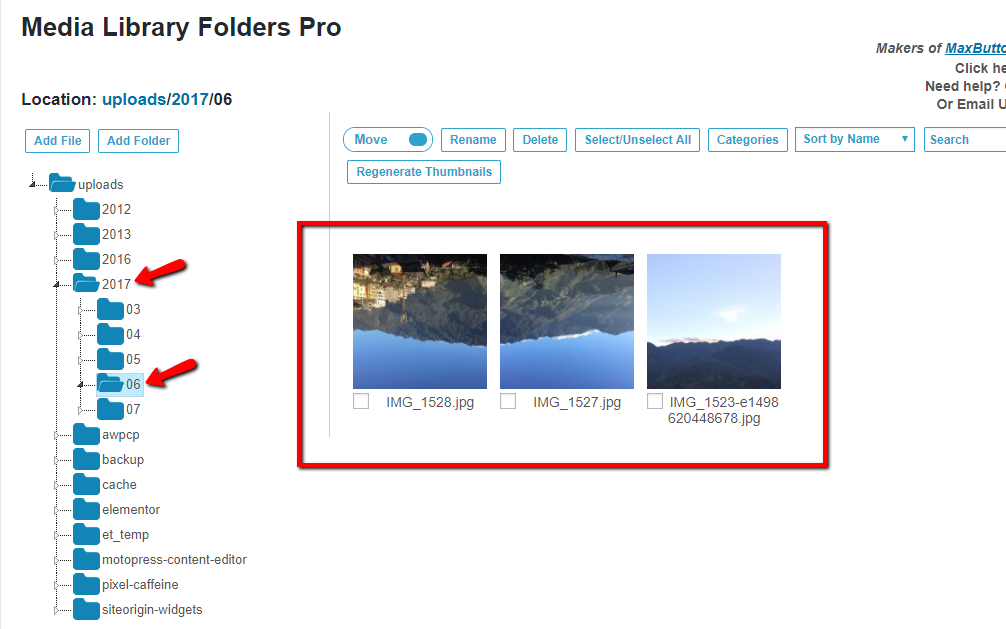
You can browse these folders identically to how you interact with the folders on your operating system. For example, if you want to find your uploads from June 2017, you’d just expand the folder structure to find the relevant folder:
Creating a New Media Folder
By default, WordPress organizes all of your uploads in folders named for months and years. That might be helpful in the moment…but are you really going to remember which folder an image is in a year down the road?
Probably not.
That’s where it comes in handy to add your own folders. With your own folders, you can set up literally any structure you want. That is, you’re in control – not WordPress!
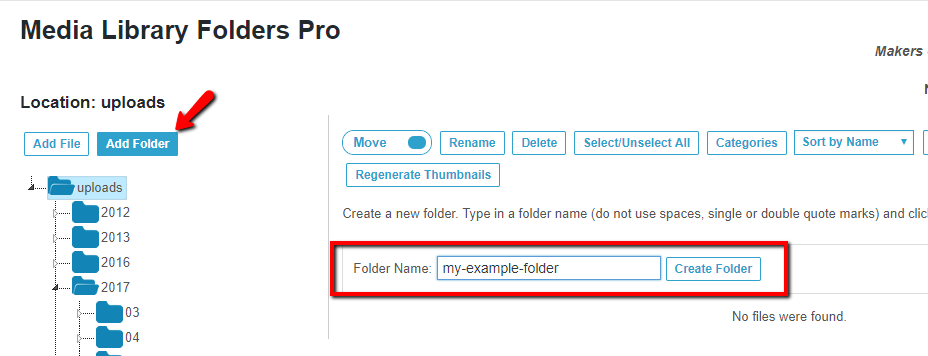
To add a new folder with the plugin, all you need to do is click the Add Folder button, give your folder a name, and click Create Folder to finalize the process:
Then, you should see your brand new folder right in the file tree (you can also see this folder via FTP – more on that later!):
You can repeat the process as many times as needed to create additional folders. Beyond that, you can also use the same method to create subfolders for further organization.
Organizing Existing Files Into Folders via WordPress Dashboard
When you add new media through the Media Library Folders Pro interface, you can upload files directly to your chosen folder.
But what about organizing the existing files in your library?
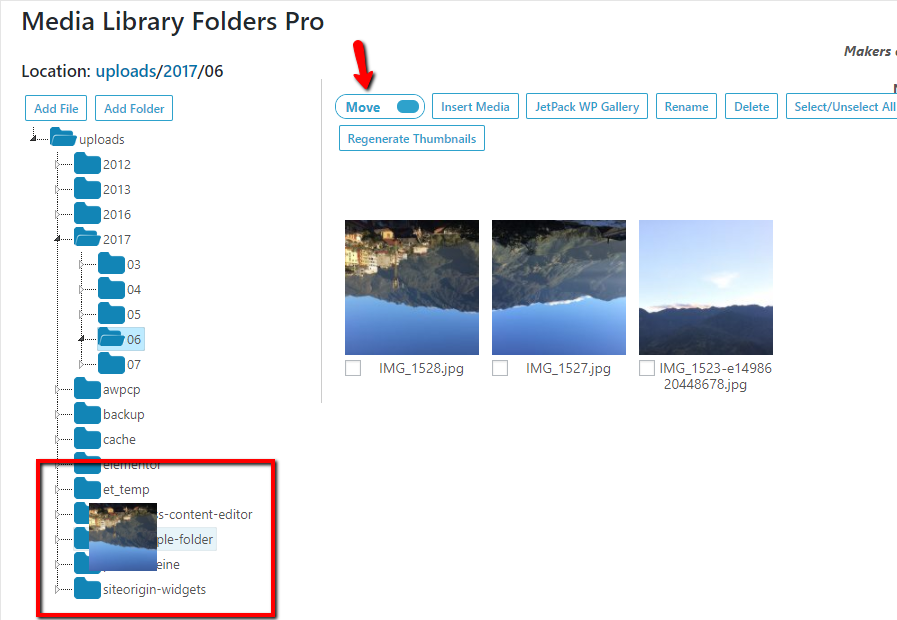
To do that, all you need to do is drag and drop files exactly like you would on your operating system. For example, to move media from WordPress’ default folder structure to your new folder, all you need to do is drag and drop:
You can choose to either completely move the file or copy the file.
This distinction is important because the actual URL of your media will change if you move it. The plugin will automatically update the URL in posts and pages – but it might cause issues if you use the file in third-party galleries or other plugins.
If you copy the file, on the other hand, the plugin will leave the existing version intact, so there’s no risk of breaking any hard-coded links (but you will have two duplicate files on your server as a result).
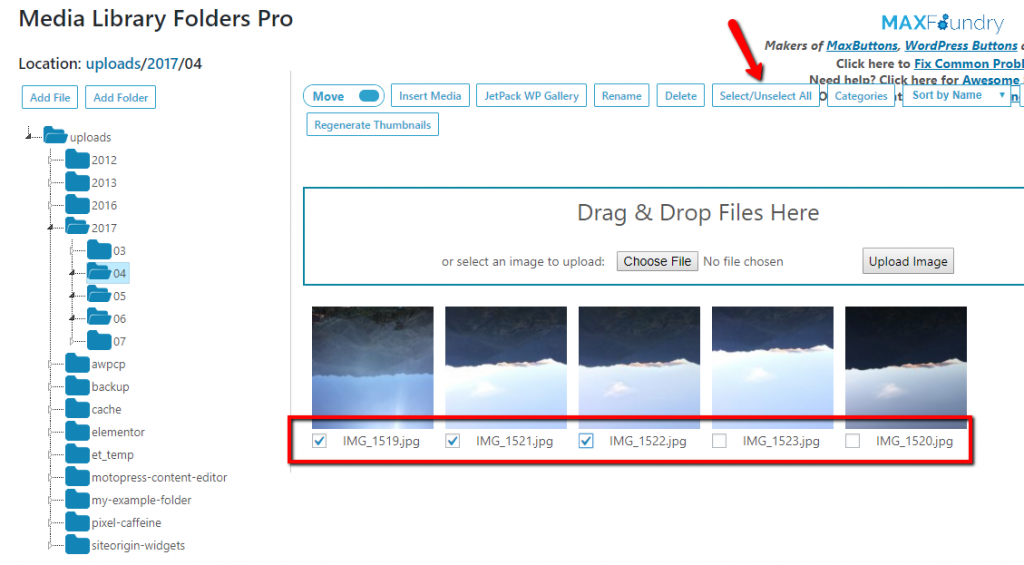
Finally, if you need to move multiple files at the same time, you can select all files or manually check multiple files and then drag and drop them all in one fell swoop:
Organizing Existing Media Into Folders via FTP
If you’re dealing with an especially large media library, you might not want to do everything manually through the WordPress interface.
This is where Media Library Folders Pro’s server sync feature comes in handy.
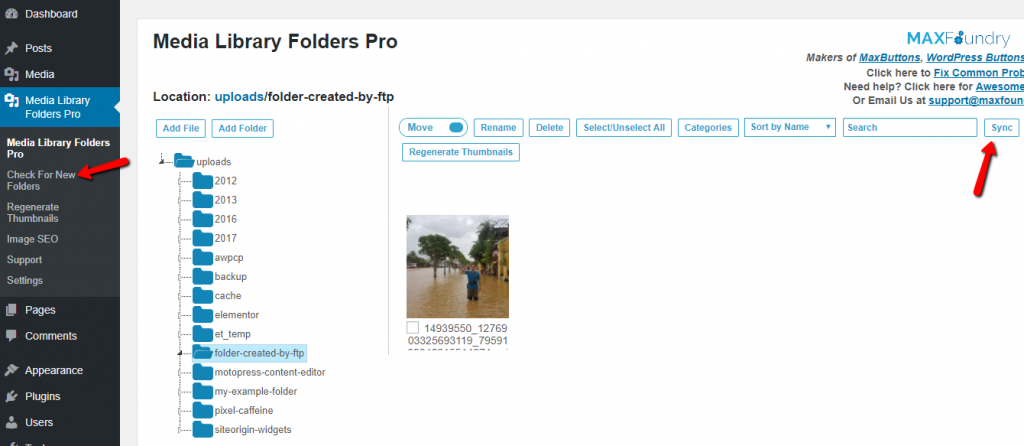
Any folder that you create via the plugin will also show up when you browse your server via FTP. And vice versa, you can also create folders via FTP that show up in Media Library Folders Pro:

Likewise, you can use your FTP program to quickly bulk upload files to your folders or move files between folders. This can save you a ton of time if you’re uploading 20+ files at once.
To bulk upload files via FTP, use your FTP program like normal. Then, you can either check for new folders that you added via FTP by clicking on Check for New Folders. Or, you can sync the contents of a specific folder with your server by clicking the Sync button:
WordPress Media Library Pro’s built-in sync function is fine for smaller numbers of files. But, it’s only designed to work with ~50-60 files per folder.
If you need to upload more files than that, we recommend the free Add From Server plugin as a good option to bulk register those files with your media library.
The plugin is easy to use – just install and activate it like normal. Then, proceed with bulk uploading files directly to your chosen folder via FTP. Once you’ve uploaded your files, go to Media –> Add from Server. Use the folder structure to browse to the directory where you uploaded your file.
Then, choose the checkmark to select all files and click Import:
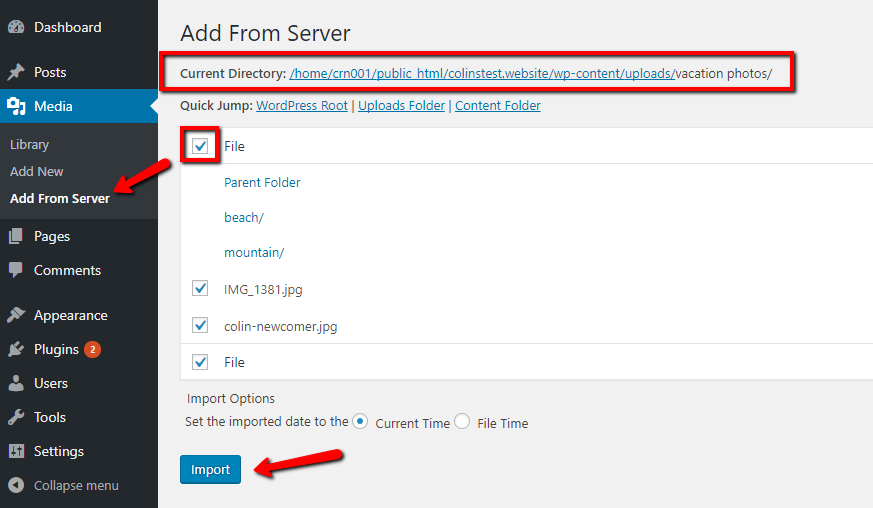
Once you click Import, Add from Server will register all of the files that you uploaded to the WordPress media library via FTP.
Then, you can use the same Sync feature to see those folders/files inside your WordPress media library.
How to Organize WordPress Media Library With Categories
As I mentioned at the beginning, the WordPress Media Library Pro doesn’t limit you to folders. You can also use categories to assign taxonomies to your images. Categories can be helpful for organizing small numbers of pictures. But as your media library grows, you might find it easier to just use folders.
What’s neat about this feature is that it fully syncs with the Enhanced Media Library plugin. So if you’ve previously created categories using Enhanced Media Library, you can still use those exact same categories within Media Library Folders Pro.
As for assigning files to categories, you can do that in a couple of different ways.
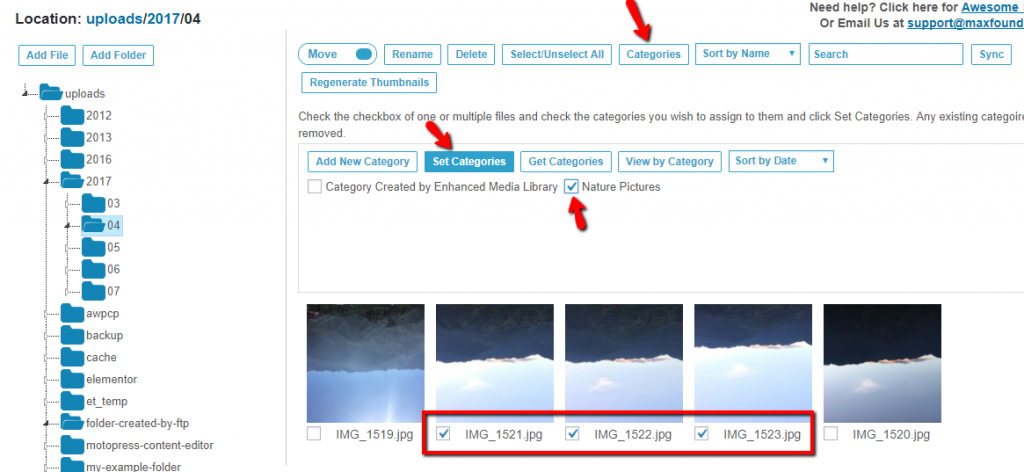
First, you can use the Media Library Folders Pro interface by clicking on Categories and then using the submenu to assign the checked categories to the images that you’ve selected:
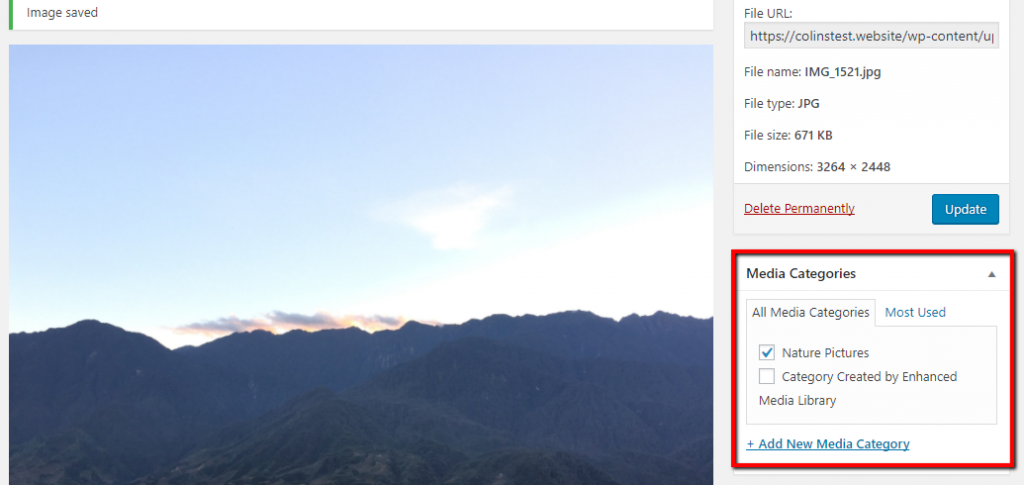
Or, you can use the same method as Enhanced Media Library and assign categories to files on each file’s individual page:
Viewing Files by Category
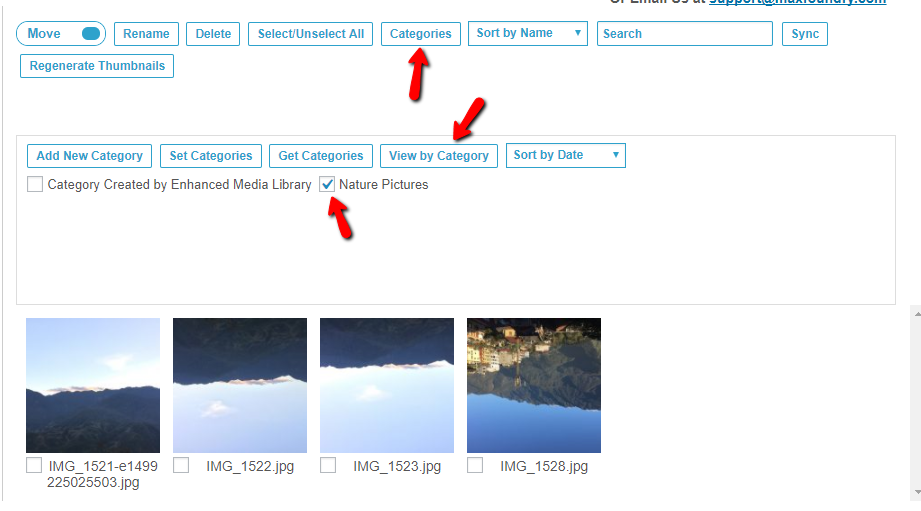
To view files by categories instead of folders, you can click the Categories button, select your desired category in the submenu, and then click View by Category. You can also choose sorting options from the drop-down:
You can also use this same method to quickly convert categories to folders by selecting all of the files in a category and dragging them to a new folder.
How to Insert Media Into Posts and Pages
To wrap things up, let me quickly show you how to actually insert your newly organized files into your WordPress posts and pages.
Media Library Folders Pro lets you use the normal Add Media button to access the Media Library Folders Pro interface:
From there, you can either use folders to find your files or use the category functionality outlined above. And you can also upload new files as needed, just like with the regular WordPress media library.
Wrapping Things Up
Organizing your WordPress media library is a great way to make your WordPress site easier to manage. If you’re regularly adding content to your site, you’ll likely find yourself using your media library every single day. For that reason, finding every way possible to improve its organization is a great way to simplify your workflow and make your WordPress tasks easier.
Whether you upload media files via FTP or via the regular WordPress media library uploader interface, Media Library Folders Pro can help you add both folders and categories to all of the files in your library.
We hope you enjoyed this guide, and please let us know if you have any questions!