You need a better way to bulk upload files to your WordPress media library than using the regular interface. FTP offers that by letting you quickly upload a bunch of files to your WordPress site…
But what happens when that bulk upload hits your WordPress media library? You have a huge jumble of unsorted and unorganized files that you bulk uploaded.
That’s why it helps to have WordPress media library folders that sync with the same folders that you create on your server via FTP. With such a system, you can retain the same folder structure while simultaneously working via both FTP and the native WordPress media library. Any change that you make in one interface seamlessly syncs to the other.
Whether you’re just looking to add some general organization to your WordPress media library or organize something specific like WooCommerce product images, you’ll find it much simpler to work with your media library when you can sync folders between your server and the media library.
Here’s What You’re Going to Learn in This Guide
By the end of this post, you’re going to know how to upload a set of organized folders to your WordPress wp-content/uploads folder and view those folders inside your WordPress media library using the exact same folder structure.
That is, you can upload a set of folders and subfolders like this via FTP (a folder called vacation photos that has two subfolders in the uploads folder):
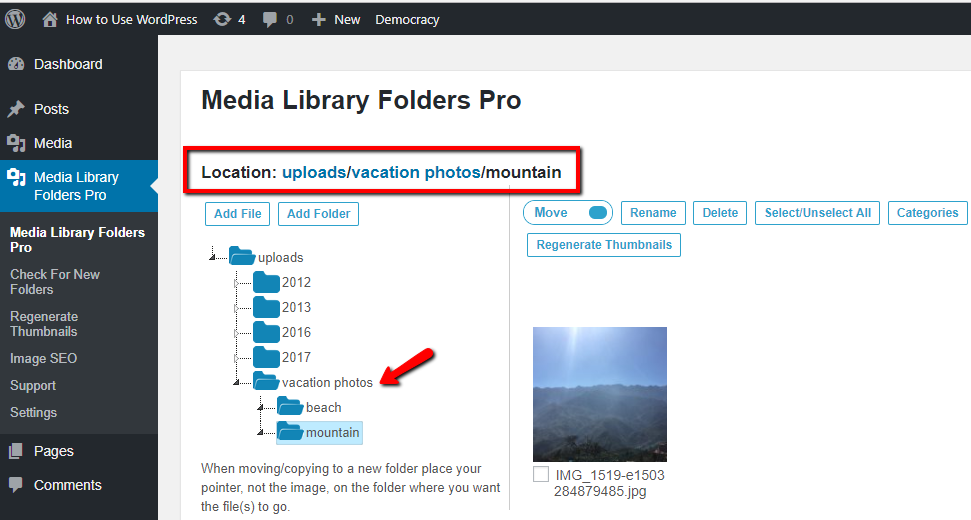
And then you’ll see those same folders and subfolders right inside your WordPress dashboard. These same folders will appear when you go to add new media to a post, page, WooCommerce product, and more:
While it is plenty possible to bulk upload images via FTP and throw them all into the uploads folder, the key difference here is that you’re going to be able to preserve the same, organized folder structure for all of the files that you upload.
This way, you can either:
- Upload media files that you’ve already organized to your FTP server while preserving the organization. This is especially helpful if you have, say, a huge set of WooCommerce product photos sitting on your computer that you need to upload to WordPress.
- Use your FTP program to organize existing files on your server into folders. Most of the time, it’s much easier to manipulate files via FTP than use the actual media library interface.
What You’ll Need to Pull This Off
To sync folders from your server to your WordPress media library while preserving the same structure, you’ll need two WordPress plugins:
- Media Library Folders Pro – this is what allows you to use real media library folders inside your WordPress dashboard (and when inserting images in posts).
- Add From Server – this free plugin helps you register images that you bulk upload via FTP to your WordPress media library.
Most of the time, you’ll be working with Media Library Folders Pro. Add From Server is just there to help you register bulk file uploads to the WordPress media library.
How to Sync FTP Server Folders With WordPress Media Library Folders
To get started, make sure you have both Media Library Folders Pro and Add From Server installed and activated on your WordPress site.
You don’t need to configure anything in either plugin – just make sure you have them active on your site.
Additionally, before getting started, you might want to read our general guide on how to organize your WordPress media library for a basic understanding of how Media Library Folders Pro functions. While the plugin is fairly easy to use, that guide will give you a fuller understanding of all of the plugin’s features and functionality.
Step 1: Upload Your Folders to WordPress uploads Folder Via FTP
Once you have both plugins installed, you’re ready to connect to your WordPress site’s server via FTP.
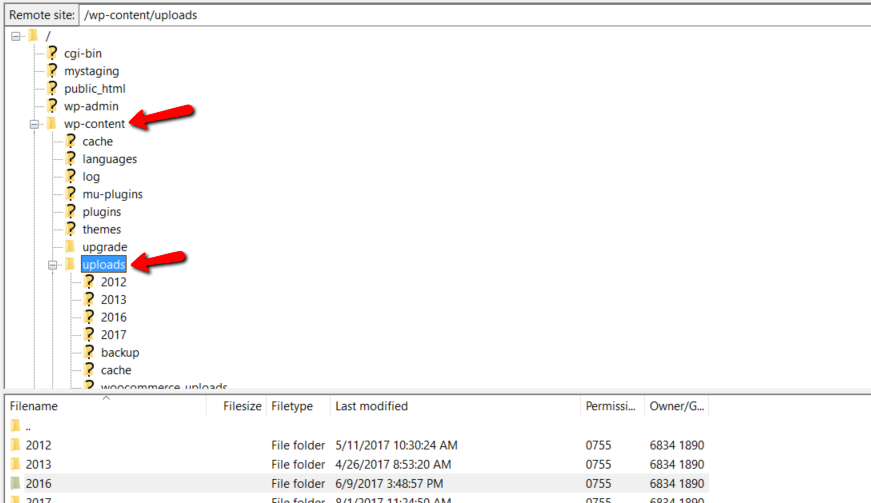
After you connect, navigate to …wp-content/uploads in your server’s folder architecture:
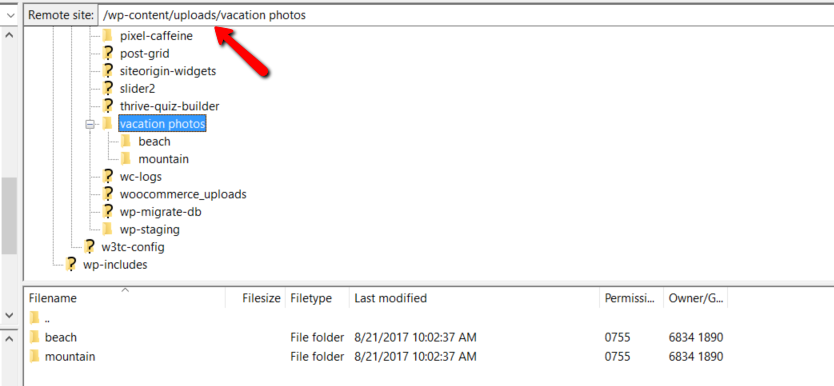
Then, upload your media files in their original folder structure. For example, I have a folder named Vacation Photos with two subfolders named:
- Beach
- Mountain
Each subfolder contains its own images.
To upload it, I would upload Vacation Photos (and its contents) directly to …wp-content/uploads:
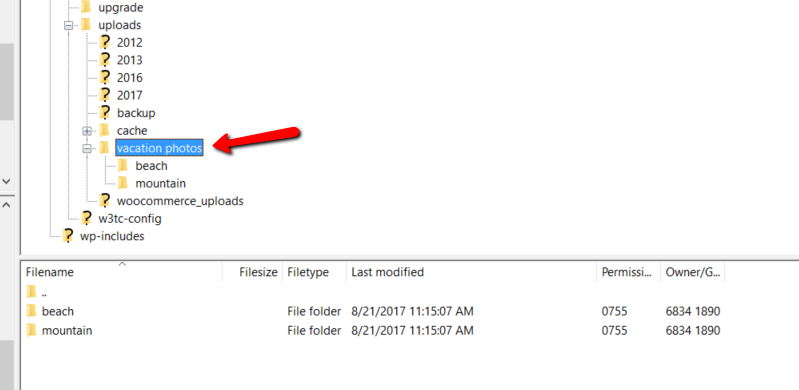
You can see the full folder structure in the image above.
At this point, your media files and folders are on your WordPress server. But they aren’t accessible in your WordPress media library.
That is, if you go to your WordPress media library, you won’t see any of the files that you just uploaded. Let’s fix that before proceeding…
Step 2: Check For New Folders in WordPress Dashboard
Once you finish uploading files to your server via FTP, jump back to your WordPress dashboard and go to Media Library Folders Pro → Check For New Folders:
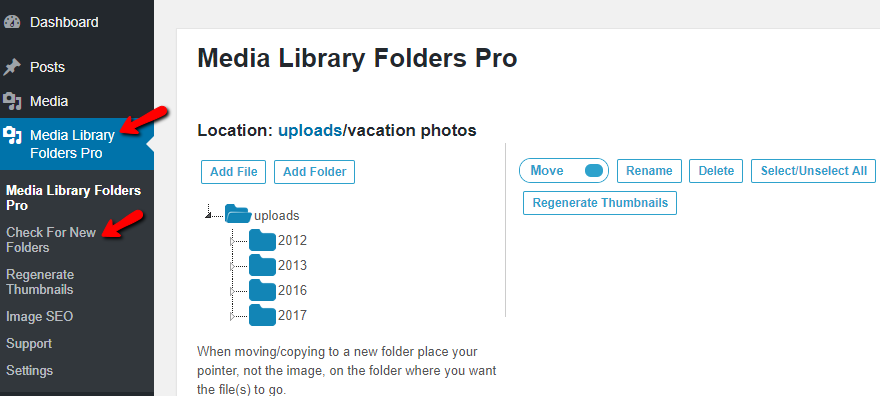
The plugin will automatically check with your server and add the folders that you created via FTP:
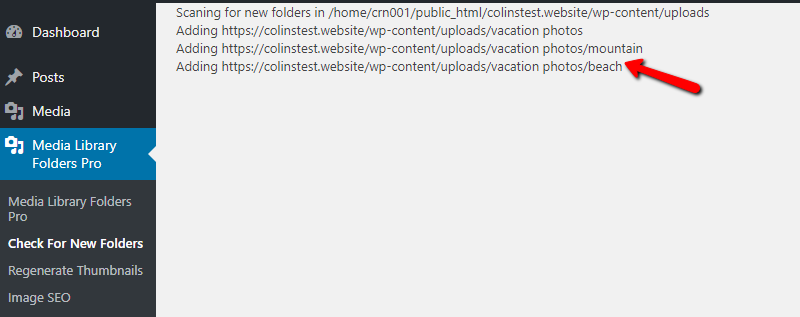
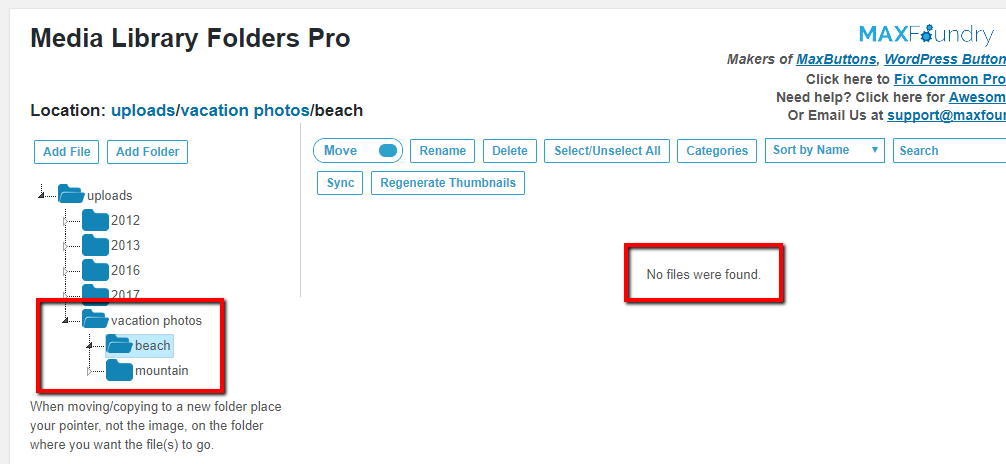
Now, if you navigate back to your Media Library Folders Pro interface, you’ll see the folders from your server right in your WordPress dashboard (in the exact same organization as they appear in your FTP program).
But…there’s still one problem – the actual files aren’t registered to the WordPress media library, so your folders still appear empty:
Step 3: Register Uploaded Files to the WordPress Media Library
You actually have two ways to register your uploaded files to the WordPress media library.
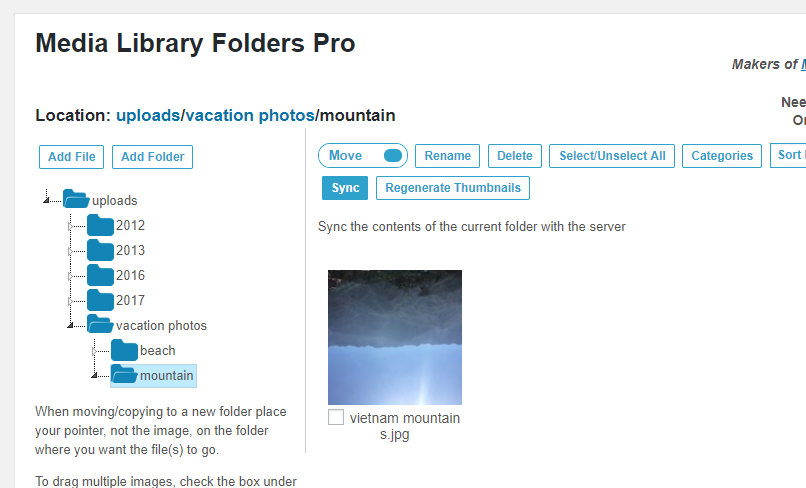
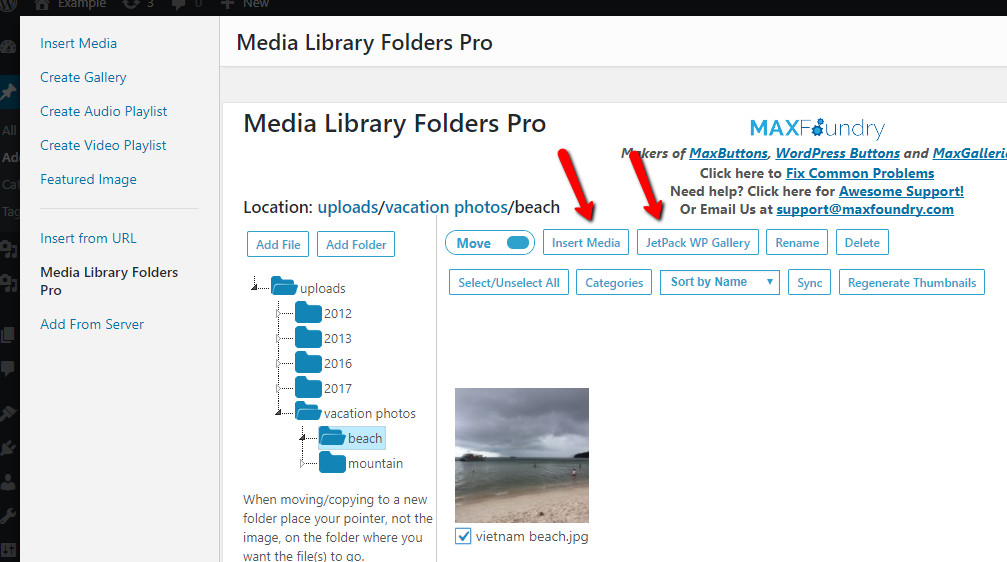
First, Media Library Folders Pro includes a built-in Sync button that syncs the active folder with your server to import any files contained in the folder. You can run the sync function for a specific folder by clicking the Sync button indicated in the image below:
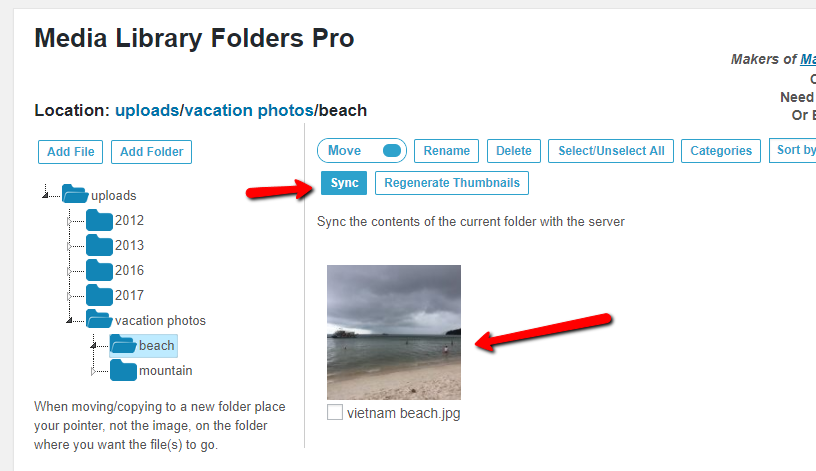
This method is fine for small numbers of files, but the plugin’s built-in sync function is only designed to handle registering up to about 60 files at one time.
So if you’re bulk uploading a more than 50-60 files to a single folder, using the plugin’s sync may not be your best option. That’s why we recommend the free Add From Server plugin. Add From Server accomplishes the same thing and is better suited to handling large numbers of files.
Before using Add From Server click the Check for New Folders option in the Media Library Folder menu as mentioned above.
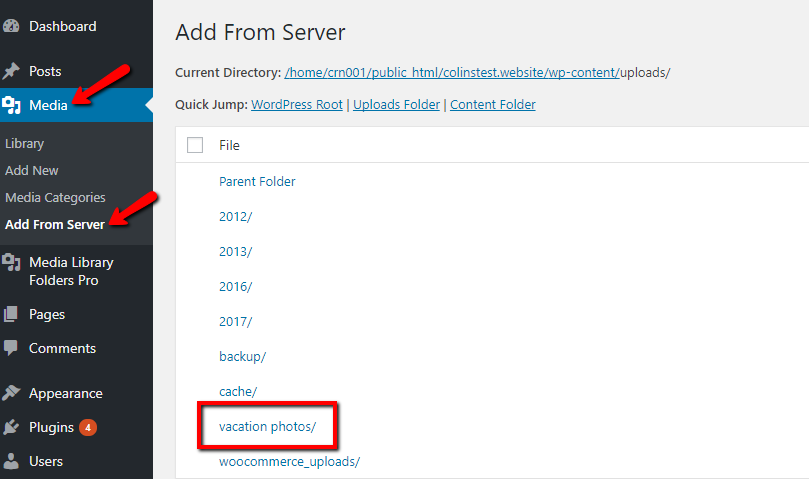
To use Add From Server, go to Media → Add From Server. Then, use the interface to navigate to the folder you want to import files from:
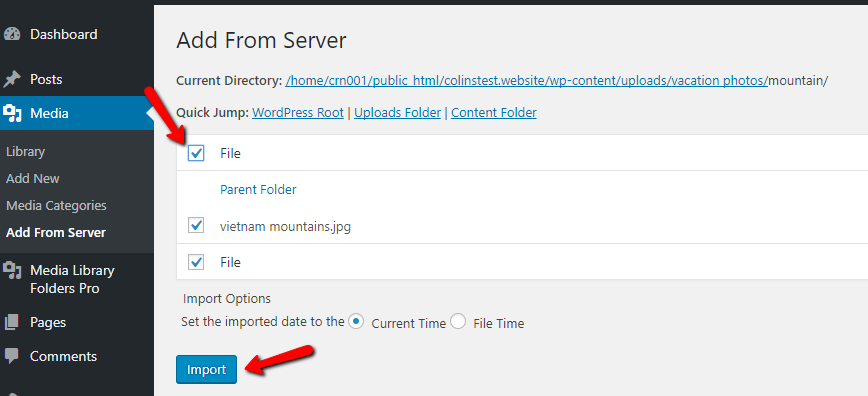
Once you find the relevant folder, use the checkbox to select all the files in the folder and then click the Import button:
That is all that is needed. Your files should now be included in the Media Library and you can navigate to these folders in Media Library Folders and see your files.
Taking Things Further – Add Alt and Title Attributes Based on File’s Folder
One neat way that you can take syncing your server’s folder structure with your WordPress media library further is to automatically add Alt and title attributes to your files based on the folder that each file is located in.
To do that, go to Media Library Folders Pro → Image SEO. Check the box to Turn on Image SEO. Then, configure the template for how you want to set both the Alt and Title attributes and click Update Settings:
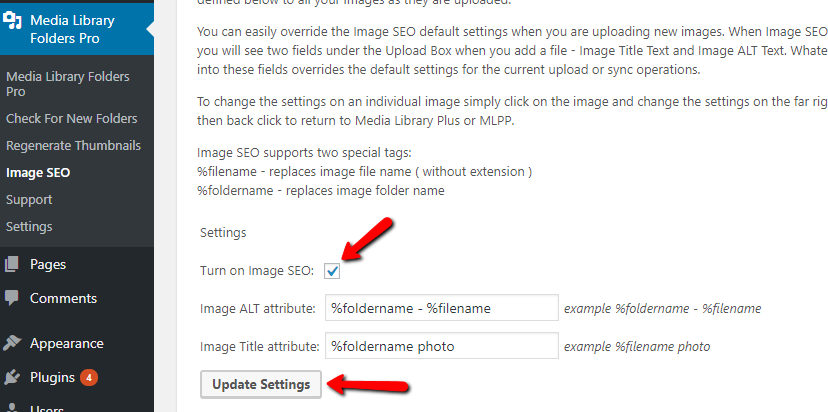
You can use both the %filename and %foldername variables to dynamically insert text.
How to use Files from Synced Folders in WordPress
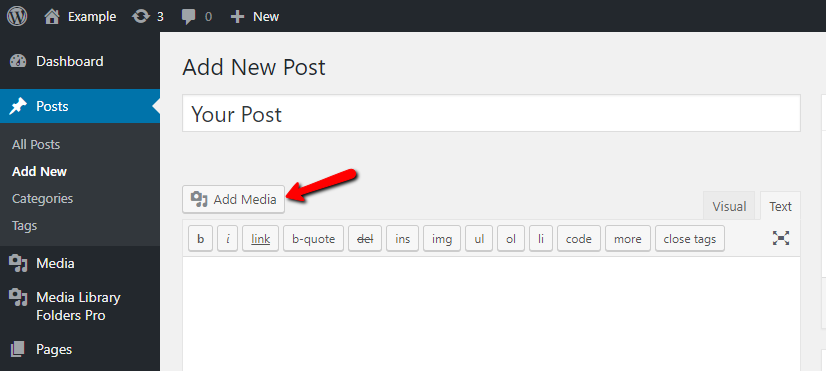
To insert media files from your synced folders into WordPress content, you can use the regular Add Media button. For example, if you’re adding content to a post, you can click the normal Add Media button:
Then, you’ll be able to see your synced folder structure in the normal media inserter popup. You can even directly create galleries from folder items:
You’ll be able to use this same method to add images from folders to any post type that supports the Add Media button.
Media Library Folders Pro also includes dedicated integrations for some popular tools. For example, if you’re working with a WooCommerce product, the plugin includes a unique interface to help you quickly add images from your folders.
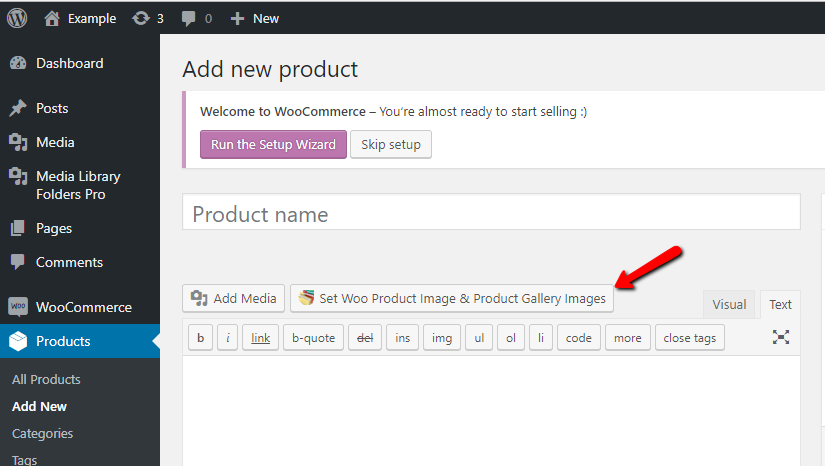
All you need to do is click the Set Woo Product Image & Product Gallery Images button:
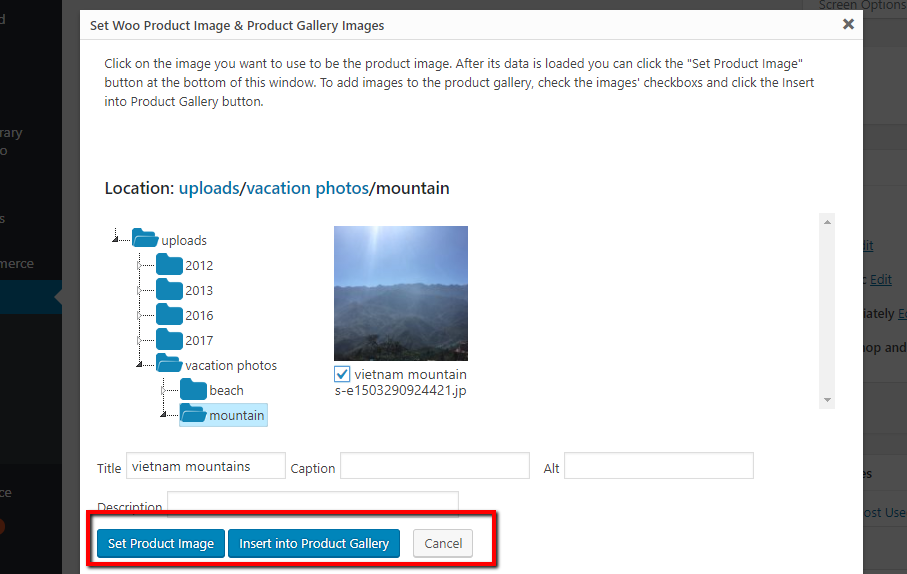
Then, you’ll see a folder tree that you can use to both set the product image, as well as to choose images to insert into the product gallery:
If you’re working with a large WooCommerce store, being able to directly access folders from your server inside the WooCommerce product interface can save you a ton of time when you’re adding new products.
Enjoy Your Synced Folders
And that wraps up our guide on how to sync FTP server folders with the WordPress media library. Whether you’re running an eCommerce store with WooCommerce, creating a custom solution that needs organized images, or just want to add some general organization to a regular ‘ole WordPress site, this combination of Media Library Folders Pro and Add From Server can make your life a whole lot easier.
If you’re only uploading small numbers of images via FTP, you can probably exclusively use Media Library Folders Pro. But, if you’re going to be uploading 50+ files to a single folder, using Add From Server is a better way to register all of those files to the WordPress media library.
We hope you enjoyed the guide and please let us know if you have any questions!