These instruction are to help you get quickly up and running with your Media Library Folders Pro. Our customers who read through this email find that almost everything with goes smoothly!
Most important know Media Library Folders Pro is a separate plugin from Media Library Folders. You will want to install MLFP but before activating it you will want to deactivate MLF.
We love reading instructions as much as you. So here’s two important quick tips:
- First, a list of the most common problems and their fixes. Email us if you need help. Whatever issue you are having we have seen it.
- We have awesome tutorials. We suggest that you read them even if everything is going super. There’s a lot in here.
We give great support. So if you run into an issue post a message in support or email us.
Again, when installing Media Library Folders Pro it is necessary to first deactivate the free version of the plugin as they both cannot be activated at the same time and Pro version does not require the Media Library Folders plugin to run.
We are going to cover issues that our customers sometimes run into. You probably will not have these problems but if you do start here and if you still have an issue contact us as soon as you are stuck or confused. We get MLFP working in almost all of the difficult WordPress setups when there is an issue.
Activation of License keys
With the purchase of your plugin you have received
- Download links for the plugin
- One or more plugin license keys
- A login password to log into MaxGalleria.com
Your login user name will be the email address you used when you made your purchase.
When you log into MaxGalleria.com, will be taken the ‘my account’ page where you will find links to all your purchased plugins under Downloads, an Edit Profile page, license keys under Licenses and a Payments and Receipts page where you can print an invoice should you need a copy for you records.
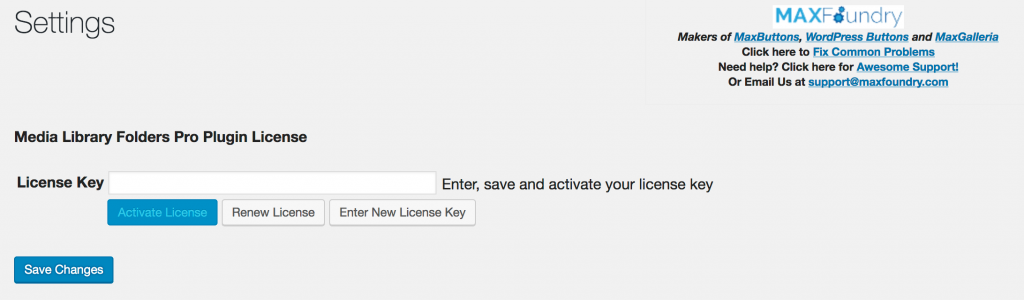
For activating the key for Media Library Folders Pro, this plugin has its own Settings page, where you can enter, save and activate the plugin.
Once the license keys have been installed and activate you can update your plugins through the WordPress Updates page.
If you have other issues installing or use Media Library Folders Pro, here are several useful troubleshooting tips:
Folder Tree Not Loading
Users who report this issue can usually fix it by running the Media Library Folders Reset plugin that comes with Media Library Folders.
First make sure you have installed the latest version of Media Library Folders.
Deactivate Media Library Folders and activate Media Library Folders Reset and run the Reset Database option from the Media Library Folders Reset sub menu in the dashboard.
After that, reactivate Media Library Folders. It will do a fresh scan of your media library database and no changes will be made to the files or folders on your site.
How to Unhide a Hidden Folder
- Go to the hidden folder via your cPanel or FTP and remove the file ‘mlpp-hidden.
- In the Media Library Folders Menu, click the Check for New folders link. This will add the folder back into Media Library Folders.
- Visit the unhidden folder in Media Library Folders and click the Sync button to add contents of the folder. Before doing this, check to see that there are no thumbnail images in the current folder since these will be regenerated automatically; these usually have file names such as image-name-150×150.jpg, etc.
Repeat step 3 for each sub folder.
How to Delete a Folder?
To delete a folder, right click (Ctrl-click with Macs) on a folder. A popup menu will appear with the options, ‘Delete this folder?’ and ‘Hide this folder?’. Click the delete option. The folder has to be empty in order to delete it. If you receive a message that the folder is not empty, use the sync function to display files that are still present in the folder.
Folders and images added to the site by FTP are not showing up in Media Library Folders
Media Library Folders does not work like the file manager on you computer. It only displays images and folders that have been added to the Media Library database. To display new folders that have not been added through the Media Library Folders you can click the Check for New Folders option in the Media Library Folders sub menu in the WordPress Dashboard. If you allow WordPress to store images by year and month folders, then you should click the option once each month to add these auto-generated folders.
To add images that were upload to the site via the cPanel or by FTP, navigate to the folder containing the images in Media Library Folders and click the Sync button. This will scan the folder looking images not currently found in the Media Library for that folder. The Sync function only scans the current folder. If there are sub-folders, you will need to individually sync them.
Folders Loads Indefinitely
This happens when a parent folder is missing from the folder data. To fix this you will need to perform a reset of the Media Library Folders database. To do this, deactivate Media Library Folders and activate Media Library Folders Reset and select the Reset Database option. Once the reset has completed, reactivate Media Library Folders and it will do a fresh scan of the Media Library data.
Unable to Insert files from Media Library Folders into Posts or Pages
For inserting images and files into posts and pages you will have to use the existing Media Library. The ability to insert items from the Media Library Folders user interface is only available in Media Library Folders Pro. This does not mean you cannot insert files added to Media Library Folders into any WordPress posts or pages. Media Library Folders adds a folder user interface and file operations to the existing media library and it does not add a second media library. Since all the images are in the same media library there is no obstacle to inserting them anywhere WordPress allows media files to be inserted. There is just no folder tree available in the media library insert window for locating images in a particular folder. We chose to include the folder tree for inserting images in posts and page in the Pro version along with other features in order to fund the cost of providing free technical support and continued development of the plugin.
Unable to Update Media Library Folders Reset
Media Library Folders Reset is maintenance and diagnostic plugin that is included with Media Library Folders. It automatically updates when Media Library Folders is updated. There is no need to updated it separately. Users should leave the reset plugin deactivated until it is needed in order to avoid accidentally deleting your site’s folder data.
Images Not Found After Changing the Location of Uploads Folder
If you change the location of the uploads folder, your existing files and images will not be moved to the new location. You will need to delete them from media library and upload them again. Also you will need to perform a reset of the Media Library Folders database. To do this, deactivate Media Library Folders and activate Media Library Folders Reset and select the Reset Database option. Once the reset has completed, reactivate Media Library Folders and it will do a fresh scan of the Media Library data.
Difficulties Uploading or Dragging and Dropping a Large Number of Files
Limitations on web server processing time may cause dragging and dropping a large number of files to fail. An error is generated when it takes to longer then 30 seconds to move, copy or upload files. This time limitation can be increased by changing the max_execution_time setting in your site’s php.ini file.
Fatal error: Maximum execution time exceeded
The Maximum execution time error takes place when moving, syncing or uploading too many files at one time. The web site’s server has a setting for how long it can be busy with a task. Depending on your server, size of files and the transmission speed of your internet, you may need to reduce the number of files you upload or move at one time.
It is possible to change the maximum execution time either with a plugin such as WP Maximum Execution Time Exceeded or by editing your site’s .htaccess file and adding this line:
php_value max_execution_time 300
Which will raise the maximum execution time to five minutes.
If you move your site
Often users install their plugins on a development or temporary site before they move the entire site to main or production site. As a result, they report that they receive an error message ‘unauthorized’ when they try to update the plugin. If is because they failed to deactivate on the old site and activate the plugin on the new site. In cases like this, you are able to deactivate the old site from the download section of the my account page at MaxGalleria .com. On this page, under each plugin you have purchased is a Sites dropdown list. Click the down arrow to see a list of sites where your license is activate. To manually deactivate one of the sites in the list, click the x or close button next to the site address. You can then return to your site activate the plugin and perform the update.
In the event that you are still unable to update the plugin, the plugin can be manually updated by going to your account page and download the plugin. You will find it under its original name, Media Library Plus Pro. If you want to upload it by FTP, unzip the file and overwrite the existing folder in the plugins directory. If you want to upload it through the WordPress Plugins Add New page, you first have to deactivate and delete the old plugin and then upload the zip file. This does not affect any files and folders added to the site through Media Library Folders Pro.
How to Upload Multiple Files
Users can upload multiple files by using drag and drop. When the Add Files button is click it revels the file upload area either single or multiple files can be highlight can be dragged from you computer’s file manager and dropped into the file uploads areas.
For MaxGalleria and Media Library Folders Pro technical support issues, it is best to log in to MaxGalleria.com and visit the Support Forum where there are individual forums for each plugin. There you can read previous posts that may address your issue. Note the technical support is limited to providing code for CSS fixes to your site, assistance with using built in plugin filters and actions and diagnosing issue on with your site. Custom coding or adding new features is not included in your technical support benefits.