Beaver Builder gives you the power to build amazing WordPress sites with drag and drop. But in order for you to actually get to build those amazing sites, you need the proper workflow to set yourself up for success.
When you’re talking about building a site, a big part of that workflow involves the images that you use in your designs…and the ability to quickly find those images.
Beaver Builder has all kinds of great image modules – from the simple Photo module to the eye-catching Slideshow module. But those modules are still built on the core WordPress Media Library, which isn’t always the easiest way to work with files.
To speed up your Beaver Builder media workflow, you can use plugins to automate certain tasks and create a more organized Media Library for your Beaver Builder designs.
In this post, we’ll share how you can apply 3 such plugins to your Beaver Builder workflow.
Automate Image Sizes And Optimization With These 2 Plugins
Using these two plugins, you can create a more optimized workflow before you even upload your first images.
Put Your Beaver Builder Image Optimization On Autopilot
Images comprise about half of an average website’s file size, according to HTTP Archive. So if you want your Beaver Builder designs to load quickly, you need to be careful that you’re only using optimized images.
Doing that manually takes time…
But thankfully, you can put the process on autopilot with the right image optimization plugin.
A great starting point is Smush Image Compression and Optimization. It’s a free plugin that will automatically:
- Resize images to max dimensions that you specify
- Compress images using lossless image compression, which means it reduces file size without any loss in quality
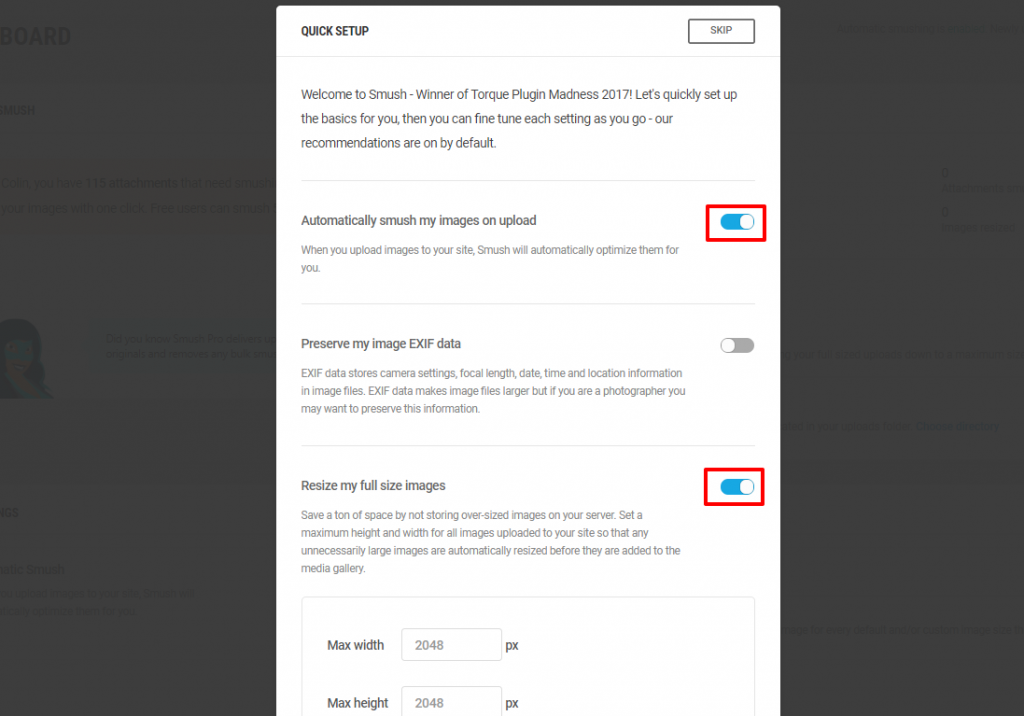
To use it, just install and activate the plugin. Then, the plugin will prompt you to configure important automatic optimization settings. We recommend leaving Automatically smush my images on upload turned on and also selecting the option to Resize my full size images:
Smush Image Compression and Optimization is free for unlimited images. But there is a 1MB limit for each individual image unless you join the WPMU DEV membership.
Beyond Smush Image Compression and Optimization, there are also a number of quality freemium options that let you optimize a certain number of images per month for free. Good options are:
Configure Special Beaver Builder Image Sizes With Simple Image Sizes
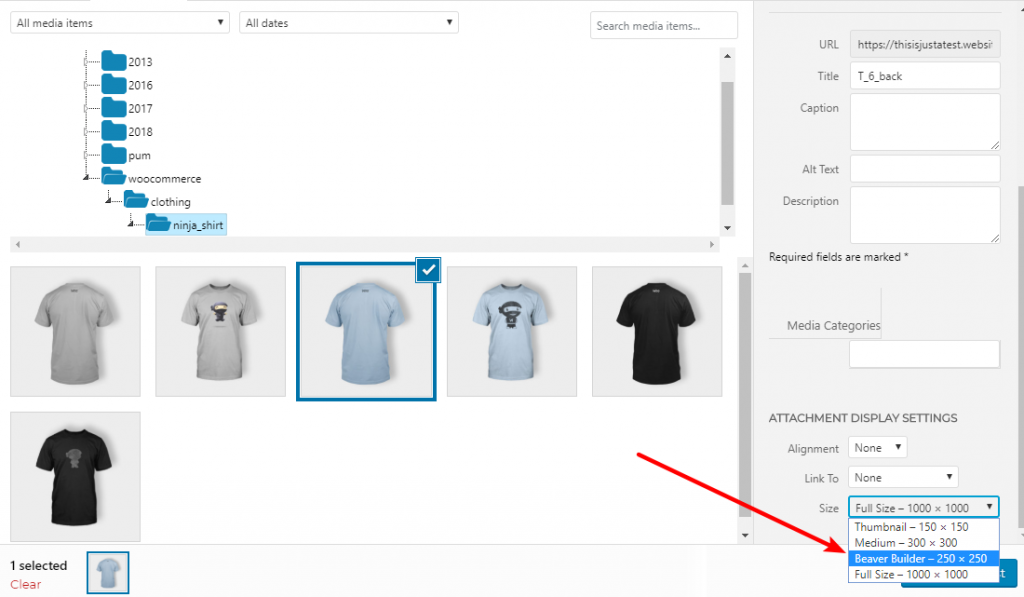
When you insert images in Beaver Builder, you get the option to choose the image’s Size:
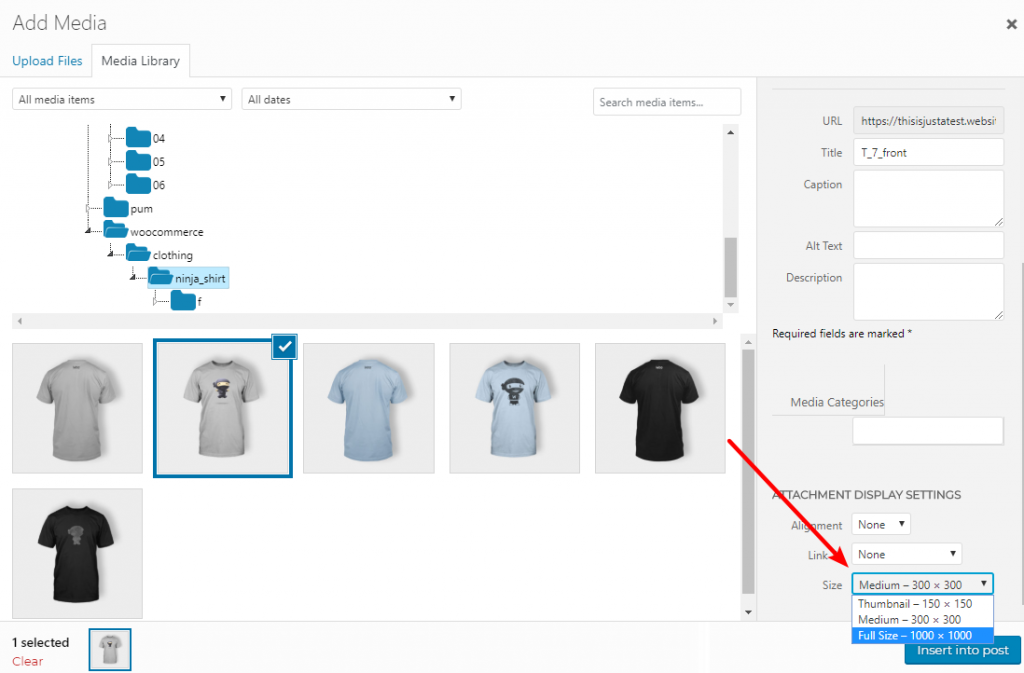
These image sizes make it easy to quickly insert a properly-resized thumbnail. Unfortunately, they’re defined by your WordPress theme, which might not make them work well if you’re specifically using them in your Beaver Builder designs.
Using the free Simple Image Sizes plugin, though, you can easily define your own image sizes:
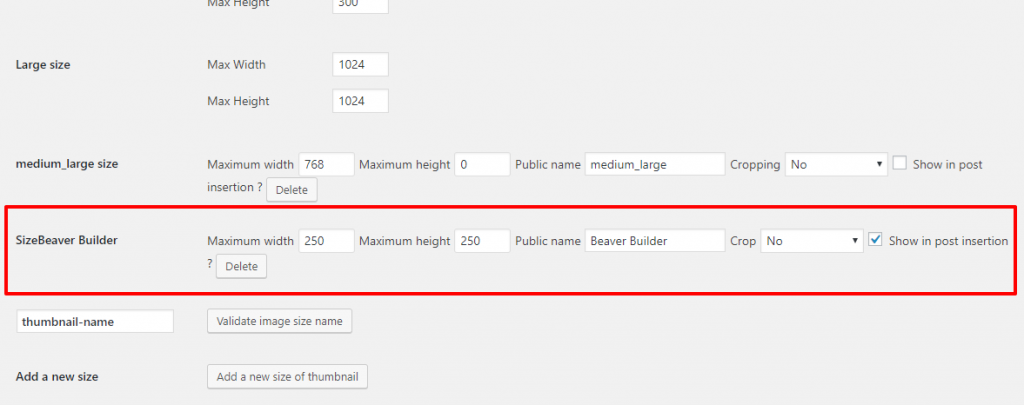
Once you use the plugin’s tool to regenerate your thumbnails, you’ll be able to quickly select those image sizes when you’re working in Beaver Builder to instantly get a properly-sized image:
Organize Those Optimized Media Files With Folders
The core WordPress Media Library is fine in the moment. But if you ever want to go back and find a file at some point in the future, it can be a major pain…
Your only option is to filter by uploaded date and, unless you can remember the month and year that you uploaded every single file at your site, that’s not always super helpful.
Folders help by letting you organize your files with context that actually makes sense to you. You can group images together by the page they appear on, by the gallery they’re a part of, or anything else that helps you work faster.
That means you can find files more quickly and, most importantly, work more efficiently.
And with the right folder plugin, you’ll even be able to:
- Upload files via FTP with custom folder structures and preserve those folders in your Media Library. This is great if you need to bulk upload lots of files.
- Use the folder structure as part of your URL. This lets you add context to your URL structures as well, rather than WordPress’ default date-based approach to image URLs.
So…how do those folders actually work? Well, here’s an example of what it looks like with the Media Library Folders Pro plugin. And you can also access your folders inside the Beaver Builder interface, which we’ll show you in a second.

Using Folders To Speed Up Your Beaver Builder Workflow
Beaver Builder includes a variety of modules that can benefit from folders. These core modules are the:
- Photo module – what you use to display a single image.
- Gallery module – an easy way to showcase multiple images as a gallery.
- Slideshow module – a great way to display multiple images as a slider.
And you can also use images in other modules that let you access the normal WordPress editor and Add Media button, notably the:
- Text Editor module – lets you display any type of text, including images.
- Testimonials module – lets you add an image to each individual testimonial.
And finally, you can also access folders when you add an image background to any module that lets you set a background.
Below, we’ll go through some more specific ways to apply folders to these different modules.
Photo Module
The basic Photo module is the workhorse image module for your designs. You probably use it everywhere…
How Folders Can Help You Work Better With The Photo Module
Because the Photo module just displays a single image, there’s no need to organize images within a single module. But it can be helpful to organize images within a single page.
For example, you can create a folder for each core page on your site. Then, instead of throwing all your media files into your Media Library, you can keep all your media content organized by the actual page you use it on.
Then, to access your images, you just drag over the Photo module like usual and click the normal Select Photo button. Only now, you can browse to the folder for that page to quickly see all the images you’re using, instead of seeing every single file in your Media Library:

Gallery Module
Beaver Builder’s Gallery module makes it easy to include a gallery in your designs. But once you create your galleries, it’s hard to keep track of which images you’ve used in all the galleries across your site.
How Folders Can Help You Work Better With The Gallery Module
To keep the images that you use in each gallery organized, you can keep them together in a single folder. You can either put this folder inside:
- One parent folder for all the galleries you use on your site.
- The folder for that specific page (if you’re using the approach we outlined in the Photo module section).
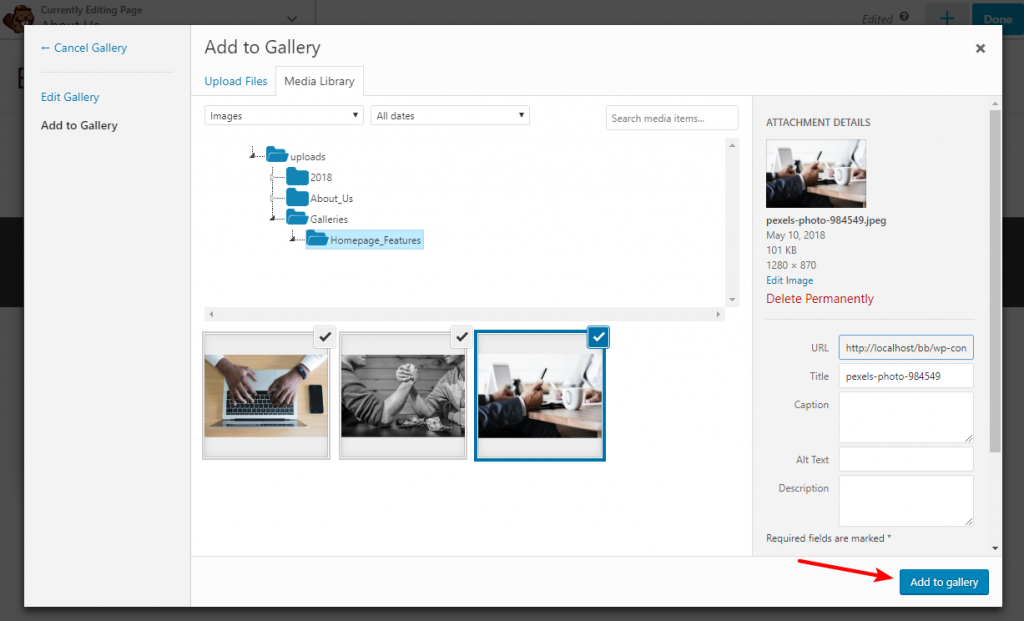
Then, you can click the regular Add Photos button in the Gallery module. Media Library Folders Pro will detect that you’re creating a gallery and give you an interface to select multiple images to Add to gallery:
If you ever need to edit your gallery in the future or add new images, all you need to do is go back to the folder to find all the images that you’ve used.
Slideshow Module
Similarly, you can apply the exact same approach you saw with the Gallery module to the Slideshow module. We won’t bother showing you because the process really is identical. But this is another great way to stay organized and manage your images.
Like the Gallery module, you can either create:
- One parent folder for all of your slideshows
- A subfolder for your slideshow images in the parent folder for that page
Both will help you stay organized!
Folders Can Help You Work Better With Other Modules And Extensions
While we’ve shown you how folders can help you improve three of Beaver Builder’s most image-focused modules, those aren’t the only way you can improve how you work with images in Beaver Builder.
Here are a few more actionable examples of the many situations where folders can come in handy:
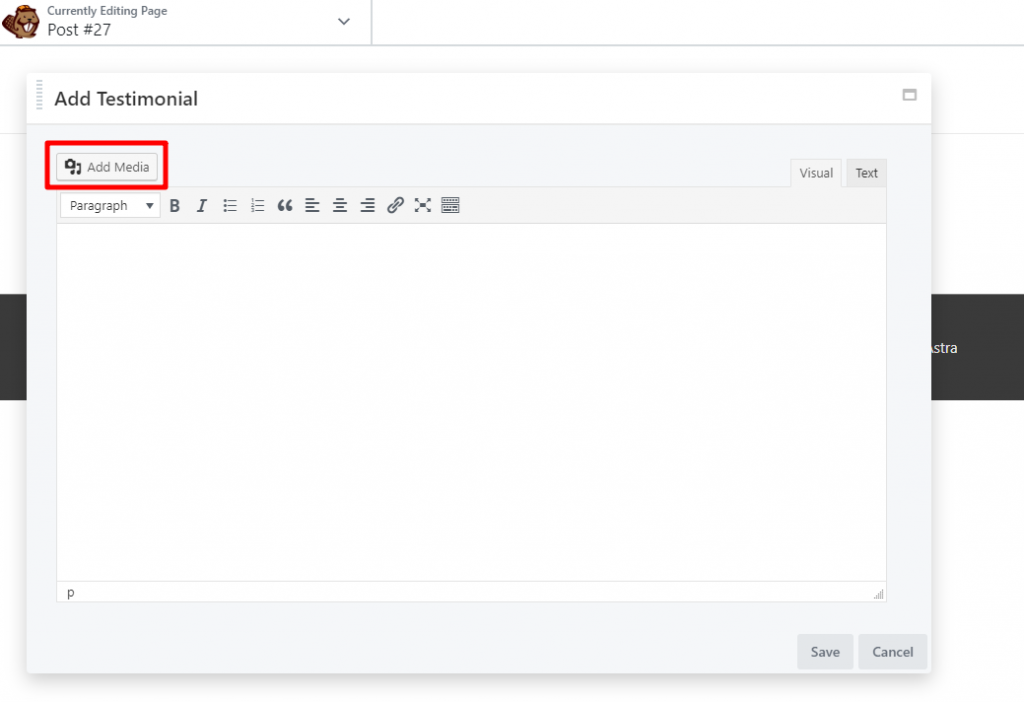
- Testimonials – create a folder to house all of the headshots you use in the Testimonials module.
- Logo grids – create a folder specifically to house all the logos of businesses that you’ve worked with.
- Video – if you self-host videos, you can also organize them with the same folder interface.
For example, to insert an image from a folder into a Testimonials module, you just need to click on the regular Add Media button to open the same folder view that you saw in the screenshots above:
And you’ll also be able to use folders to organize images in the modules that you add via third-party extensions.
For example, if you use the popular Ultimate Addons For Beaver Builder (UABB) from Brainstorm Force, you’ll be able to use folders to manage the images that you use in its:
- Photo galleries
- Team member lists
- Etc.
Your Clients Will Love This, Too
If you’re building websites for clients with Beaver Builder (which we know many of you are), your clients will be able to benefit from this same folder functionality.
While we know it’s always a risky proposition to give a client edit access, some of them want it. And when they need to edit something, it’s a lot easier to explain “just browse to the gallery folder like you would on your computer” than it is to explain the core WordPress Media Library.
Here’s To A More Organized Workflow
By using real folders with Beaver Builder, you can wave goodbye to digging through your unorganized Media Library and say hello to a more organized workflow with every image in its proper place.
You’ll be able to organize the images that you use:
- On a single page
- In a Gallery or Slideshow module
- In any other place – like testimonials, portfolios, etc.
Combine folders with automatic image optimization and custom Beaver Builder image sizes, and that means less time wasted working with media files and more time building awesome websites!