Just like the free WP Paginate plugin, WP-Paginate Pro provides and great alternative to the default previous and next links on your site’s blog posts page.
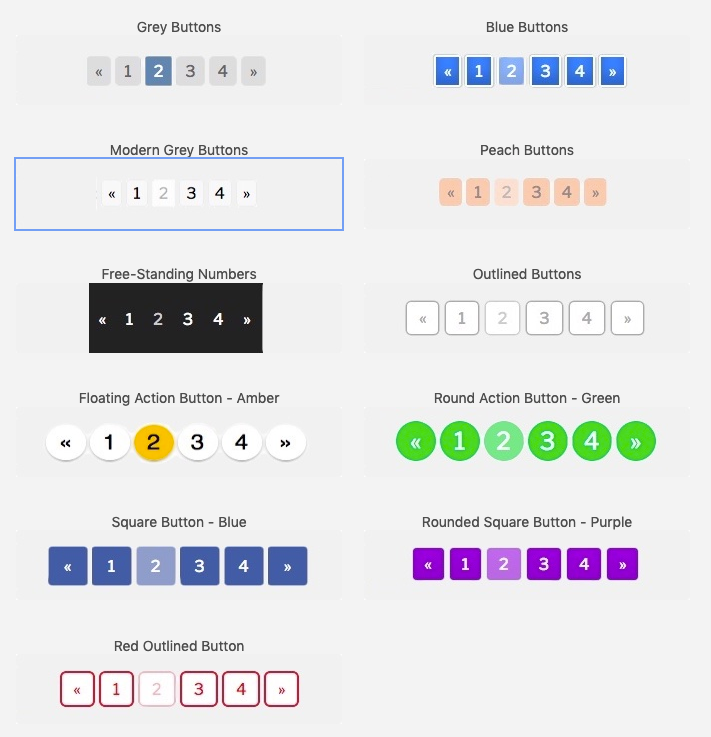
A variety of pre-set button styles that can be customized with the Pagination Style Customizer:
Install the plugin as you would any WordPress plugin, go to the Plugins Add New page, click the Upload Plugin button at the top of the page. On the next page, select the zip file that you download from MaxGalleria.com. Upload and activate the plugin.
You will find the setting page for the plugin under the WordPress Settings menu, WP-Paginate Pro.
The first thing to do after installing WP-Paginate Pro is to activated the license key. Click on the third tab on the WP-Paginate Pro settings page. Here you should paste in your license key. Click the Save Changes button to save your key. Then click the Activate License button.

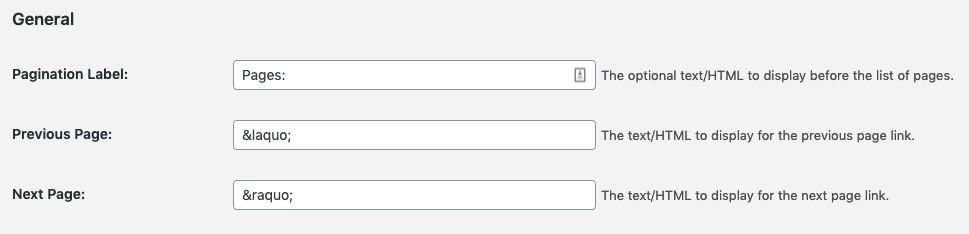
On the first tab of the settings page, Settings, General Section, you can enter the text label for the pagination links along with the character to use for the previous page and next page links. The default characters are ‘«’ and ‘»’.
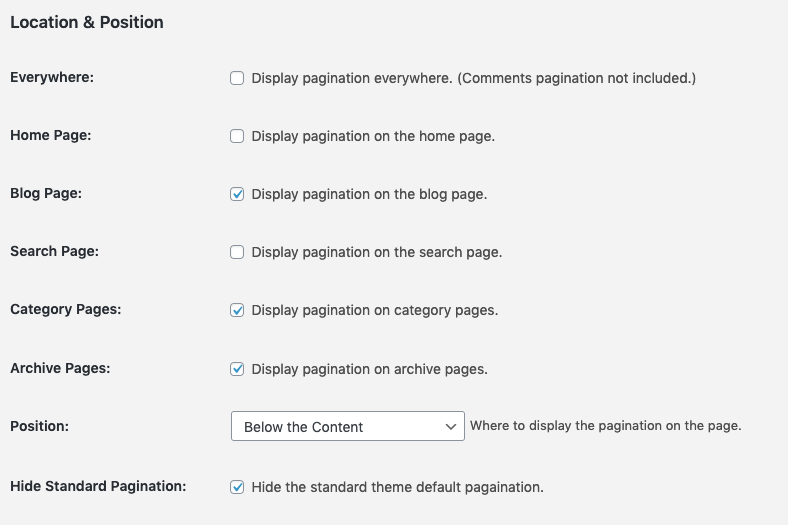
In this section the page and the location of the paginating links on the page can be specified. In addition of having WP-Paginate Pro links on the blog post page, the pagination links can also appear on search, archive and category pages. They can appear on the home page if the site’s home page is a blog index page. Note pagination links will cannot appear in a single post or page.
The links can be positioned on either above or below the content of the selected pages or both. If you pages have default pagination links, checking the Hide Standard Pagination check box will hide these links.
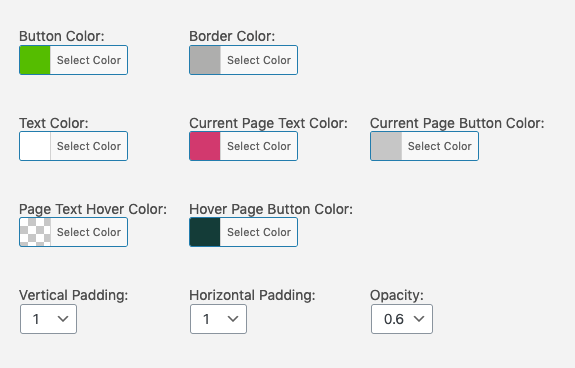
In the Appearance section the font of the links can be selected. To match the font used by the page, select ‘Inherit’. Then one can choose any of eleven preset button styles. If you wan to modify one of the preset styles simply use the Pagination Style Customizer can change the style.

With the Advanced Settings the HTML before and after the pagination links can be specified. The WP-Paginate CSS File, to include the default stylesheet wp-paginate.css file normally needs to be checked to correctly display the pagination links.
The Add Trailing Slash option is a setting that some sites need to use in order for the pagination links to work correctly.
Finally, the page range, anchors and gap in the page numbers can be modified if needed.
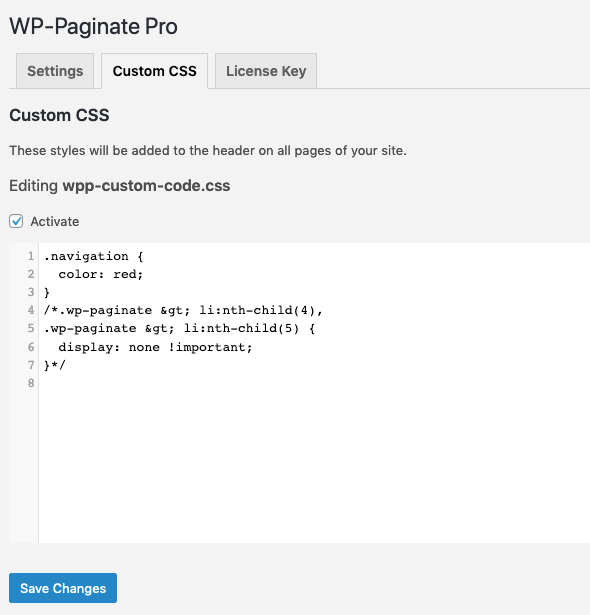
If you wish to make additional CSS changes to your pagination links, you can add CSS rules through the Custom CSS tab which contains a CSS editor. CSS code entered here will be saved to a wpp-custom-code.css in your site’s uploads folder. You can turn off the use of this file by unchecking the Active check box on this page.
Pagination in Post Comments
Adding pagination to comments requires editing your theme’s comments file, usually the `comments.php` file. In the file, replace the existing `previous_comments_link()` and `next_comments_link()` code block with the following:
					 <?php if(function_exists('wp_paginate_comments')) {
        wp_paginate_comments();
    } ?>