Like Amazon S3, DigitalOcean Spaces is simple, affordable object storage. By connecting your WordPress site to DigitalOcean Spaces, you’re able to store all of your media files at a DigitalOcean Space.
You can then continue to store and serve files from your own server. Or, you can remove files from your own server and serve them directly from Spaces (or a CDN that you connect to Spaces).
Beyond bulk offloading your entire WordPress Media Library, you’ll also be able to move individual files between your own server and Spaces as needed.
In this article, we’ll show you how you can use Media Library Folders Pro and the Media Library Folders Pro S3 add-on to offload your media files to DigitalOcean Spaces.
How To Offload WordPress Media Files To DigitalOcean Spaces With Media Library Folders Pro
To offload your media files to Spaces, you’ll need both Media Library Folders Pro and the Media Library Folders Pro S3 add-on.
Once you have both plugins installed and activated, you’ll need to:
- Create a DigitalOcean account
- Create a new Space
- Generate access keys for your Space
- Add your access keys to your wp-config.php file
- Configure the plugin’s settings in your WordPress dashboard
Here’s how to get everything set up…
Step 1: Create Your DigitalOcean Account
To get started with DigitalOcean Spaces, you’ll first need to create a regular DigitalOcean account. While you will need to also enter a payment method, DigitalOcean gives you a two-month free trial for Spaces so you won’t need to pay anything for your first two months.
To sign up for a DigitalOcean account, head here.
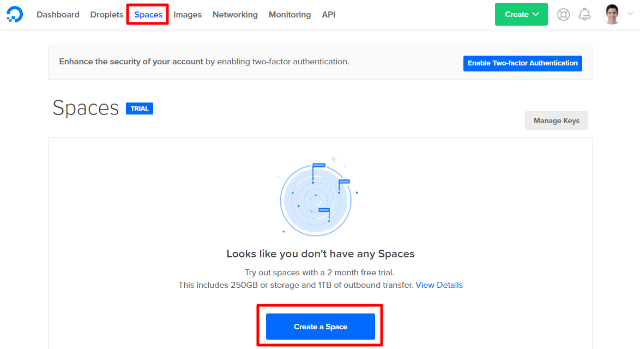
Step 2: Create A Space
Once you’ve signed up for DigitalOcean and entered a payment method, you should see the full account dashboard.
Go to the Spaces area and then click the button to Create a Space:
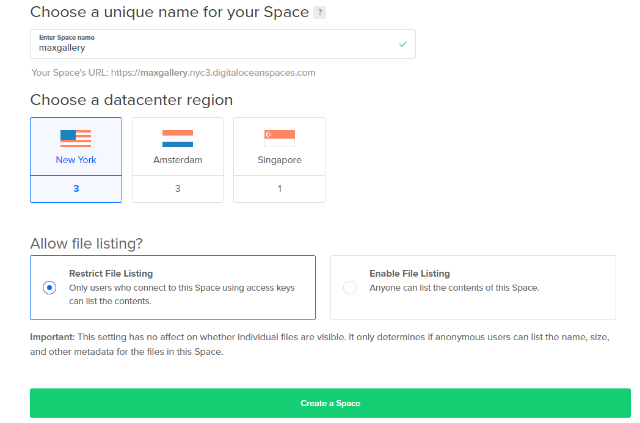
On the next screen:
- Enter a name. We recommend that you make it your domain name for easy organization, but you can use whichever name you prefer.
- Choose a datacenter region. When in doubt, choose the region that’s closest to your target audience.
- Choose whether to allow file listing. By default, we recommend that you leave this as Restrict File Listing unless you’re planning to connect DigitalOcean Spaces to a CDN (as the interface notes, this doesn’t affect whether or not individual files are visible. You will still be able to serve files from Spaces even if you leave it as Restrict File Listing).
Then click Create a Space at the bottom:
There will be a slight delay while DigitalOcean creates your space.
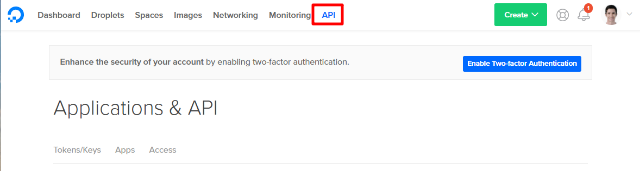
Step 3: Create DigitalOcean Spaces Access Keys
In order to allow WordPress and Media Library Folders Pro to connect to Spaces, you’ll need to generate a public and private access key.
To generate these keys, go to the API tab of your main DigitalOcean dashboard:
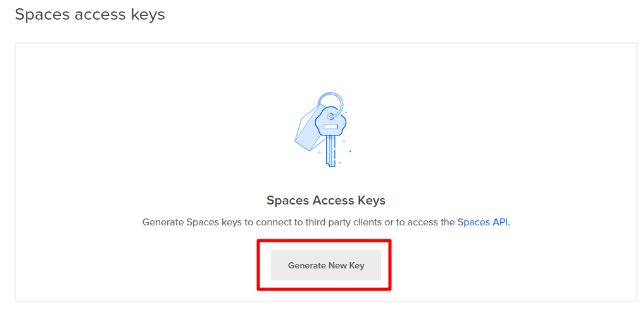
Then, scroll down to the Spaces access keys section and click Generate New Key:
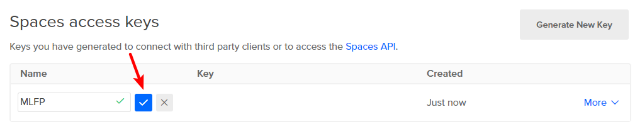
Then, enter a name for your key and click the checkbox. We recommend using something like “MLFP” so you can remember what tool the key connects to:
You should then see both a public and secret access key:
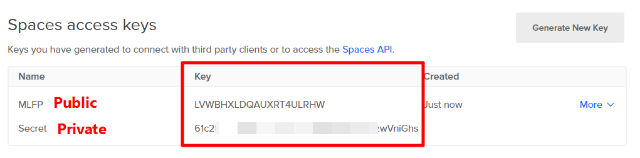
Make sure to copy these two keys to a safe location because you’ll need them in the next section. Once you leave this page, there’s no way to see the secret key again.
If you lose the secret key, you’ll need to generate a new set of access keys.
Step 4: Add Code Snippet To wp-config.php File
Now, assuming that you have both Media Library Folders Pro and the Media Library Folders Pro S3 add-on installed and activated at your site, you’ll need to add a code snippet to your WordPress site’s wp-config.php file.
define(‘MF_CLOUD_TYPE’, 'do');
 define('MF_AWS_ACCESS_KEY_ID', 'REPLACE_THIS');
 define( 'MF_AWS_SECRET_ACCESS_KEY', 'REPLACE_THIS');
Make sure to insert your actual Spaces access keys in place of the REPLACE_THIS placeholder.
Step 5: Configure Settings In WordPress Dashboard
Once you’ve added the above code snippet to your wp-config.php file, you can finish out the setup in your regular WordPress dashboard.
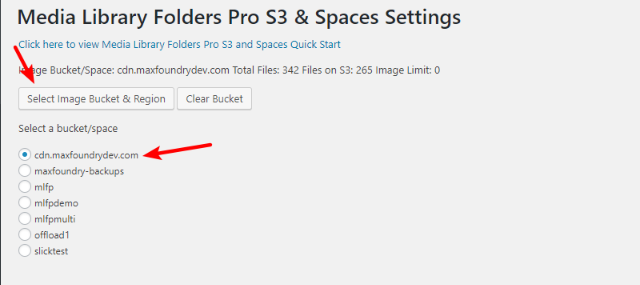
Go to Media Library Folders Pro → S3 and Spaces setup.
Then, choose Select Image Bucket & Region and select the Space that you want to offload your files to (if you’ve set up multiple Spaces, you’ll see them all here):
Once you select your Space, you can use the buttons below to configure how the Spaces integration functions.
To copy all of your existing files to your Space, click the Copy Media Library to cloud server button. If you’d like to serve files directly from Spaces, you can check the box to Use files on the cloud server.
There are also other options to:
- Remove files from your local server after offloading them to Spaces
- Download files from Spaces back to your local server
- Remove files from your Space
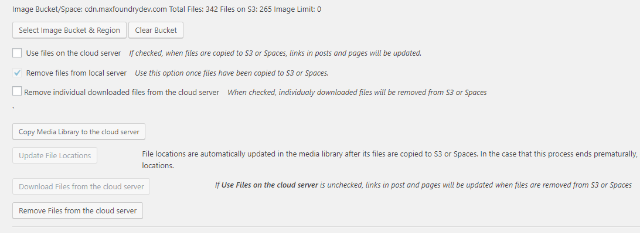
And you can also upload or download individual files to/from Spaces from the regular Media Library Folders Pro folder listing.
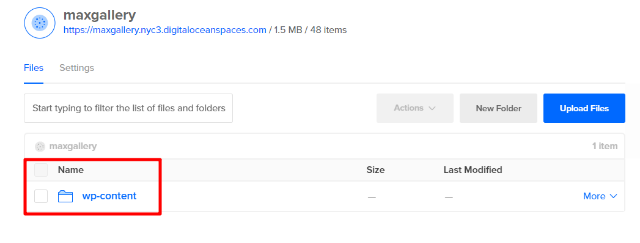
Once you configure the plugin and start offloading files to Spaces, you should see all of your files in your Spaces account, as well:
Have any other questions about how to offload WordPress files to DigitalOcean Spaces with Media Library Folders Pro and the Media Library Folders Pro S3 add-on? You can get more help at the support forum.