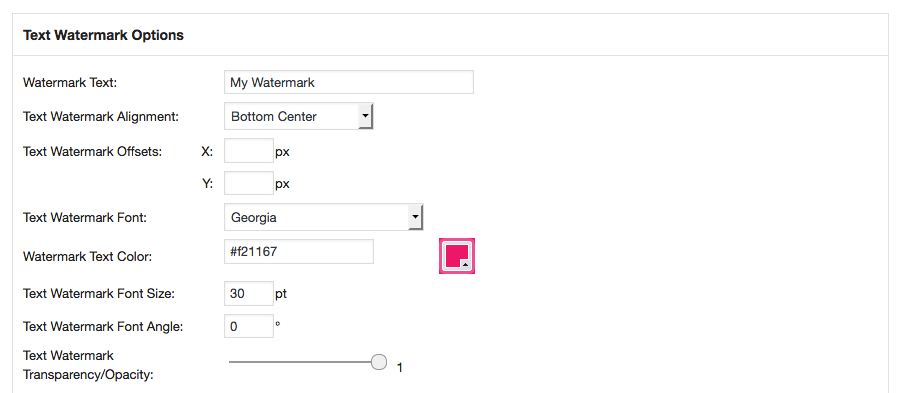
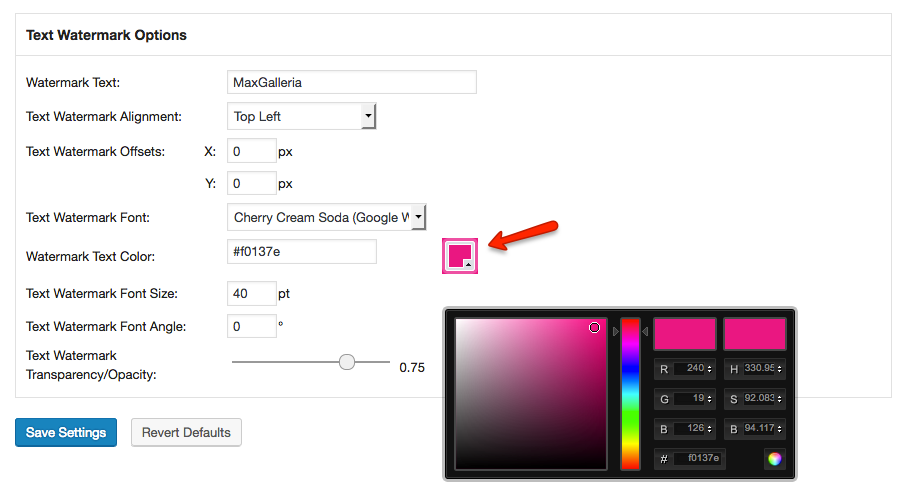
To create a text watermark, under General Options:
The Watermark addon is now included with MaxGalleria Pro and no additional installations are necessary. NB: Support for our individual addons will no longer be available from the 1st May 2022.
The MaxGallery Watermark Addon allows site administrators to place watermarks on their images. The features of the addon include:
To run MaxGalleria Watermark you will first need to have the free MaxGalleria WordPress Gallery plugin installed and activated
To install MaxGalleria Watermark upload it to your site using the cPanel’s file manager and unzip the zip archive file in your plugins folder. Alternatively, you can unzip the zip archive file on your local computer and upload it to your plugins folder by FTP. Once the plugin has been uploaded you can activated it from the site’s plugin page.
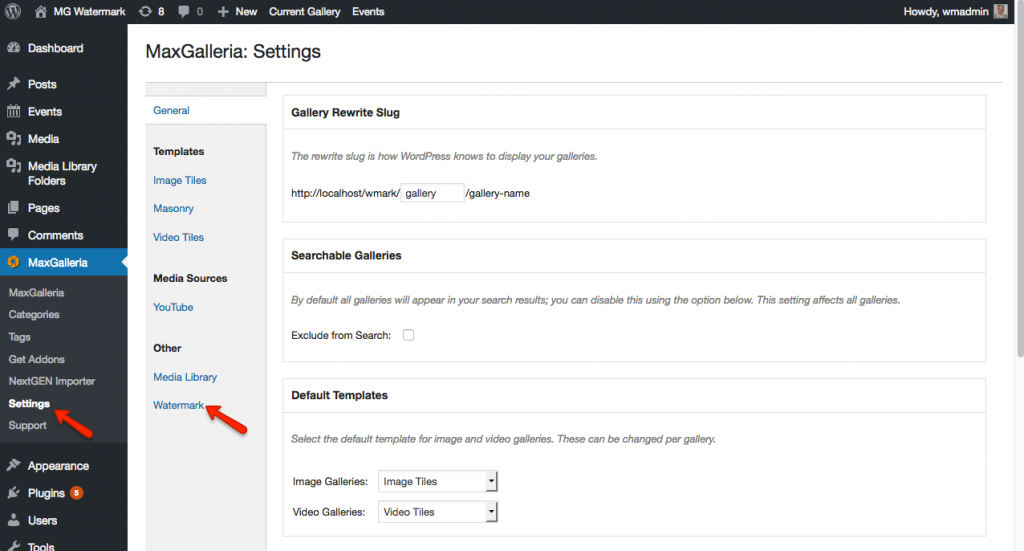
Once activated you will need to configure the watermark settings. These can be found by Clicking the MaxGalleria → Settings in the dashboard menu and then clicking on the Watermark tab.
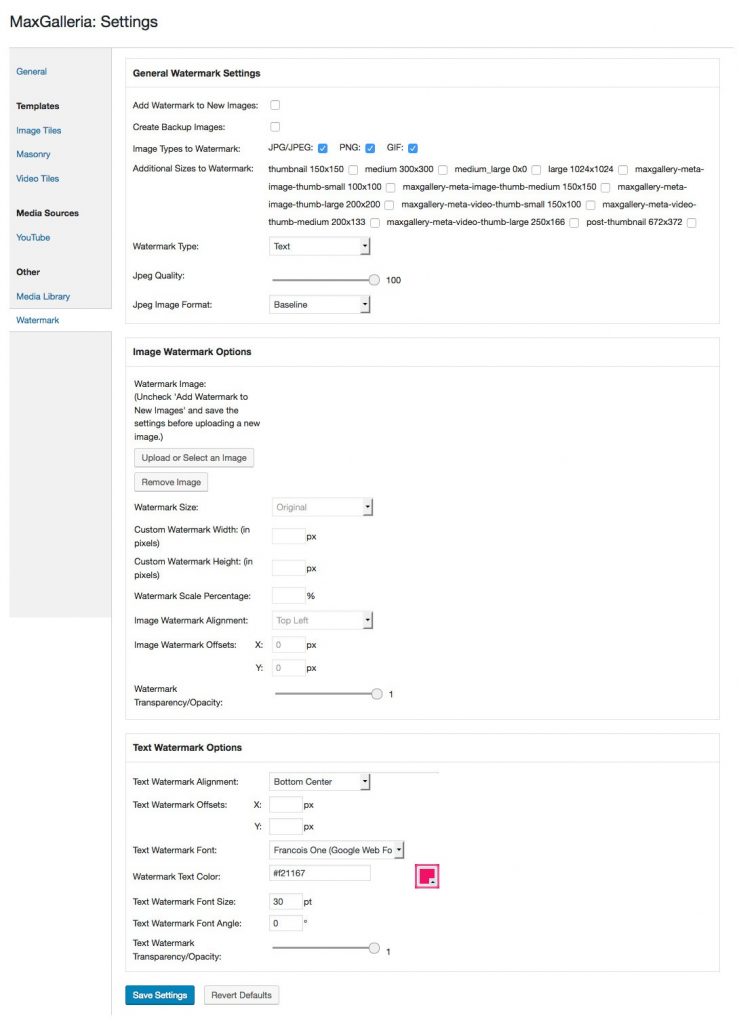
If you would like to automatically watermark images uploaded to your site, you can check the option, ‘Add Watermark to New Images’ to turn on this feature. When checked, this option will add watermarks to the original images and to their thumbnail sizes that have been selected under ‘Additional Sizes to Watermark’.
Note, when uploading an image to be used as a watermark image, the ‘Add Watermark to New Images’ option should be unchecked.
Should you want to save copies of your images without watermarks the ‘Create Backup Images’ option can be activated to accomplish this. The backup option will create a folder ‘mg-backup’ in the wp-content/uploads folder where the backup images will be stored. The folder structure in ‘mg-backup’ will match the folder structure of the uploads folder.
On sites were our Media Library Folders addon is installed this ‘mg-backup’ folder will not be displayed since it contents are not included in the Media Library. Otherwise they would be watermarked if the ‘Add Watermark to New Images’ option was turned on.
With the ‘Image Types to Watermark’ option one change choose which types of images can be watermarked. The MaxGallery Watermark supports JPG/JPEG, PGN and GIF image formats for watermarking.
The ‘Additional Sizes to Watermark’ allows site administrators to choose which size thumbnail images will be watermarked. When an image is watermarked, either automatically or manually, the watermark is added to the original image. Since a WordPress site may generate a number of various sizes of images, under this option all the available thumbnail sizes are listed and one can choose which sizes will receive a watermark.
Note that the size and locations of watermarks do not change with the size of the thumbnail images. Thus on smaller thumbnails watermarks will take up more space or may be printed off the edge of the image.
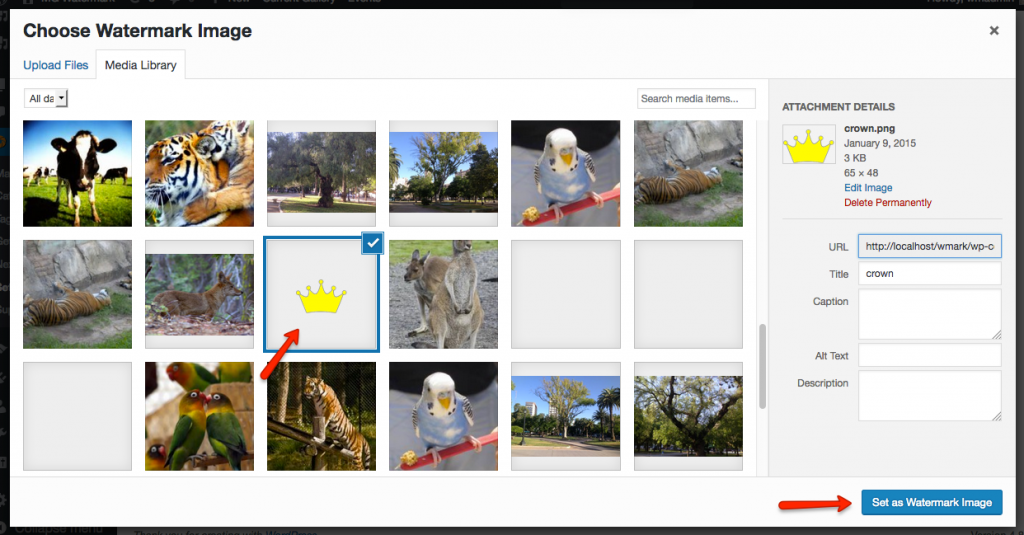
‘Watermark Type’ let you choose between an image or a text watermark.
The last two options under General Settings specify the characteristics of Jpeg images; the quality (1-100) and the format (Baseline or Progressive).
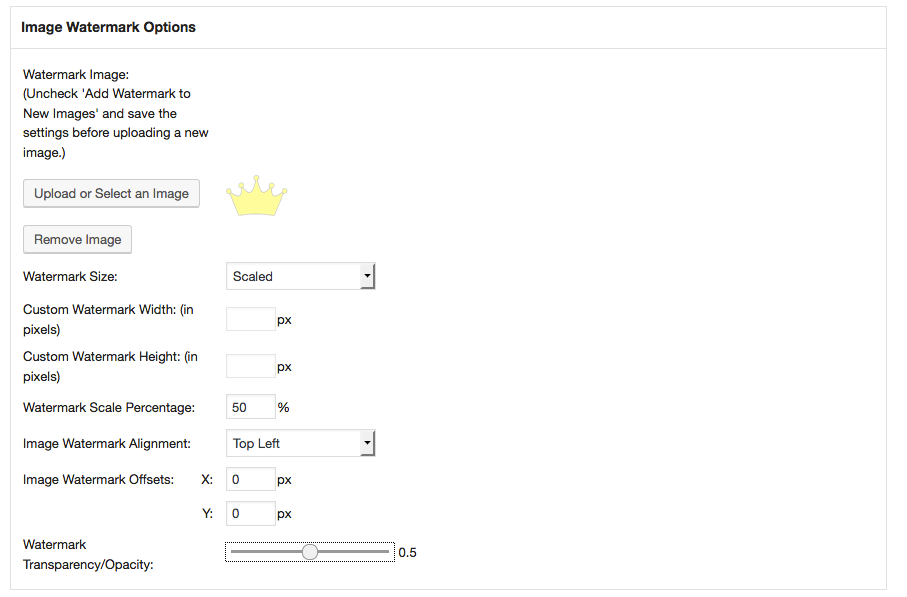
To create an image watermark, under General Options:

To create a text watermark, under General Options:
Once you have made these selections, click the Save Settings button and then upload a test image, if you have ‘Add Watermark to New Images’, to see how your watermark appears.

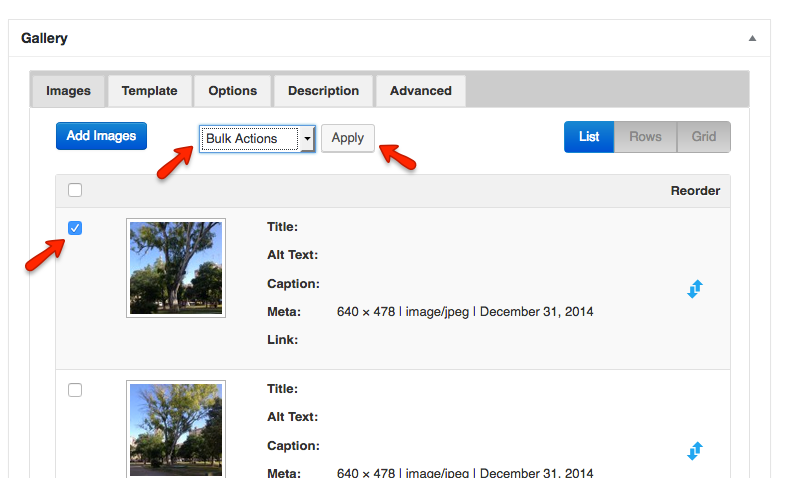
With the ‘Add Watermark to New Images’ option checked, images uploaded to your site, to posts or galleries, will be watermarked. Now you may have images in existing MaxGalleria galleries that you also want to watermark. MaxGalleria Watermark can also handle those.
To watermark existing images open a gallery, select the images you want to mark, in the bulk actions dropdown select ‘Watermark’ and then click the Apply button.