» maxgalleria_instagram_before_add_images_to_gallery
» maxgalleria_instagram_after_add_images_to_gallery
The Instagram addon is now included with MaxGalleria Pro and no additional installations are necessary. NB: Support for our individual addons will no longer be available from the 1st May 2022.
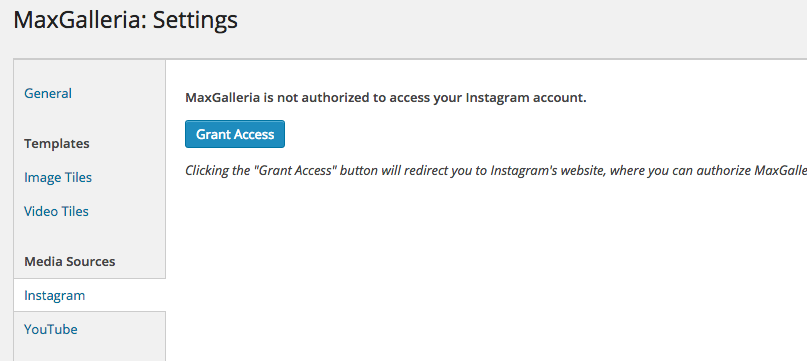
After installing the Instagram add-on, head to the Settings tab under Galleries. In media Sources you’ll see Instagram.

To start pulling from Instagram you need to let Instagram know that everything is cool. Clicking Grant Access will take you to Instagram to login if you have not already done so.

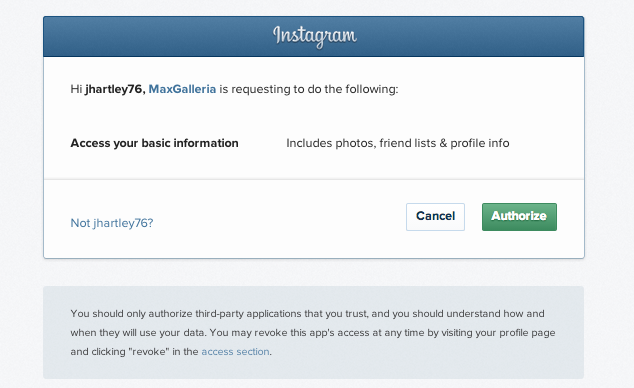
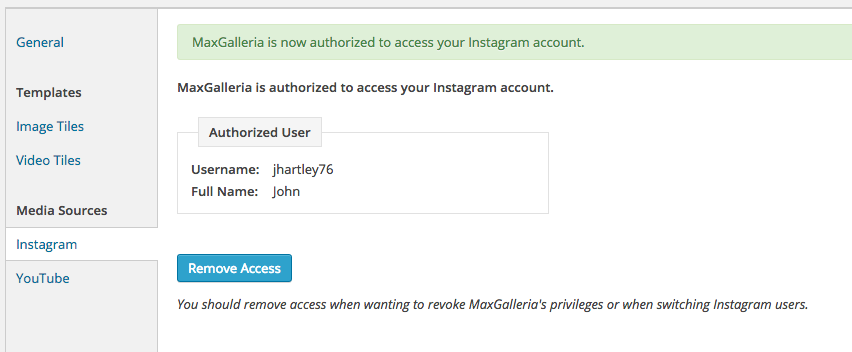
Once logged in to Instagram, you’ll see a notification that MaxGalleria wants to access your Instagram photos. MaxFoundry never gets access to this information, you are only authorizing for your particular website. After authorizing you will be redirected to the Settings page and shown the Instagram information you just authorized.

If at any time you would like to remove access, you can do so from the same Settings page.
If you are in a new gallery or old, click Add Images. Along with the standard uploading options, you’ll now see an Instagram tab on the left. Clicking on the Instagram tab will show all of your Instagram images which you can now select from and add to your gallery. Click as many as you’d like and then click Add to Gallery.

If you would like to go further back in your Instagram feed history you can do so by clicking Load More. When new photos are added to Instagram they will appear in this area, but will not be automatically added to your gallery.