Whether you’re completely new to WordPress or someone who has always used it for the basics, there is no doubt that the WordPress Media Library has frustrated you at some point in your journey. It could be because you have to guess what year and month you uploaded an image (for those without a memory like an elephant), not being able to upload a certain file type or simply being unable to optimize your images the way you need to for a better SEO score.
This comprehensive guide aims to walk you through every aspect of the WordPress Media Library, from basics like uploading images to optimization techniques. Let’s get cracking to get you from zero to hero.
Understanding the WordPress Media Library
The WordPress Media Library is an essential tool for managing media files in WordPress sites, crucial for content creators managing blogs, portfolios, or any site with multimedia content. To access it, log into the WordPress dashboard and go to the “Media” menu, where you’ll find options to browse the existing “Library” or “Add New” media.

Uploading media can be done directly from your computer, supporting various file types like JPEG, PNG, GIF, and PDF.

Management features allow editing of titles, alt texts, captions, and descriptions for SEO and usability. WordPress automatically creates image thumbnails in various sizes, aiding in responsive design.
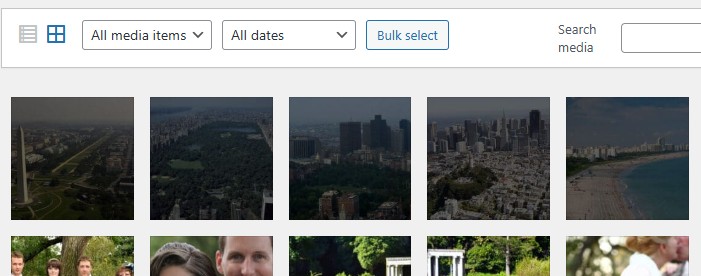
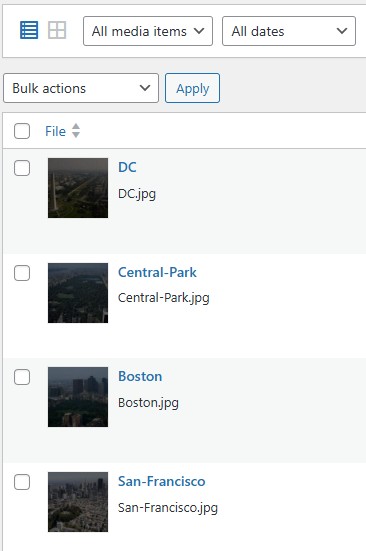
The library supports both list and grid views for different browsing experiences, with filters for type, date, and author, plus a search function for quick access.


Media can be inserted directly into posts or pages, with options for alignment, size, and linking. Many themes utilize a ‘Featured Image’ from the library to enhance visual presentation.
Security considerations include managing file permissions to protect your media, while performance can be improved by optimizing images using plugins like Smush or ShortPixel. Regular backups are advised to safeguard your media content.
Advanced users can leverage plugins for further organization, like adding categories to media, and developers can use WordPress’s REST API for media management. Mastering the Media Library significantly enhances content management efficiency and site functionality.
Understanding File Types in the WordPress Media Library
Understanding file types in a Media Library is crucial for managing digital content. Here’s a concise overview:
Image File Types:
- JPEG/JPG: Lossy compression for photographs, ideal for web due to smaller file sizes.
- PNG: Lossless compression, great for images needing transparency or high quality like logos.
- GIF: Supports animation and transparency, limited to 256 colors, good for simple animations.
- SVG: Scalable vector format, perfect for logos and icons that need resizing without quality loss.
- WEBP: Supports both lossy and lossless compression, offers better compression than JPEG or PNG, includes animation and transparency support.
- HEIC/HEIF: High Efficiency Image Format, provides superior compression with better quality than JPEG, supports sequences, animations, and transparency.
Video File Types:
- MP4: Widely supported with good compression and quality balance.
- AVI: Older format with larger file sizes, less used now.
- MOV: Apple’s QuickTime format, common in video editing but less universally supported.
- WMV: Microsoft’s video format, with limited cross-platform compatibility.
- MPG: An older MPEG format, still used for video broadcasting and DVDs.
- VTT: WebVTT format for subtitles/captions, not a video format but often associated with video files.
- OGV: Open format for video and audio, part of the Ogg project, good for web use with HTML5.
- 3GP: Designed for mobile phones with limited bandwidth, supports basic video and audio.
- 3G2: Similar to 3GP but for CDMA networks, also used for mobile multimedia.
Audio File Types:
- MP3: Standard web audio format with good quality-to-size ratio.
- WAV: Uncompressed for high quality, results in larger files.
- OGG: Open format supporting multiple streams but less common.
Document File Types:
- PDF: Preserves formatting across devices, widely used.
- DOC/DOCX: Microsoft Word formats, require specific software for full functionality.
- TXT: Basic, universally readable but without formatting.
- XLS/XLSX: Microsoft Excel formats, used for spreadsheets, require specific software for full functionality.
- KEY: Keynote presentation format, specific to Apple devices.
- ODT: OpenDocument Text, part of the open standard for office documents, compatible with various software.
- PPT/PPTX: Microsoft PowerPoint formats, used for presentations, require specific software for full functionality.
Management and Considerations:
- Compatibility: Choose file types compatible with your CMS and user devices.
- Optimization: Reduce file sizes for web use without quality loss.
- Security: Watch out for file types that could pose security risks.
- SEO: Use proper file naming and tagging to boost search engine rankings.
This knowledge aids in efficient content management, enhancing user experience and system performance.
Uploading and Organizing WordPress Media Files
Uploading and organizing media in WordPress is crucial for efficient website management. Uploading Media Files can be done directly through the WordPress dashboard by navigating to ‘Media’ > ‘Add New’ for batch uploads, or within posts/pages using the ‘Add Media’ button. The easy way is to select files using your computer’s file manager and then drag them to the media page and drop them in Media Files.
For bulk uploads or large files, FTP/SFTP can be utilized by uploading to the /wp-content/uploads/ directory, though these files won’t automatically appear in the media library without plugins like “Add From Server“, “Media Library Folders” (which can be used to add images uploaded via FTP; either by the sync function or with the Maintenance feature in the Pro version) or “Media from FTP.”
Note: it is necessary to add media files to the media library because it is a database of files that have been imported and processed by WordPress. Some users believe that the files in the media library of live picture of media files on the server. But this is not the case. The media library only displays files that have been include it is database. Media file data is stored in the posts table was an ‘attachment’ post type.
Organizing Media Files starts with WordPress’s default year and month-based folder structure. For more complex organization, plugins like “Media Library Folders” allow creating custom folders for categorization.
“Real Media Library” provides virtual folders for organizing without altering server directories, preserving SEO links. “FileBird” offers an intuitive interface for folder creation and direct uploads, while “Media Library Categories” enables categorization with taxonomies.
Manual organization via FTP is possible but requires careful URL management. For SEO, renaming files with keywords and optimizing alt text can enhance visibility. Regular maintenance to remove outdated files helps maintain performance. These practices ensure a well-managed media library, improving both content management and user experience on WordPress sites.
Using the WordPress Media Library Search and Filter Options
The WordPress Media Library is essential for managing media content like images, videos, audio, and documents. To access it, go to your WordPress dashboard and select Media > Library, where you can choose between List View for detailed information or Grid View for thumbnails.


Searching: You can use the Search Media box for basic text searches across filenames, titles, captions, alt text, or descriptions. For more advanced searches, plugins like Search & Filter or Media Search Enhanced can search by specific metadata, such as EXIF data for images.
Filtering:
- Media Type: Filter content by type (images, audio, video, documents) using a dropdown menu.
- Date: Filter media based on upload dates, selecting by year, month, or day.
- Author: Although not available by default, custom code can add an author filter for multi-author sites.
- Custom Filters: Plugins like Enhanced Media Library or Media Library Filter allow filtering by categories, tags, or custom taxonomies, enhancing organization for large libraries.
Practical Tips:
- Bulk Actions: After filtering, you can perform bulk operations like deleting or editing multiple items.
- Customization: Plugins like Media Library Organizer can offer more refined sorting and searching.
- Performance: For sites with vast media libraries, consider database optimization or external search solutions like Elasticsearch to keep performance smooth.
Mastering these tools with or without plugins can significantly enhance your ability to manage and utilize media on your WordPress site effectively.
Managing Image Sizes and Thumbnails in WordPress
Managing image sizes and thumbnails in WordPress is essential for optimizing website performance, user experience, and SEO. WordPress automatically creates several image sizes upon upload: Thumbnail (150×150 pixels), Medium (300×300), Large (1024×1024), and Full Size.
WordPress use thumbnails to display images on the media page and media popup displayed when editing posts or pages. Themes and plugins can define their own thumbnail sizes in addition to the default WordPress thumbnails.
You can also define custom sizes in functions.php or through plugins for specific uses like featured images.
Techniques for managing these include:
- Customizing default sizes via functions.php by adding custom image sizes for different contexts.
- Using plugins like Regenerate Thumbnails to update existing thumbnails post-size changes, or Simple Image Sizes for easier size management without coding and Media Library Folders Pro allows administrators to remove unwanted thumbnail sizes and their related thumbnails.
- Optimizing images with plugins like Smush or ShortPixel to compress files, balancing quality and load time.
- Implementing responsive images where WordPress uses srcset attributes for browsers to choose appropriate image sizes. You can further customize this with HTML or CSS.
- Lazy Loading, introduced in WordPress 5.5, ensures images load only when nearing the viewport, enhancing initial page load times.
- Handling thumbnails in posts using functions like the_post_thumbnail() with size parameters.
- SEO considerations include using descriptive alt tags, proper titles, and ensuring images aren’t oversized for their display context.
Best practices involve finding a balance between image quality and performance, regular maintenance of image sizes, and backing up your site before making significant changes. By optimizing how WordPress handles image sizes and thumbnails, you can significantly improve site speed, user engagement, and search engine visibility.
Optimizing Media Files in WordPress for SEO
Optimizing media files in WordPress is vital for SEO, improving website performance, user experience, and search rankings. Images, often the largest page assets, can slow down load times if not handled properly, adversely affecting SEO. Image compression is crucial, where tools like Smush or ShortPixel automatically reduce file sizes upon upload, maintaining quality while speeding up the site and saving bandwidth.
File names should be descriptive, like “wordpress-media-library.jpg” instead of generic labels, aiding search engines in understanding content. Alt text is essential for both accessibility and SEO, offering text alternatives for images and helping with search engine indexing. Using relevant, keyword-inclusive alt text can enhance image search visibility.
Though less SEO impactful, image title attributes add descriptive layers for screen readers, and should complement alt text without redundancy. Utilizing responsive images with the srcset attribute ensures images are optimized for various device screen sizes, enhancing user experience in a mobile-first indexing world.
Metadata like captions adds context, aiding SEO by clarifying image relevance. Implementing structured data, such as Schema Markup, can enrich search listings with visual elements, potentially boosting click-through rates. Lazy loading, which delays image loading until necessary, reduces initial load times, positively affecting SEO due to Google’s emphasis on speed.
In essence, effective media optimization in WordPress combines technical tweaks with strategic content adjustments to elevate site performance, accessibility, and SEO.
Adding alt Tags and Captions to Media Files in WordPress
Adding alt tags and captions to media files in WordPress significantly boosts both accessibility and SEO. Alt tags, or alternative text attributes, describe images for visually impaired users or when images fail to load, aiding in SEO by improving image search visibility.
To add alt tags:
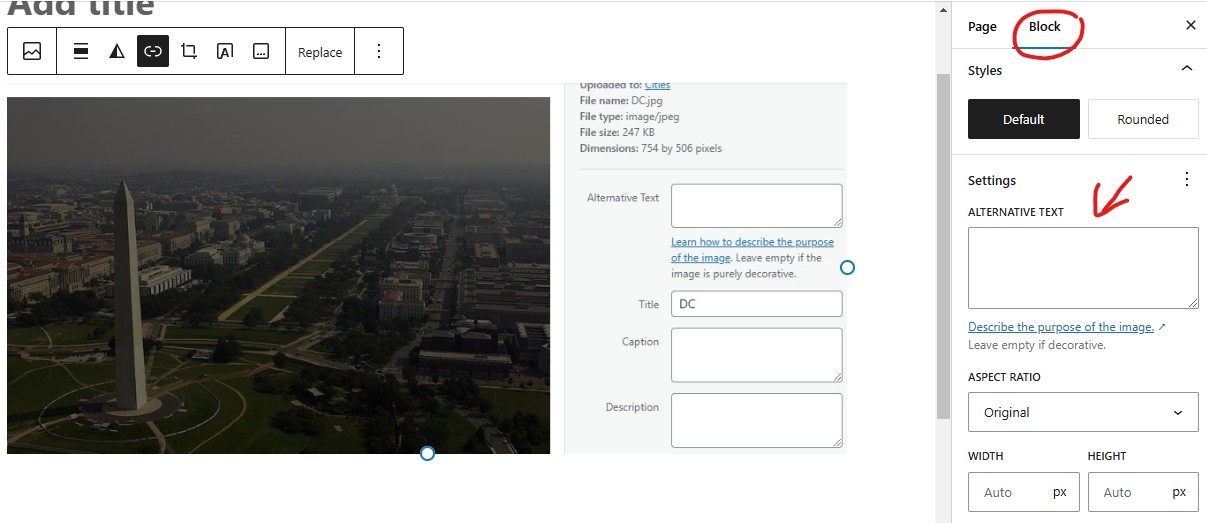
- Media Library: Edit or upload images in WordPress, then enter descriptive alt text in the “Alternative Text” field.

- Block Editor: Use the Gutenberg editor to add or modify alt text for each image instance, adjusting for context.

- Bulk Editing: Use plugins like “Bulk Image Alt Text” for efficient management of alt tags across multiple images.
Captions offer additional context visible to all:
- During Upload: Input captions in the ‘Caption’ field when uploading images.
- Using the Editor: Directly add captions below images in the block editor for immediate visual feedback.
- Customizing Appearance: Modify caption styles via custom CSS in your theme to match site design.
- For Accessibility: Ensure captions do not repeat alt text but add complementary context.
By implementing these features, your WordPress site becomes more accessible and SEO-friendly, enhancing user experience and content comprehension. Remember, both alt tags and captions should be relevant and descriptive, enhancing the narrative of your site or post.
Using Plugins to Enhance the WordPress Media Library
WordPress’s Media Library is a versatile tool for managing media content, but its capabilities can be greatly enhanced through specific plugins:
- Media File Renamer tackles the issue of disorganized filenames by automatically renaming files based on customizable rules upon upload, aiding in better organization and SEO.
- Enhanced Media Library upgrades the standard interface by offering advanced filtering options like file type, date, and custom categories, along with bulk management features for easier handling of large media collections.
- Media Library Folders introduces a folder system, allowing for drag-and-drop organization, which is particularly useful for sites with extensive media libraries.
- Media Cleaner addresses storage bloat by identifying and allowing the removal or archiving of unused media, thus optimizing site performance.
- Enable Media Replace facilitates the replacement of media files while preserving all existing links, maintaining SEO and user experience without manual updates.
- Media Library Folders Pro for thumbnail regeneration and renaming, replacing images or categorizing media files. It also provides a tool for removing or importing orphan media files in the media library and an API for programmatically using MFLP features.
- ShortPixel Image Optimizer focuses on optimizing images to reduce file sizes without quality loss, crucial for maintaining site speed.
- Real Media Library adds a structured folder system with additional features like folder galleries for direct use in content, enhancing both management and content creation.
- Media Library Folders Pro S3 extends the functionality of Media Library Folders by allowing you to offload your media files to Amazon S3 or DigitalOcean Spaces.
These plugins collectively transform the WordPress Media Library into a more organized, efficient, and performance-optimized system, catering to various needs from SEO to storage management, making it indispensable for blogs, e-commerce sites, or any media-heavy platforms.
Troubleshooting common issues in the Media Library
Troubleshooting issues in WordPress’s Media Library involves addressing several common problems with a systematic approach:
Images Not Displaying or Broken Links:
- File Permissions: Ensure server permissions are set to 755 for folders and 644 for files. Use FTP or file managers to adjust.
- URL Paths: Check if database paths match file locations, using plugins like “Better Search Replace” to correct discrepancies.
- Image Sizes: If images don’t display correctly, regenerate thumbnails with plugins like “Regenerate Thumbnails.“
Slow Media Library:
- Optimize Images: Use tools like Smush or ShortPixel to compress images.
- Database Optimization: Clean up the database with plugins like WP-Optimize to remove unnecessary data.
- Server Resources: Ensure your hosting plan supports the load, especially with large media libraries.
Upload Failures:
- File Limits: Adjust php.ini settings like upload_max_filesize and increase memory limits in wp-config.php.
- Plugin Conflicts: Temporarily disable plugins to identify any causing upload issues.
Missing Media Files:
- Check Trash: Files might be in the trash; recover if necessary.
- Database Sync: Use plugins like Media Sync if files exist on the server but not in the library.
Security and Access Issues:
- Permissions: Verify correct file permissions for media access.
- Security Plugins: Adjust or disable security plugins if they’re too restrictive.
General Tips:
- Debug Mode: Enable WP_DEBUG to catch PHP errors.
- Updates: Keep WordPress, themes, and plugins updated to avoid bugs.
- Backup: Always backup before troubleshooting using tools like UpdraftPlus.
By addressing these areas systematically, most Media Library issues can be resolved. For persistent problems, community resources like WordPress forums can provide additional insights. Remember, each site’s configuration is unique, so patience and thorough testing are crucial.