Getting started with MaxGalleria is as easy as activating the plugin, loading some images and clicking Publish Once you’ve downloaded the MaxGalleria platform, install it on your WordPress installation. Activate from your ‘Plugins’ page. Next, go to Settings->Permalinks and click the ’Save Changes’ button to add MaxGalleria’s gallery template to your site’s permalinks. Now head to the menu item called Galleries.
If you’d like to use your new gallery in a post or page, you can grab the shortcode in the bottom right of your Gallery Edit page, or use the “Add Gallery” option in the TinyMCE for your post.

From Galleries you have several options. You can go to your Galleries overview page, import a NextGen Gallery into MaxGalleria, adjust your MaxGalleria defaults, or get Support.
For now, let’s take a look at the Galleries page. Once there you can see your entire list of galleries as well as Add New galleries. Click Add New.
When you first get into your Gallery editor you’ll be prompted to select an Image or Video gallery. Currently MaxGalleria does not support galleries with both images and videos in the same gallery. First, create a title for your gallery. In this example we’ll use “My First Gallery.”
Adding Images is the same as in a post or page. Using the standard WordPress media library you can add previously added images or upload new images to your gallery. The larger the image size, the longer it will take to load so be patient as the images are getting loaded in.
Once the images have loaded you could press Publish and be done, or you can check out the other gallery options. We’ll get to those in a moment, but let’s talk about Videos.
Much like Images, to add Videos, just click “Add Videos” and you’ll get a similar lightbox. Straight out of the box you’ll have the ability to add YouTube videos to your gallery by copying and pasting the video URL. You can add multiple videos at a time, one URL per line.
After clicking “Add To Gallery” your gallery will refresh and a thumbnail from the video or videos will appear as your gallery thumbnail images.
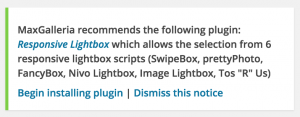
Starting with version 4.11 you will see a box suggesting the installation of the Responsive Lightbox plugin by dFactory. Responsive Lightbox contains six scripts including SwipeBox, prettyPhoto, FancyBox, Nivo Lightbox, Image Lightbox, Tos “R” Us.
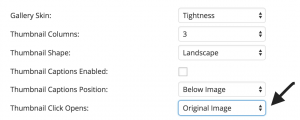
You can choose to use Responsive Library for your gallery or albums by going to the Options Tab and setting ‘Thumbnail Click Opens’ to ‘Original Image.’
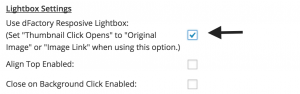
Then scroll down to Lightbox Settings and click the button next to Use dFactory Responsive Lightbox and you are good to go.
With the core of MaxGalleria, you have the Image Tiles gallery ready for use. Below are the basic options available to both Video and Images in the Tile layout:
Magnific Popup Options (Only in the Pro version. These settings apply when Thumbnail Click Opens is set to Lightbox Image.)
Gallery Options – Only in the Pro version. These are only available when the Gallery Enabled option is checked.
For each gallery you can create a description that discusses your gallery or adds extra information for anyone viewing the gallery. If enabled, you can choose to put the description above or below your gallery (default is above).
The import/export feature of MaxGalleria Pro allows one to export one or more image or video galleries from one WordPress website to another. The import/export feature does not export albums.
Requirements
If used with Media Library Folders or Media Library Folders Pro, note that these plugins are not required, then you would need to ensure that the latest versions of these plugins have been installed: Media Library Folders version 8.1.9 or newer; Media Library Folders Pro version 8.2.5. or newer.
Create A New Export File
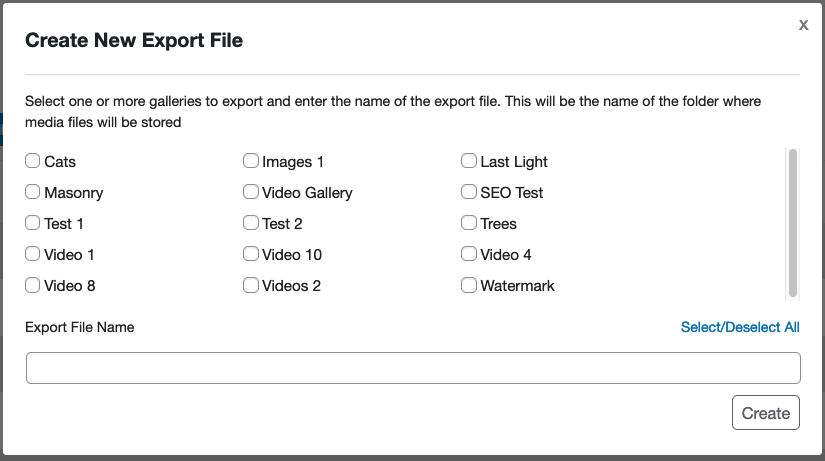
A gallery export file can contain any number of galleries with their images and videos. Click the Create New Gallery Export File button to create a new export file. This will display a popup window for selecting one or more galleries and entering an export file name. The first gallery selected will be used as the file name, but this can be changed. After choosing the galleries to export, click the Create button.
Once the export file has been generated, it will appear in the import/export file list, and it can be downloaded by clicking the file’s download icon under the Actions column on the right side of the page.
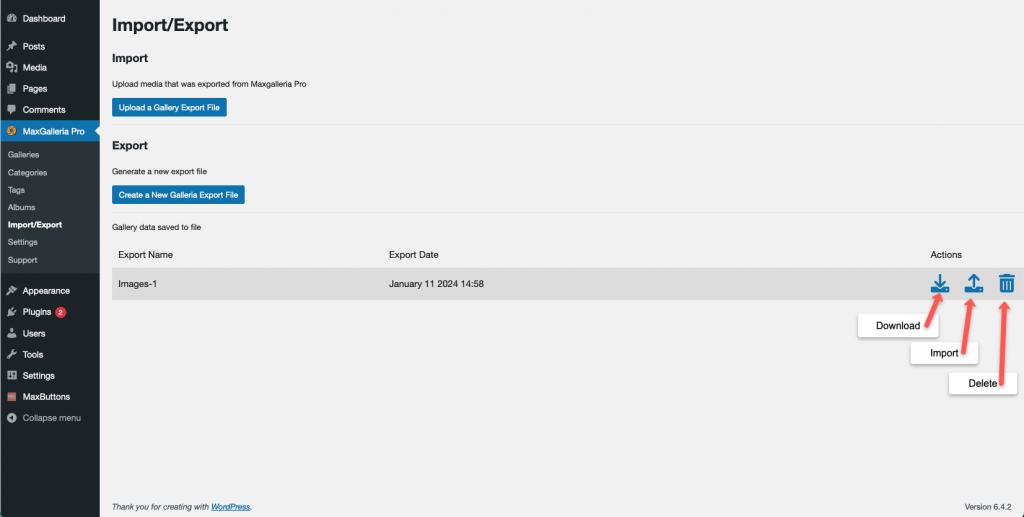
To upload the export file to another site using MaxGalleria Pro, view the MaxGalleria Pro Import/Export page, click the Upload a Gallery Export File button, and select the file to upload. While the file is uploading, you can cancel the upload.
Note: Export files generated by MaxGalleria will have ‘-mpg’ appended to the end of the file name, and files exported from Media Library Folders Pro will have ‘-mlfp’ appended to the end of their export file names. Media Library Folders Pro export files can not be imported into MaxGalleria and vice versa.
Once the upload has been completed, it will appear in the import/export file list. Click the file Import icon in the Actions column on the right side of the page to import the file contents.
When the import process has been completed, visit each new gallery’s option page, check that the desired options are selected, and click the Update button. Your gallery is now ready to view.
Finally, if the export file is no longer needed, it can be removed by clicking its Delete icon.

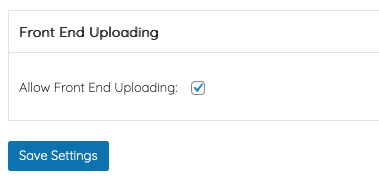
To enable front end uploading, first go to your MaxGalleria Pro Settings and check the box “Allow Front End Uploading” and then save the settings.
Edit the page on which you’d like to have frontend uploading enabled and add this shortcode:
[mg-image-file-upload folder_path=”” display_image=”1″ gallery=””]
The shortcode has four parameters:
folder_path the path to folder where you want to store the gallery images, example, “example-site/https_docs/example.com/wp-content/uploads/2024/05”. You may need to use your site’s file manager to get the path to your destination folder. Note, the folder path is different than the URL. A URL start with ‘http’ or ‘https’ and will not work for the folder_path parameter.
display_image – “1” to display the uploaded image or “0” for no display.
file_types – by default, only images file types are allowed. If not included, all WordPress image file types are allowed. To restrict file types, create a comma separated list of allowed file types, file_types=”jpg, png, webp”
gallery – The ID number of the destination gallery; the gallery ID number can be found by looking at the link of the edit page of a gallery, which will like this this: example.com/wp-admin/post.php?post=432&action=edit. The number that comes after the ‘post=’ is the ID number of the gallery.
Here is an example of a complete shortcode:
[mg-image-file-upload folder_path=”example-site/https_docs/example.com/wp-content/uploads/2024/05″ display_image=”0″ gallery=”432″]
In this example, uploaded images will be added to the gallery with the ID of 432 and stored in uploads/2024/05 folder.
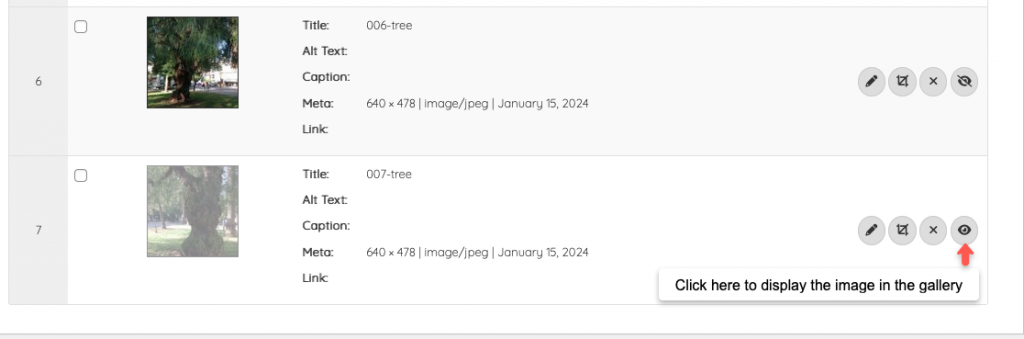
When images are added to a gallery, they are automatically excluded from being displayed. A site administrator needs to open the gallery page and change the status of excluded images for them to be displayed on the front end of the site.
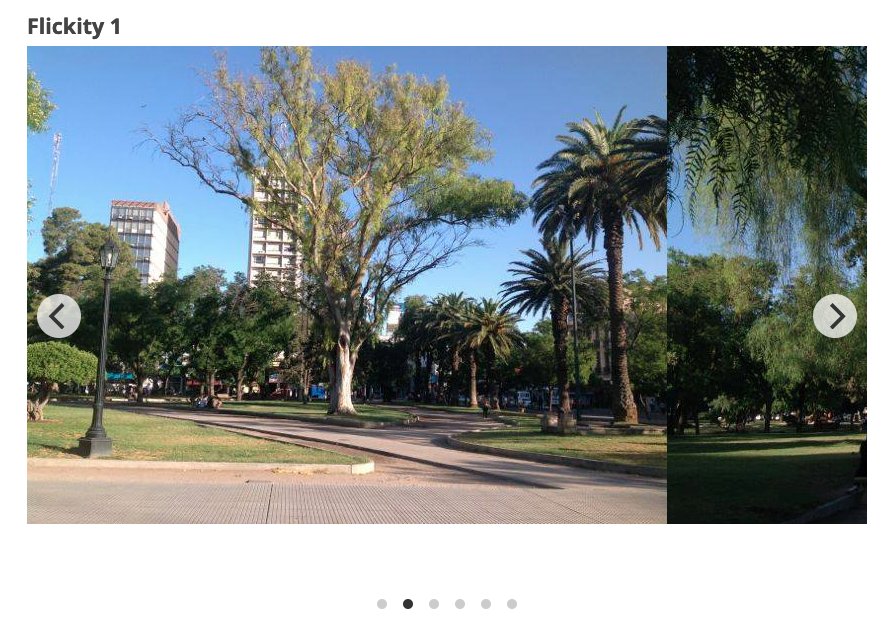
To use our new Flickity template, update your current version of MaxGalleria Pro to version 7.1.7. Create a new gallery, choose the Flickity template and select options that you want to use.
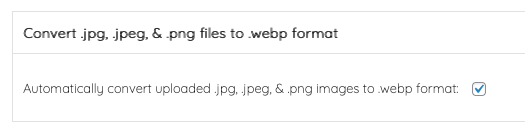
To turn on the auto convert feature, go to MaxGalleria Pro Settings and scroll down to the Convert .jpg, .jpeg, & .png files to .webp format section, check the Automatically convert uploaded .jpg, .jpeg, & .png images to .webp format option and click the Save Settings button.
Flickity Carousel Options
Click here to view details about Flickity Carousel options.
| Draggable Enabled | On by default if the slider contains two or more slides. Uncheck to disable. |
| Free Scroll | Enables free scrolling and flicking of content without requiring cells to align to a specific position. For continuous flicking, ensure both Free Scroll and Wrap Around are selected. |
| Contain | Check both Free Scroll and Container for a horizontal scroller. |
| Previous Next Buttons: | Display the next and previous buttons. |
| Page Dots: | Display page dots |
| Arrow Shape | SVG path for the arrow shape. The default is “M 10,50 L 60,100 L 70,90 L 30,50 L 70,10 L 60,0 Z” |
| Wrap Around | Enable infinite scrolling by wrapping around to the beginning when the end of the cells is reached. |
| Group Cells | To group the cells visible in the carousel, enter “true.” If you prefer to group cells by a specific number or percentage, enter the desired number or percentage to group cells that fit within that portion of the carousel’s width. Enter “false” to disable grouping. |
| Auto Play | The carousel will automatically move to the next cell. Auto-play will pause when you hover the mouse over it and resume when you move the mouse away. Auto-play will stop if you click the carousel or select a cell. To set the standard 3-second pause between advances, enter “true.” To specify a different pause duration, enter the desired number of milliseconds. To disable auto-play, enter “false.” |
| Pause Auto Play On Hover | Pauses autoplay on mouse hover when checked. |
| Adaptive Height | Adjusts the carousel height to match the height of the selected slide. |
| Watch CSS | When selected, the slider can be toggled on or off using CSS code. |
| As Nav For | Enter the class of a slider to control. For using one Flickity carousel as navigation for another. |
| Drag Threshold | The default setting is 3 pixels, indicating the distance a mouse or touch must move before dragging starts. |
| Selected Attraction | The slider is drawn toward the selected cell, with higher attraction values making it move faster and lower values making it move slower. The default setting is 0.025. |
| Friction | The slider’s movement is slowed by friction. Higher friction makes the slider feel more sticky and less bouncy, while lower friction makes it feel looser and more wobbly. The default friction setting is 0.28. |
| Free Scroll Friction | When set to “true,” friction slows the slider’s movement. Higher friction makes the slider feel stickier, while lower friction makes it feel looser. The default setting is 0.075. |
| Lazy Load | When checked, images load only when they come into view, which can help speed up the page load time. |
| Initial Index | Zero-based index of the initial selected cell. |
| Accessibility | Enables tabbing and arrow key navigation. |
| Set Gallery Size | When enabled, this option sets the carousel height to match the tallest cell. Disable it to size the carousel using CSS instead of the cell sizes. Keep it enabled if no CSS has been applied. |
| Resize | When selected, the carousel adjusts its height to match the tallest cell. Deselect to size the carousel using CSS instead of the cell sizes. |
| CSS Height | Enter the height of the carousel in pixels or percent. The default is “auto”. When entering a number include “px” for pixels or “%” for percent. |
| Use Full Image Size | When checked, images will be displayed using their full size. |
| Cell Alignment | Align cells within the carousel element. |
| Main Selector | CSS selector for the main carousel element. The default is “.main-carousel”. |
| Cell Selector | Enter the CSS selector for the cell elements. The default is “.carousel-cell”. |
| Percent Position | Positions the cells using percentages instead of pixels, making the carousel fluid and responsive. When enabled, include the percentage followed by a percent sign. |
| Right to Left | When checked, the carousel will move from right to left. |
MaxGalleria allows you to load your own styles and scripts if you want to add anything to the options MaxGalleria already provides. Simply use the URL of the stylesheet or JavaScript file, click “Enabled” and the scripts and styles will be loaded after the necessary MaxGalleria files.
From here you can also reset all of the gallery options to the defaults by checking the Reset option. The action cannot be undone and you will lose any previously saved options for that gallery.
Note: If you changes themes be sure that the new theme contains a copy of the file ‘single-maxgallery.php’ which you can find in the MaxGalleria plugin folder.
» maxgalleria_gallery_post_type_labels
» maxgalleria_gallery_post_type_args
» maxgalleria_image_tiles_lightbox_stylesheet
» maxgalleria_image_tiles_main_stylesheet
» maxgalleria_image_tiles_skin_stylesheet
» maxgalleria_image_tiles_easing_script
» maxgalleria_image_tiles_lightbox_script
» maxgalleria_image_tiles_main_script
» maxgalleria_image_tiles_before_gallery_output
» maxgalleria_image_tiles_after_gallery_output
» maxgalleria_image_tiles_gallery_output
» maxgalleria_image_tiles_before_thumb
» maxgalleria_image_tiles_after_thumb
» maxgalleria_image_tiles_thumb
» maxgalleria_video_tiles_lightbox_stylesheet
» maxgalleria_video_tiles_main_stylesheet
» maxgalleria_video_tiles_skin_stylesheet
» maxgalleria_video_tiles_lightbox_script
» maxgalleria_video_tiles_main_script
» maxgalleria_video_tiles_before_gallery_output
» maxgalleria_video_tiles_after_gallery_output
» maxgalleria_video_tiles_gallery_output
» maxgalleria_video_tiles_before_thumb
» maxgalleria_video_tiles_after_thumb
» maxgalleria_video_tiles_thumb
» maxgalleria_video_attachment
» maxgalleria_video_embed_code
» maxgalleria_youtube_regex_patterns
» maxgalleria_before_gallery_thumb
» maxgalleria_after_gallery_thumb
» maxgalleria_thumb_size_landscape_one_column
» maxgalleria_thumb_size_landscape_two_column
» maxgalleria_thumb_size_landscape_five_column
» maxgalleria_thumb_size_landscape_six_column
» maxgalleria_thumb_size_landscape_seven_column
» maxgalleria_thumb_size_landscape_eight_column
» maxgalleria_thumb_size_landscape_nine_column
» maxgalleria_thumb_size_landscape_ten_column
» maxgalleria_thumb_size_portrait_one_column
» maxgalleria_thumb_size_portrait_two_column
» maxgalleria_thumb_size_portrait_three_column
» maxgalleria_thumb_size_portrait_four_column
» maxgalleria_thumb_size_portrait_five_column
» maxgalleria_thumb_size_portrait_six_column
» maxgalleria_thumb_size_portrait_seven_column
» maxgalleria_thumb_size_portrait_eight_column
» maxgalleria_thumb_size_portrait_nine_column
» maxgalleria_thumb_size_portrait_ten_column
» maxgalleria_thumb_size_square_one_column
» maxgalleria_thumb_size_square_two_column
» maxgalleria_thumb_size_square_three_column
» maxgalleria_thumb_size_square_four_column
» maxgalleria_thumb_size_square_five_column
» maxgalleria_thumb_size_square_six_column
» maxgalleria_thumb_size_square_seven_column
» maxgalleria_thumb_size_square_eight_column
» maxgalleria_thumb_size_square_nine_column
» maxgalleria_thumb_size_square_ten_column
» maxgalleria_gallery_widget_stylesheet
» maxgalleria_gallery_widget_before_output
» maxgalleria_gallery_widget_after_output
» maxgalleria_gallery_widget_output
» maxgalleria_gallery_widget_before_thumb
» maxgalleria_gallery_widget_after_thumb
» maxgalleria_gallery_widget_thumb
» maxgalleria_gallery_widget_before_view_more
» maxgalleria_gallery_widget_after_view_more
» maxgalleria_gallery_widget_view_more
» maxgalleria_before_add_images_to_gallery
» maxgalleria_after_add_images_to_gallery
» maxgalleria_before_add_image_to_gallery
» maxgalleria_after_add_image_to_gallery
» maxgalleria_before_include_single_image_in_gallery
» maxgalleria_after_include_single_image_in_gallery
» maxgalleria_before_include_bulk_images_in_gallery
» maxgalleria_after_include_bulk_images_in_gallery
» maxgalleria_before_exclude_single_image_from_gallery
» maxgalleria_after_exclude_single_image_from_gallery
» maxgalleria_before_exclude_bulk_images_from_gallery
» maxgalleria_after_exclude_bulk_images_from_gallery
» maxgalleria_before_remove_single_image_from_gallery
» maxgalleria_after_remove_single_image_from_gallery
» maxgalleria_before_remove_bulk_images_from_gallery
» maxgalleria_after_remove_bulk_images_from_gallery
» maxgalleria_before_reorder_image_in_gallery
» maxgalleria_after_reorder_image_in_gallery
» maxgalleria_before_reorder_images_in_gallery
» maxgalleria_after_reorder_images_in_gallery
» maxgalleria_before_reorder_images_in_gallery
» maxgalleria_after_reorder_images_in_gallery
» maxgalleria_before_add_videos_to_gallery
» maxgalleria_after_add_videos_to_gallery
» maxgalleria_before_include_single_video_in_gallery
» maxgalleria_after_include_single_video_in_gallery
» maxgalleria_before_include_bulk_videos_in_gallery
» maxgalleria_after_exclude_single_video_from_gallery
» maxgalleria_before_exclude_bulk_videos_from_gallery
» maxgalleria_after_exclude_bulk_videos_from_gallery
» maxgalleria_before_remove_single_video_from_gallery
» maxgalleria_after_remove_single_video_from_gallery
» maxgalleria_before_remove_bulk_videos_from_gallery
» maxgalleria_after_remove_bulk_videos_from_gallery
» maxgalleria_before_reorder_video_in_gallery
» maxgalleria_after_reorder_video_in_gallery
» maxgalleria_before_reorder_videos_in_gallery
» maxgalleria_after_reorder_videos_in_gallery
» maxgalleria_before_nextgen_import
» maxgalleria_after_nextgen_import
» maxgalleria_before_nextgen_import_picture
» maxgalleria_after_nextgen_import_picture
» maxgalleria_image_tiles_before_enqueue_styles
» maxgalleria_image_tiles_after_enqueue_styles
» maxgalleria_image_tiles_before_enqueue_scripts
» maxgalleria_image_tiles_after_enqueue_scripts
» maxgalleria_video_tiles_before_enqueue_styles
» maxgalleria_video_tiles_after_enqueue_styles
» maxgalleria_video_tiles_before_enqueue_scripts
» maxgalleria_video_tiles_after_enqueue_scripts
» maxgalleria_before_admin_menu_pages
» maxgalleria_after_admin_menu_pages
» maxgalleria_before_template_meta_boxes
» maxgalleria_after_template_meta_boxes